Do you have SSD and still use an old-fashioned HDD for your system? Why it's almost as old-fashioned as typewriter and abacus. But “reinstallling” Windows on SSD will let you get rid of all annoying delays on your computer.
Solid State Drives (SSDs) are well known to be the better alternatives to Hard Disk Drives (HDDs), and this kind of advantage has caused a lot of drama in the world of technology presently. Aside from the fact that SSDs work faster, they also work more quietly and are more stable compared to hard disk drives because of the non-movable parts used to build the technology.
If you’re suffering from slow boot-up using an HDD system, reinstalling Windows on SSD is always the perfect solution. This may be a doubt for some, but this has been the perfect answer to many of those experiencing the same issue. Here, we are going to discuss these easy steps to walk you through the process.
Before moving on with the procedure, make sure to back up all important information since the method will definitely remove important files, settings, and applications. Also, prepare an empty CD, USB flash drive, or DVD to make an installation media. Reinstalling Windows 7, 8, or even 10 onto solid-state drives can give your computer and its system a fresh start. The big question is, how?
Steps to follow
The next steps should allow you to do the process without any problem.
- Download and use Microsoft Media Creation Tool to make the installation media. This serves as the initial step towards reinstalling Windows onto Solid State Drives (SSDs). Check the illustration below for proper reference.
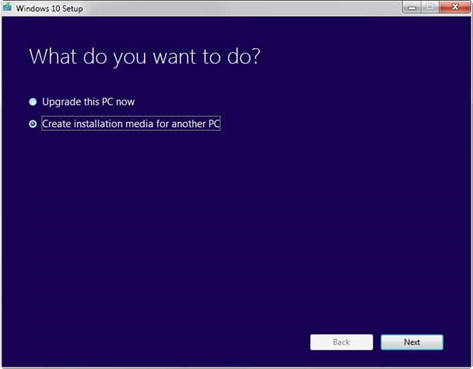
- Accept Microsoft license terms when asked. This is the page that will pop up while you are still installing the media. After this, you need to select “Create installation media (USB Flash drive, DVD or ISO file) for another PC” before clicking “NEXT”. The next procedure should be easy enough, as all you need to do is to follow the guides to finish creating Windows installation media
- Before proceeding to the next step, turn off your computer system. After shutting it down, plug the installation disk and make sure it is secured in position. Open the Central Processing Unit (CPU) case and remove the old hard disk carefully and insert the SSD into the drive bay.
- Turn on your computer when you have securely placed everything and carefully followed the previously stated directions. Follow the steps to boot into BIOS and modify booting order to allow the computer to boot from the installation disk.
- The next window should ask you to verify “language to install”, “time and currency format”, and “keyboard or input method”. After being able to verify those, click “Next” then click “Install now” when given the option to move forward with the process.
- If done properly, the next window should ask you to input the license key and place your product key if available. If not, you can just type one or opt to skip it by clicking “I don’t have a product key” and activate it after Windows install completes.
- Choose “Custom: Install Windows only (advanced)” when asked, “Which type of installation do you want?”.
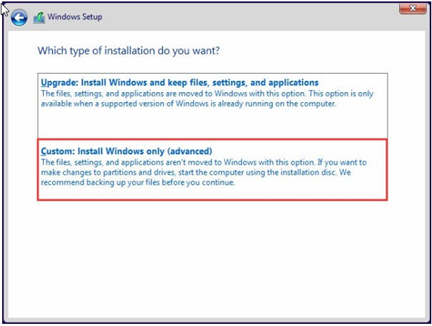
- The next screen should ask you to select the SSD where you plan to reinstall Windows. You are already close to finishing the process. After identifying the SSD to where you would be reinstalling Windows, click “Next” and Windows should start the installation automatically after you do that.
After reinstalling Windows on an SSD, you should be able to work faster than before. Speed and performance are said to mark up ten times. Any applications you installed on the SSD will launch quicker, read files quicker, and save files faster. This would be a whole new chapter for you and your computer system – more efficiency and output with less time.
Summary: Reinstall Windows on SSD
- Insert the Windows installation media
- Press any key when prompted to boot from the installation media
- Select your language, time and keyboard settings
- Select Install now
- Agree to the license terms
- Select the Custom option to perform a clean install of Windows 10
- Choose the system drive with enough free space to install Windows 10. You must have enough space on your hard drive to install Windows 10.
- Install and enjoy!
