When you change your computer's hard drive, the Windows operating system is not able to automatically access the data in the previous hard drive. However, there are means through which you can be able to access and unlock the drive on which Windows operating system is installed.
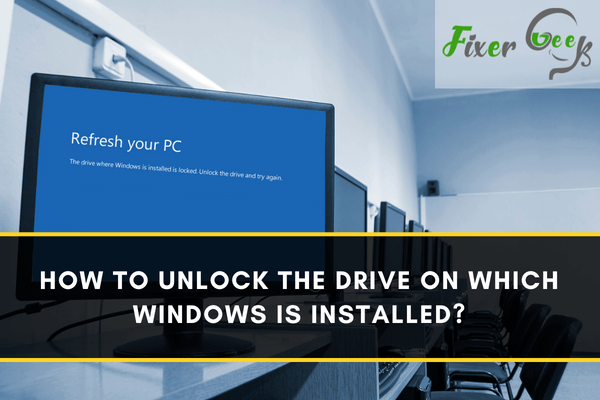
The Error Message: “The drive where Windows is installed is locked,” the error message reads. “Unlock the drive and try again.”
Inconveniences such as the aforementioned do aggravate an already concerning situation, especially since this message pops up whenever users refresh or reset their computers to bring their computers back to a normally functioning state after having experiencing errors.
There are many possible reasons as to why such an error occurs, such as a damaged MBR or master boot record, corrupted Windows system files, damaged BCD or boot configuration data, and disk-based errors.
Thankfully, there are multiple ways to fix such an error, as well as a few programs created for such a purpose as the MiniTool Partition Wizard. Programs for backing up data at risk of loss during the repair such as EaseUS also exist.
SIX WAYS TO FIX IT:
Check disk errors with CHKDSK
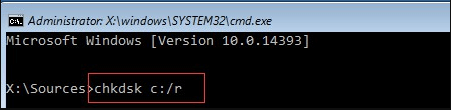
The CHKDSK utility is integral to Windows, and it serves to inspect the integrity of the hard disk as well as repair bad sectors upon their discovery.
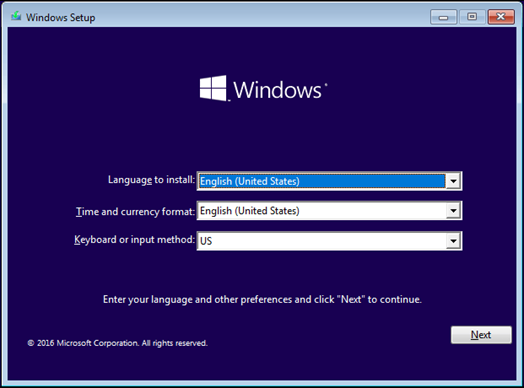
- Start by booting the computer using Windows installation media, be it a USB stick or a DVD. Click Next.
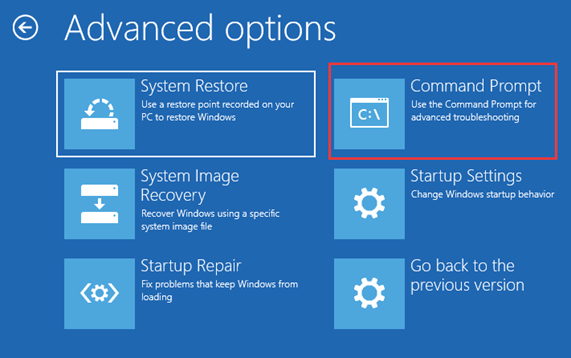
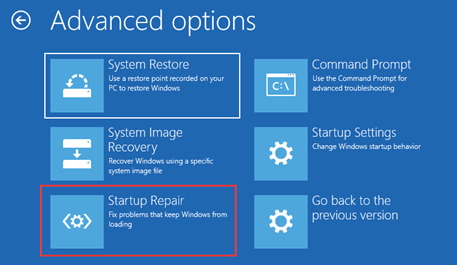
- Click “Repair your computer”. Proceed to click “Advanced startup options” and choose “Troubleshoot”. After, click “Advanced options” and then “Command Prompt”.
- Type the command chkdsk C: /f /x /r onto the command prompt window. Press the Enter key to initiate the check. Note that C is the letter of the drive wherein Windows is installed. Also, specifying the parameter /r can take more time in fixing errors in comparison to the parameter /f due to the former functioning to locate bad sectors and recover readable information aside from merely fixing errors.
- Once the operation is done, reboot the Windows computer and see if the same error persists.
Use the SFC command
The System File Checker command, better known as the SFC command, is a Command Prompt useful in the verification and replacement of important Windows system files. It is advised by a considerable number of troubleshooting steps.
- Start by opening the command prompt window the same way as in the first fixing option.
- Type the command sfc /scannow onto the command prompt window and press the Enter key to proceed.
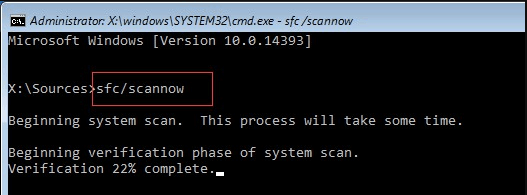
- Allow the scan to finish and proceed to fix any potential errors that may occur.
- Reboot the Windows computer and see if the same error message persists.
The Bootrec command
The Bootrec command is the utility used to update the master boot record code or the MBR code, the boot configuration data or the BCD, and the partition boot sector code. The Bootrec command corrects boot problems on Windows Vista and the later Windows versions.
- Start by going to the “Troubleshoot” feature the same way as in the first fixing option.
- Proceed to “Advanced options”, followed by “Automatic repair”, and then to “Command prompt”.
- There are three command lines to type. Remember to press the Enter key after typing each command line. The command lines are as follows:
i. bootrec /RebuildBcd
ii. bootrec /fixMbr
iii. bootrec /fixboot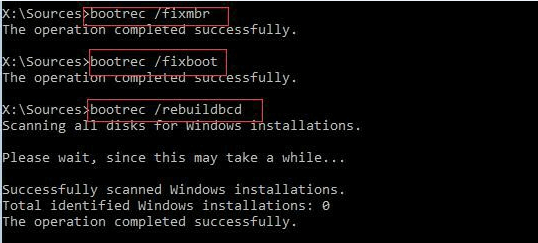
- Type the command line Exit and press the Enter key.
- Reboot the Windows computer and see if the same error message persists.
Refresh the computer
- Start by restarting the computer and proceed with booting from the USB drive or the DVD installation media.
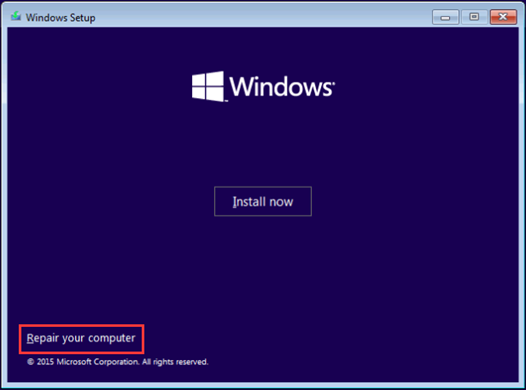
- Proceed to click “Repair your computer”.
- Click “Troubleshoot”, followed by clicking “Refresh your PC”.
- The wizard instructions will be there for guidance. Follow them to complete the process.
Windows Installation Disc
The “Repair Your Computer” feature in the Windows installation disc could help resolve problems that are preventing Windows from functioning.
Regardless of whether Windows remains unbootable after repair or not, the error of the drive where Windows is installed is locked could still be fixed.
- Prepare an installation disc or a repair disk. A USB drive or DVD could work.
- Proceed with connecting the installation disc to the computer and booting therefrom.
- Select the appropriate settings for language, time, currency, keyboard, and input method. Click Next to continue.
- Select “Repair your computer” instead of “Install now"
- Click on “Troubleshoot”, followed by clicking “Advanced Options”, and then “Startup Repair”. Doing so will fix the problems that are keeping Windows from loading to unlock the hard drive.
Use a software
The use of software such as MiniTool Partition Wizard can help, with instructions specific to the software. The MiniTool Partition Wizard can resolve this error by rebuilding the master boot record or MBR.
Summary: How to unlock the drive on which Windows is installed?
If you forgot your Windows user account password and want to unlock your Windows drive, follow these steps:
- Reboot your system and press the F8 key.
- Go to Repair Your Computer.
- You should see a box to login.
- Press Enter for Administrator or click the username you want to reset the password for.
- Enter 'net user username password' where username is your username, and password is your new password.
- Enter 'exit' and reboot the computer. You now have access to your locked computer.
There are ways that you can unlock a drive on which Windows is installed.
Conclusion
Errors like the aforementioned ones can be inconvenient but thankfully, there are ways to work around it and fix it so your computer would function normally again.
