Are you confused on how to install Git on windows? Are you worried that downloading and installing Git may damage your computer? Do you want to get started with git but don't know where to start?

Git is one popular open-source project tracking application for developers. And the journey has to start with an installed software on your PC.
Setting Git on your computer or laptop requires a steady internet connection. The rest comes pretty simple with the comprehensive guidelines.
Step by Step Git Installation (Windows)
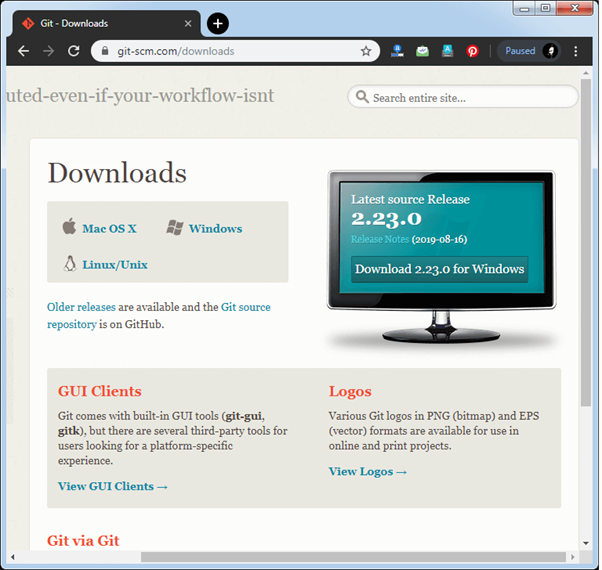
- Visit the official Git website to find the download options. Click on the ‘Windows’ to download the installation file.
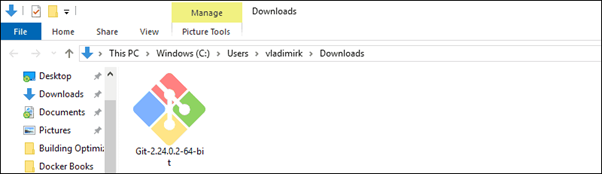
- Browse to the downloaded location on your hard drive. Tap a double-click to start the installation process.
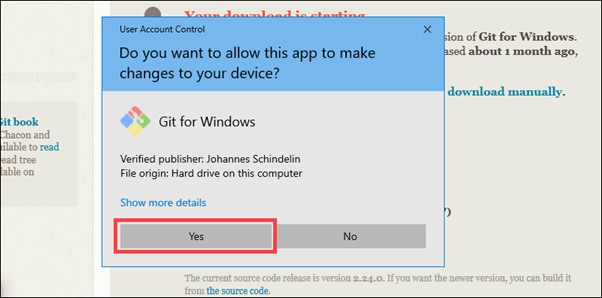
- A dialog box will appear to confirm your processing of the change. Press ‘Allow’ or ‘Yes’ right on the bottom.
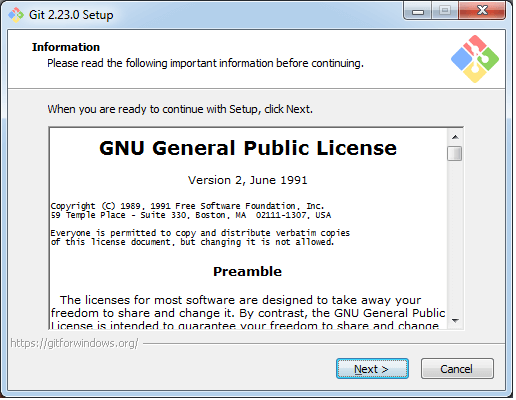
- Another new window containing GNU General Public License will occur. Click on the ‘Next’ button to start the process.
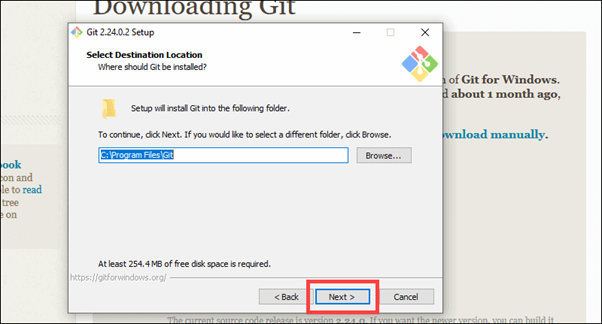
- Installer file will ask for an installing location on the hard drive. Leave the default option to click the ‘Next’ button.
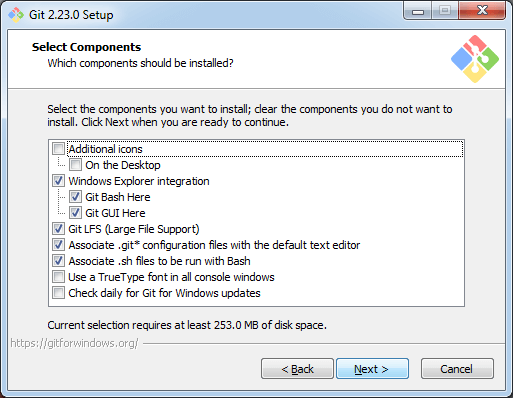
- One new window will open, featuring component selection. Keep the default checks unless you need to modify.
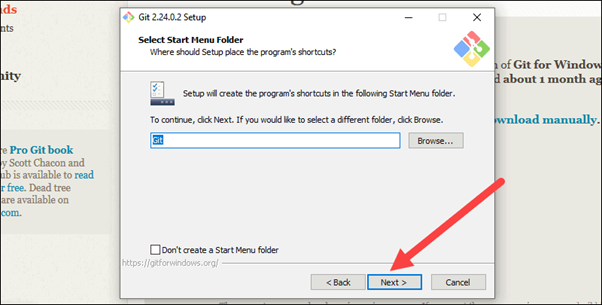
- Next window asks you to create a start menu folder. You can either keep it default or check the option below.
- Clicking on the ‘Next’ button will take you to another window. It requires your permission from the text editor.
- Notepad++ seems a popular choice for collaborating with Git. You can consider other options like – default Notepad.

- Again, press the ‘Next’ button to continue with the process. The next window concerns installed ‘PATH Environment’.
- A set of different directories will help to execute a command. You’re to choose from either of the three options.
- Try to check the middle segment, featuring a bracketed Recommended. Click ‘Next’ on the left side of the window bottom.

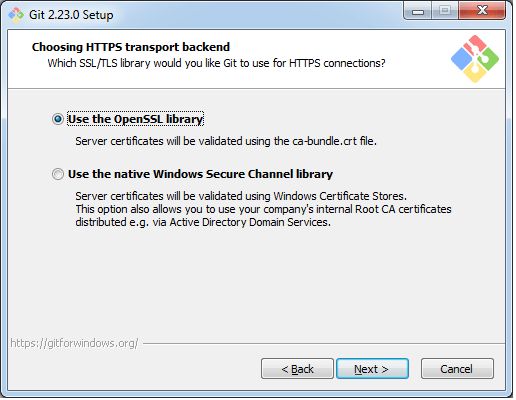
- Appeared window relates to server certification. Most of the Git users keep default with the OpenSSL library.
- But it doesn’t allow Active Directory Environment activities. You should switch to Window Secure Channel Library.
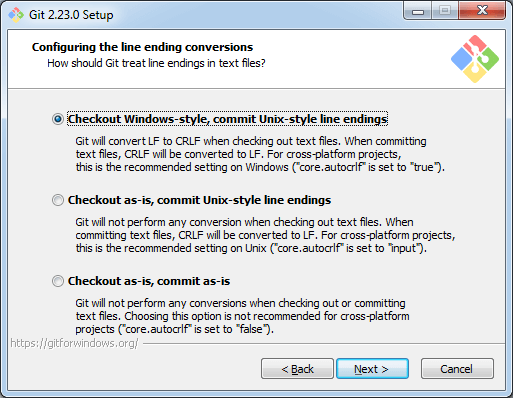
- Click on ‘Next’ to reach the line ending selection window. Leave the default selection to avoid any potential issue.
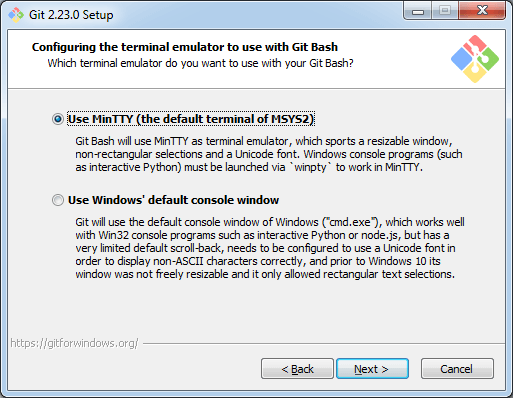
- Pressing on the ‘Next’ will get you to the terminal emulator. Keep the selection to the default MinTTY to click on ‘Next’.
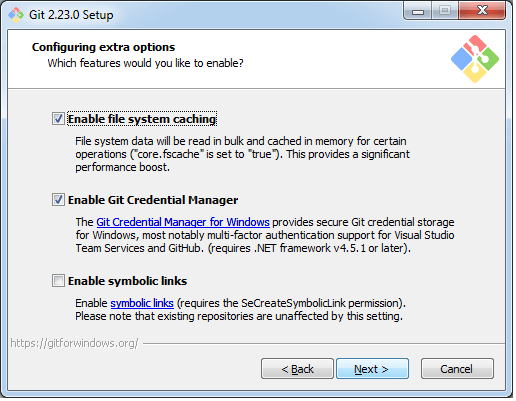
- The next window contains some additional customizations. There are three options, two appearing with checked boxes.
- Working with a command-line shortcut requires enabled symbolic links. Click on the ‘Next’ to get to a new window.
- Installing experimental features let you enjoy some interactive offers. Unless necessary, keep the box unchecked.
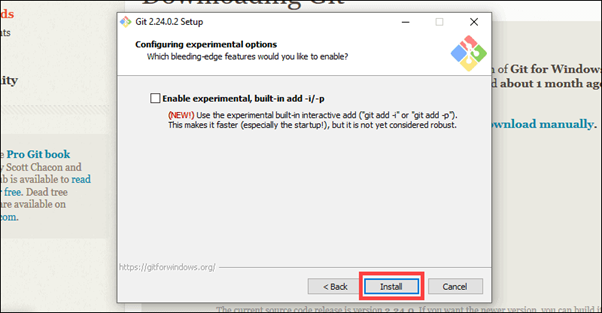
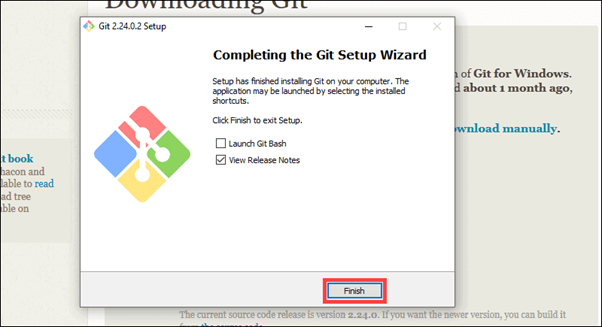
- Make a press on the ‘Install’ button at the bottom-left corner. Wait for the files to get extracted, installed & set.

- Following the installation, a new window will appear. Check release notes or launch Git bash to finish the setup.
Launching Git in Windows OS
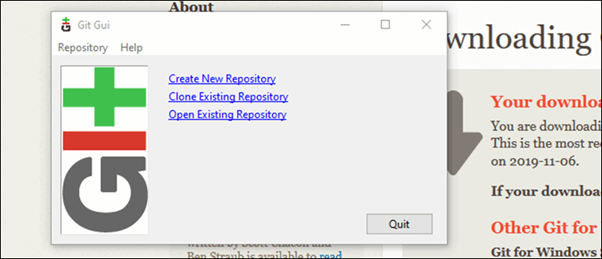
There are two different modes for installed Git – Bash Shell & GUI
- Open the ‘Start’ menu to type git GUI. Press enter or click the appeared icon to launch the application.
- Open the ‘Start’ menu to type git bask. Press enter or click the appeared icon to launch the application.

Depending on your requirements, you’re free to choose any of the two layouts.
Summary: Install Git on Windows
- Download Git for Windows installer
- Install Git for Windows
- Configuring your Git username for every repository on your computer
- Generating your SSH key pair
- Adding your SSH key to the ssh-agent
- Adding a new SSH key to your GitHub account
