Do you want to design your own brochure for a business, a party or any other event? I am sure that no one will reject a nice looking piece of paper with your name or anything else printed on it. I decided to share my experience of making brochures on Mac as most of people still use PC and I think it might be interesting to see how we can get the same result using free open source tools.
You can easily make a brochure on your Mac OS by using the “Pages” application. The app has all the features and editing tools needed to create a brochure.
Steps you need to create a complete brochure
- Open the “Pages” application from the Dock Menu options in your Mac system interface. If you don’t have it there, then click on the “Search” icon and type “Pages” and click on the “Pages” application that comes on the list.
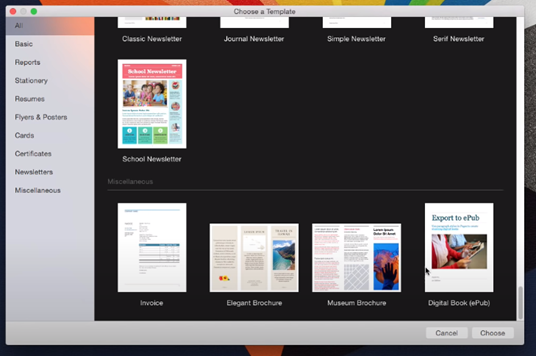
- A list of templates will be shown to you. You need to choose the “Miscellaneous” templates for your work. There are four options there. Doble-click on the “Elegant Brochure” template. You can also use the “Museum Brochure” if you want.
- To undo your action of deselecting any text, picture, or segment, just move your cursor to the grey area and click on your mouse or touchpad. This action will deselect your selected pictures or texts in the brochure.
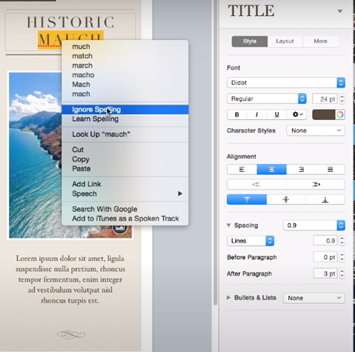
- You will see a variety of brochures. You can edit any of them and it will change the texts according to your direction. You can set the title of your brochure by editing the larger texts titled “Travel in Hawai” or “LOREM IPSUM” and typing your preference. After typing your title, you will see that the dictionary corrects your word. If you want to keep that word, drag your cursor to select the word and right-click on it to see the words available. If the word is not available in the dictionary, click on the “Ignore spelling” option to stay with your given word.
- If the letters are too big, they will remain hidden. To make it visible, click on the “+” icon below it and drag it down to make the title texts visible. You will have to drag the line down to remove it from your texts. You can also change the title style of your brochure by selecting from the drop-down menu of the title. Choose the settings of your letter space for a better aesthetic view.
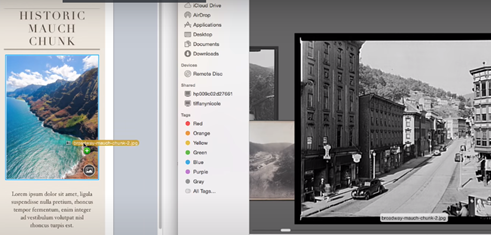
- There is a “Photo” icon on the bottom right of the picture. You can add your picture which will replace the default one. The texts and pictures given by default are considered as “Placeholders”.Go to your local storage directory to choose your photo. Drag and drop your photo to the brochure to upload it there. Double-click on your uploaded photo and slide and zoom your photo to show your preferred section. You can also change the border of your picture by changing the options on the right-side section of the application.
- On the second page of the brochure, there is an option for every photo to make changes to it. There is also a “Flower” icon beside the pictures. If you wish to keep it, you can.
- You can also move the text area from one place to another. If you want to highlight the texts, just click one time on the text area. You can change the size and color of the highlighted texts if you want from the text options.

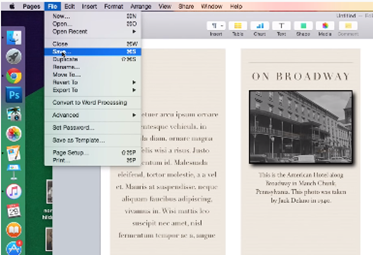
- After you have finished editing your brochure, click on the “File” option and select “Save” to keep your file. You can also save it as a pdf file so that you can print it black or white.
Summary: Make a brochure on Mac
- Open a new document in Microsoft word and use the word processor to create an outline of your brochure.
- Save this document as a Word file so you can easily edit it later.
- Open a new canvas in Photoshop.
- Use the side panel to select a paper size for your brochure such as 8.5 x 11 inches or 17 x 11 inches for a tri-fold brochure.
- Select the text tool from the toolbar on the left side of the screen use it to add text boxes to your brochure layout.
- Click on the "File" menu located at the top of the screen and select "Place".
- Click and drag on your layout to place an image on your brochure.
- Click on the "File" menu again and select "Save As".
