- Method 1: Disable the Third-Party Antivirus Software
- Method 2: Disable the Windows Defender Firewall
- Method 3: Checking the System Date & Time
- Method 4: Resetting the App in Question
- Method 5: Reset the Microsoft Store Process
- Method 6: Clear the Microsoft Store Cache
- Summary: Resolve an App Crash in Windows 10
- Conclusion
So, you install the software and it crashes? What did you do wrong? Here are some steps to resolve the app crash in Windows 10.
If you own a Windows 10 powered computer, chances are you might have encountered a few technical issues including apps crashing suddenly. When this predicament happens, you must fix the troubled app as soon as you can.

Luckily, there are many ways of fixing an app crash in Windows 10. Check them out below:
Method 1: Disable the Third-Party Antivirus Software
Your system will update pre-installed apps on time, especially after the completion of important system updates. However, this is where the trouble starts.
In most cases, any third-party antivirus software running in the background can block some update features on occasions. Such a scenario will lead to app instability, and worse, periodic crashes.
When you encounter an app crashing frequently, try to disable your antivirus software in the meantime. Once all your apps and the Microsoft Store app are up-to-date, you may enable the antivirus software again.
Visit the antivirus software company's official website or contact their technical support for assistance on toggling the software's real-time protection.
Method 2: Disable the Windows Defender Firewall
After several important system updates, Windows Defender Firewall can potentially block the Microsoft Store. This may result in annoying app crashes. Thus, you need to disable this firewall momentarily. Here is how:
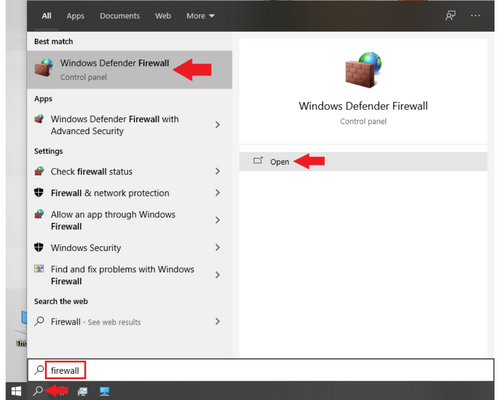
- Click on the Windows Search bar and type firewall.
- Then, open Windows Defender Firewall.
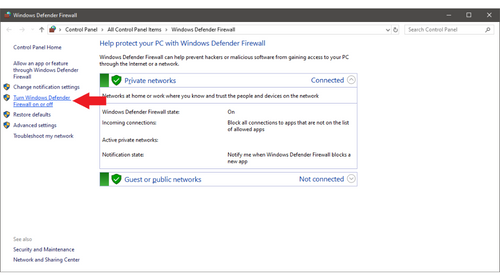
- Click on the link that lets you switch on or off the Windows Defender Firewall. This option is located on the left-hand menu.
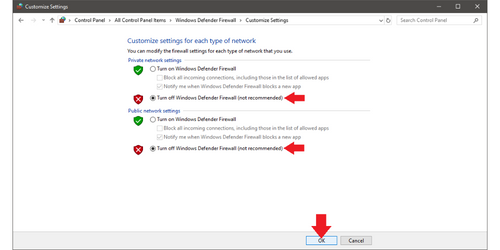
- Click on the radio option that says "Turn off Windows Defender Firewall" for both Private and Public networks and click OK.
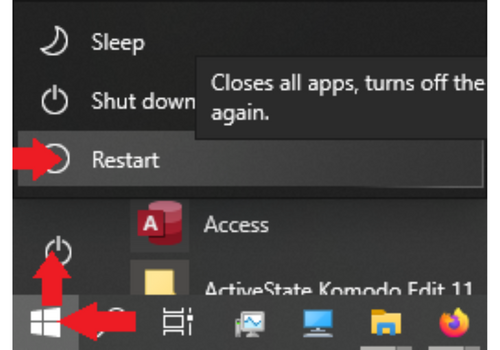
- Restart your computer.
However, when you open the app and it does not crash anymore, never forget to enable the firewall again to ensure full system protection.
Method 3: Checking the System Date & Time
Unknown to many people, an incorrect date or time may pose problems on your system with the Microsoft Store. In this case, configure your system to set the date and time automatically.
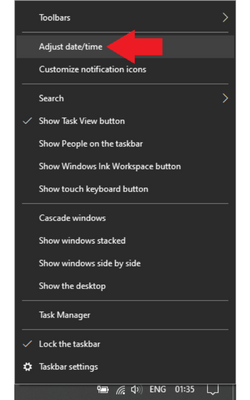
- Right-click the date/time on the Taskbar and select Adjust date/time.

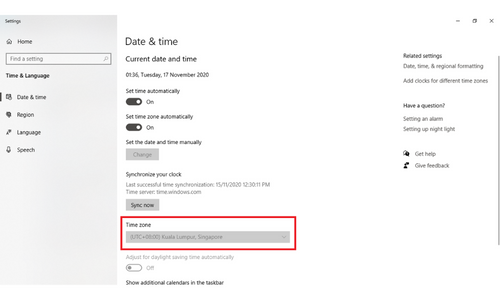
- Check the Time zone dropdown box and make sure that it is on point.
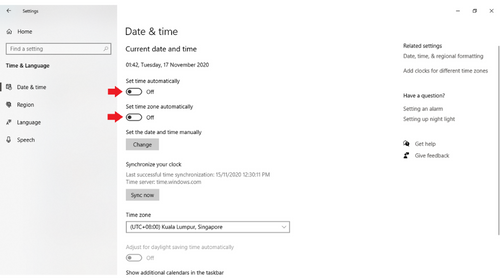
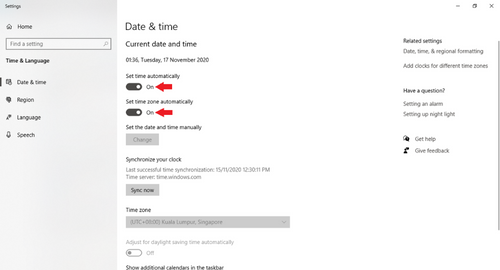
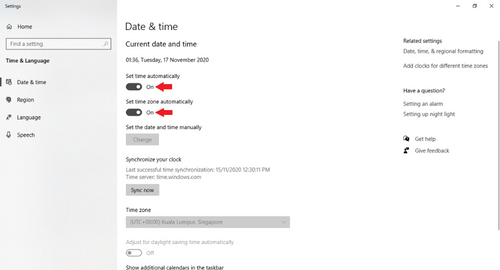
- Disable both the options "Set time automatically" and "Set time zone automatically."
- Click on the Change button under "Set the date and time manually."
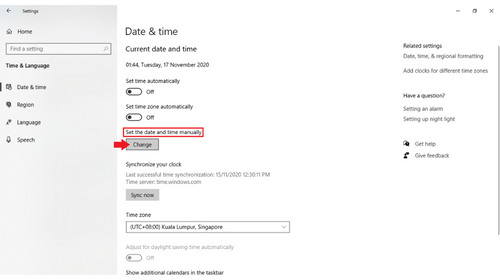
- Set any date and time temporarily and click Change to confirm.
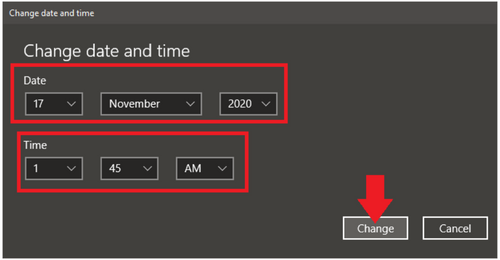
- Enable both Set time automatically and Set time zone automatically.
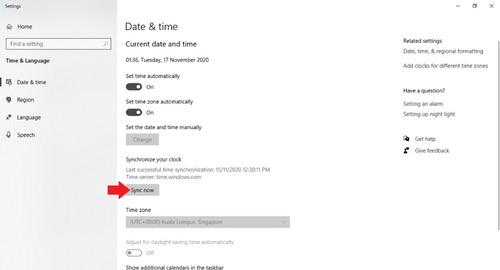
- Under "Synchronize your clock," click on the Sync now button to update the system date and time. After doing so, make sure that a check symbol appears next to Sync now.
Method 4: Resetting the App in Question
Follow the steps below to reset the app:
- Click on the Start Menu (Windows Logo button) and open Settings (gear icon).

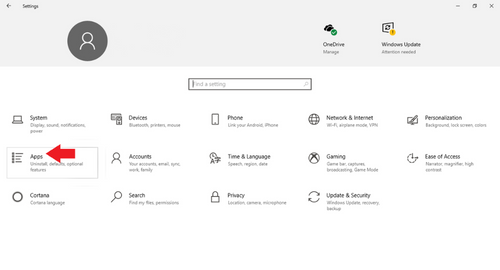
- Look for Apps in the Settings window and then click on it.
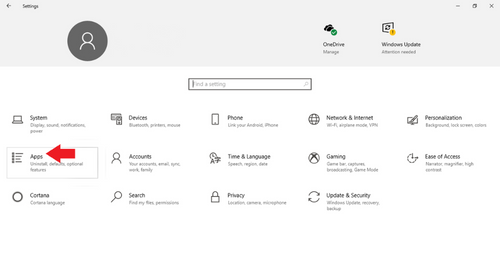
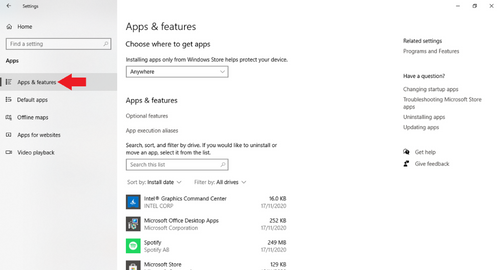
- Click on the Apps & features menu located on the left side.
- Click on the app that has the issue. Under the app name and publisher name, click on the "Advanced options" link to proceed to the next page.
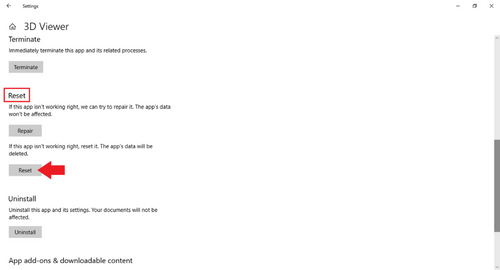
- Find the Reset section near the bottom. Under this section, click on the Reset button.
- Reboot your computer and open the app again.
Method 5: Reset the Microsoft Store Process
If the same issue persists, you may also use the prior method to the Microsoft Store process using the Command Prompt with administrative privileges.
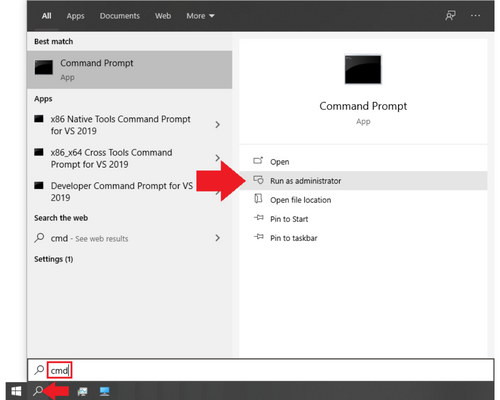
- In the Search bar, type cmd and run Command Prompt as administrator.
- In the command line, type WSReset.exe and press Enter on your keyboard.
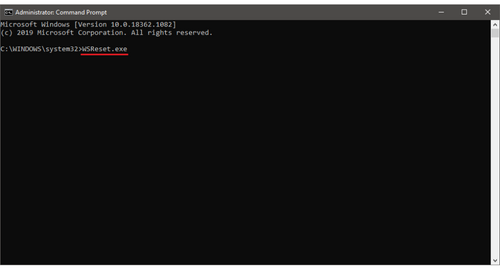
- Wait for the process reset to finish. Afterward, close the Command Prompt window and restart your computer.
Method 6: Clear the Microsoft Store Cache
Lastly, if the same issue is still persistent, you may navigate to a concealed folder that stores temporary files associated with the Microsoft Store.
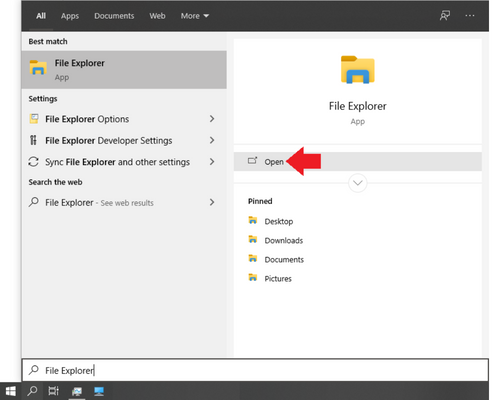
- Open File Explorer via the Search bar.
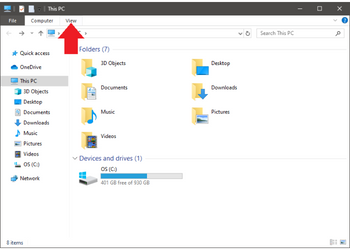
- Click on the View tab and enable Hidden items.
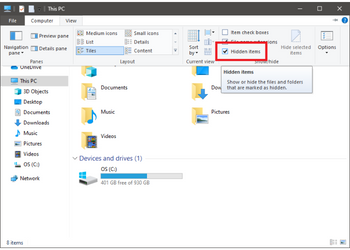
- Navigate to:
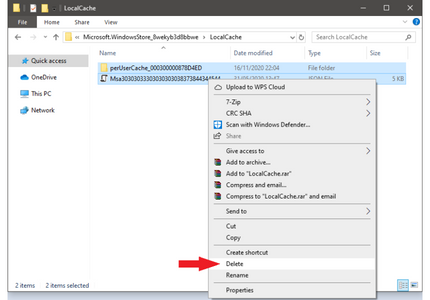
C:Users[YourWindowsUserName]AppDataLocalPackagesMicrosoft.WindowsStore_8wekyb3d8bbweLocalCache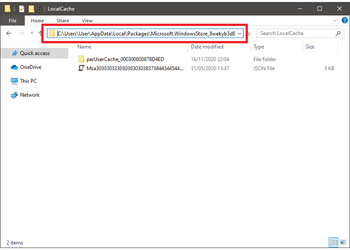
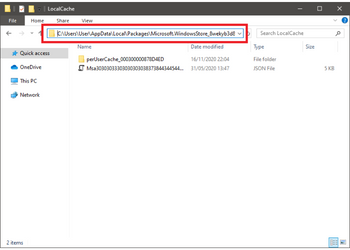 See the above screenshots for the specific details.
 - Press Ctrl + A to highlight all files inside the LocalCache folder. Right-click on the selected files and choose Delete.
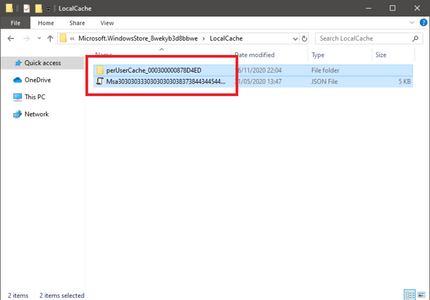
- Restart your computer and observe any changes.
Summary: Resolve an App Crash in Windows 10
- Open the Task Manager.
- Click More details at the bottom of the Task Manager window.
- Scroll down and find the process for the app that crashed.
- Click End Task to close the app.
- Open Settings and select Updates & Security.
- Select Troubleshoot from the left side of the pane, then choose Windows Store Apps from the list of options on the right.
- Select Run the troubleshooter to start looking for problems. The tool will scan for any apps that aren't working correctly and attempt to fix them.
Conclusion
If you Windows 10 is experiencing an app crash, you can try any of the methods above to fix the issue. We hope that you find this article useful.