Agile CRM is an extremely popular customer relationship management (CRM) tool to help businesses grow and nurture their customer relationships. This article will teach you How To Setup Service On Agile CRM?
Agile CRM is an online CRM (customer relationship management) software used by most of the companies to keep track of their contacts for deals and history across the system for rapid workflow. The Service Module in Agile CRM is a great feature to keep track of your company statistics.
Accessing the Service Module
To access your service module in Agile CRM:
- Click the “Sales” icon which is at the top center of the webpage.
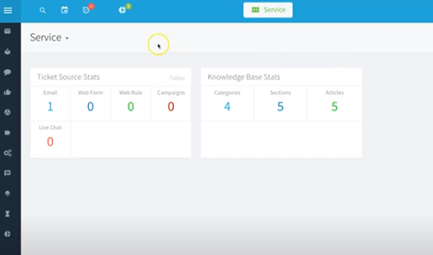
- Click on the “Service” icon. It will take you to the Service Module dashboard.
Features on the Service Module
Dash let
The status data are called “Dash lets”. If you want to add a new dash let, click on the “Add new Dash let” which is on the top right side of the dashboard. Select your category from the list. Click “Add” after applying your changes. You have now added a new dash let to your dashboard.
Help Desk
If you want to access your help desk section, click on the “Help Desk” icon.
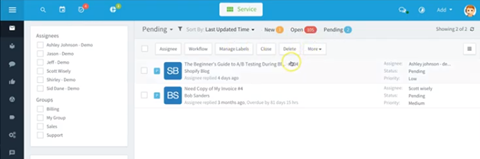
It shows your tickets, assigned users and groups, labels, and created dates, status, and types of tickets. Click any ticket to open your ticket and view the details. You can also include an email to a customer or support technician. You can set your date from the quick buttons. You can also change your status. Set your problem type and priority as you want. You can sort your tickets by date, priority, untouched, problem difficulty, etc. You will be able to see all the tickets based on your category. Click on the “Menu (3 bars)” icon to select different fields that you want to see on the ticket columns. Click the ticket and you can work within the ticket with editing history recorded. You can also include your workflows and merge your ticket.
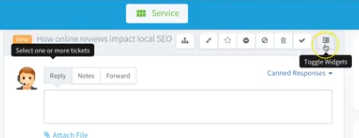
Widgets
You can toggle your widgets on and off by using the “Toggle Widgets” button. Removing the toggle widget will give you more space to work with your tickets. The “Canned Responses” option will give you the benefit of pre-providing your response for the ticket and you can send it right within the ticket.
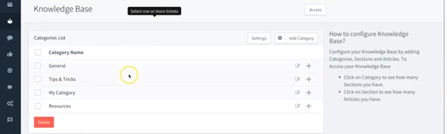
Knowledge Base
Agile CRM has a knowledge base feature integrated with the service module. Click on the “Knowledge Base” icon and you can view all the types of categories in your knowledge base. You can edit or add categories based on your tickets.
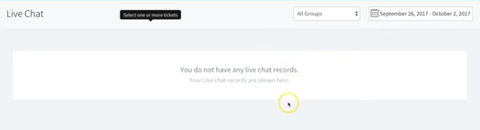
Live Chat
To view the live chat, click on the “Live Chat” icon. The chats you have recorded or you want to record will show up on the list. You can easily sort out the problems by replaying the live chat history. You can also customize your live chat by searching date ranges to look for the particular chat.
Feedbacks
For feedbacks, click on the “Feedback” icon and it will report the feedbacks you are given based on the helpdesk tickets. The consumers provide feedback for your service to them. The feedbacks notification will also be given to your mail address if you enable the option. You can filter your good and bad feedbacks too.
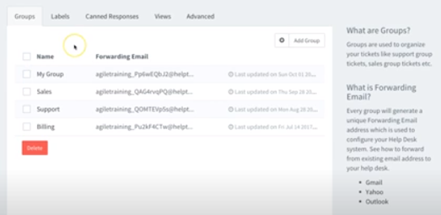
Assigning groups and labels
Click on the “Group” icon and assign your group members to send particular data to the specified group. Click on the “Label” icon and label the helpdesk tickets you received in Agile CRM. You can select specified labels to edit or delete the data.
Automation
There is built-in automation in the Agile CRM service module. Using automation will save you time as it will pre-calculate all the information that is needed.
Summary: Setup service on Agile CRM
- Log onto your Agile CRM account.
- In the top left corner click on the "gear" icon and click settings.
- Click on the "Integrations" tab in the left navigation bar.
- Select "Gmail" in the services list.
- You will need to connect your Gmail account with a Google account. If you have not already done so, select your preferred Google Account in the pop-up that appears.
- If you have not approved this connection before, click on Allow to approve access to your Google account.
