Creating folders on android is not as hard as you think. There are many reasons why you would need to create folders on your device. They could be used for organization or just for keeping everything in one place. It's good to keep things neat and tidy, even on your phone. Let's go ahead and find out how to create a new folder on Android!

Agile CRM is one of the best marketing automation platforms for agents. It bears the task of the agent to keep up with the leads and sales that come in. The reason Agile CRM is mostly favored for tracking this process of closing deals through them and then it starts moving to the other deals. If you want to create a Lead or Sales in Agile CRM, you can follow the procedure:
Adding Company
Suppose, you have a new business that you want to add. For the lead to work would be to add the company. Name your company and paste the link to your company’s website in the URL section. Now you have the company with logo visible at the Sales section in CRM. The creator of the company will also show up in the left section. You can rate the company based on its priority: five stars if it’s good, ready to close or already closed or anything less than that usually has a note attached to it for explaining the reason.
Adding Contacts
Before you do anything, go to “Contacts” and select “Add Contact” to provide the contact details of the company. You have to make sure to get all the contact info in there and the tags to recognize what type of industry it is. Click “Save” to apply your changes. You will see the level, contact role, and a link to the company. There are no ratings and tags on contacts.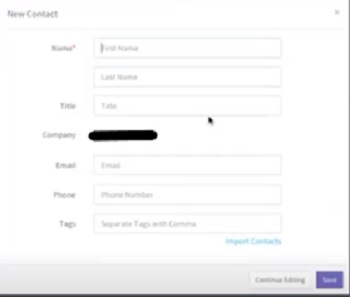
Storing referrals
Now go to “Notes” and note down about the lead. Put a subject and the note. It is the data to track your referrals. The note details should be related to the company: what the company needs. The option “Referral To:” will be the contact of the company owner. Click “Save” to apply your changes.
Storing Phone Calls
If you speak with the person on phone, go to “Notes” and add your subject as a “Phone Call” and the date of the call. Add on your note what the call was for and what the questions were. If you do not answer all the queries, then note them down for replying to it in the future. You can also put feedback on the phone conversation if you want. Refer to the contact of the person you had the phone conversation with.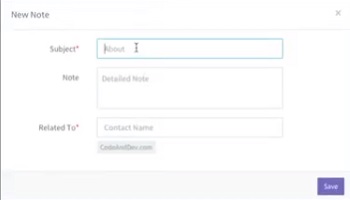
Overview of Contacts
As you have tagged the contact on the note, go to “Contact” and select the contact. You will see the referral and the phone call details pop up.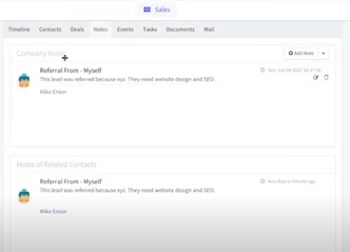
Adding Proposals
Add your proposals under the “Documents” section, not on the “Deals” section because this is kind of a quick intro on how you are tracking your leads. You can assign a document to the “Deal” section.
Adding Lead Scores
You can also score your leads if you want the high-quality leads to appear on the top. You can assign scores to the company manually or based on user behavior you can make the process automatic using Workflow automation. If you want to assign a score:
- Go to your Agile CRM dashboard.
- Go to the “Contact” Page which is below the “Sales” or “Marketing” sections.
- Click on the contact in which you want to assign a score.
- Go to the drop-down next to the “score” icon. Increase or decrease the score based on the company’s performance.

Summary: Create a lead in Agile CRM
- In the top right-hand corner of your Agile CRM account, click on the person icon, and select "Admin Settings"
- Click "CRM Settings"
- Scroll down the page to the "Lead Routing Rule" section and select "Add routing rule"
- Give your rule a name you'll remember
- Select "Sales or Global leads," whichever you prefer
- Select your criteria for this lead to be routed - you can choose whatever criteria you want
- Click "Add Tag," and give this tag a name that's relevant for this type of lead - something like "Routed Lead." Agile will automatically assign this tag to all leads that meet the criteria you selected in step 5
- Scroll down to the bottom of the page, put a check-mark in the box next to "Enable lead pipes," and click Save changes
