Where do I add a wood floor in SmartDraw? If you are thinking this and asking this question, then you have come to the right place. You have just found the perfect source to solve your problem with adding a wood floor on SmartDraw. Our team of writers has also helped thousands of businesses and people like you that needed expert insight, guidance and hand-holding on using SmartDraw in their own unique way. And now it's your turn.
Smart Draw is an easy and powerful floor plan maker. You can create various types of floor plans in it. There are a lot of different templates of the floor plan in Smart Draw as well. You can choose from them or make a floor plan from scratch. Now, there are many features in Smart Draw to change the look and element of your floor plan. The wood floor is also such a feature you can add to your floor plan diagram. If you don’t know how to add it, then follow this article. Here, we will show you how to add a wood floor on Smart Draw.
Before You Get Started
There are two versions of Smart Draw you can use for making a floor plan. An online edition, you can use on any computer or tablet from a browser. A downloadable version, you can download and use on your desktop. You can use the free trial version or the paid version. The free trial version has a limit on how many days you can use it, after that you have to pay to use it. So it is better to use the paid version. If you want to install Smart Draw on your computer, you can download it from here - Download Smart Draw.
For adding a wood floor, ensure these things given below:
- You have the basic idea about how to create a floor plan in Smart Draw.
- You can create your floor plan in Smart Draw first, then follow the article. Or, you should already have a floor plan ready.
If you don’t know how to create a floor plan, don’t worry. In this article, we will also give you some basic ideas about how to create it and edit it. After ensuring these, let's move on to adding wood floor on Smart Draw.
Adding a Wood Floor on Smart Draw
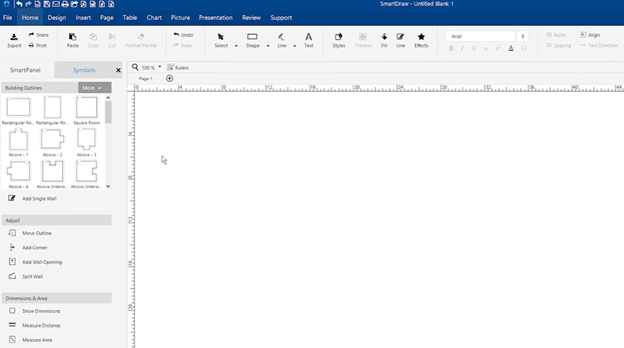
- First, open Smart Draw. Then log in to your account.
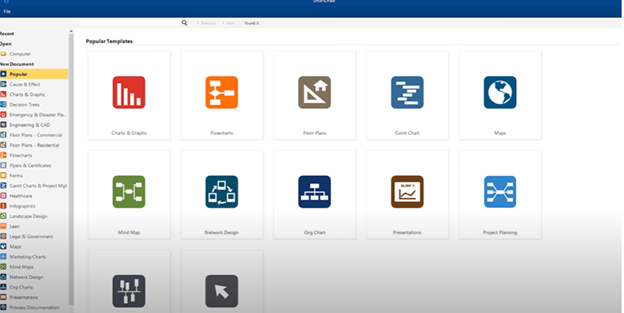
- See the “New Document” list on the left side of the window. There you will find the options “Floor Plan - Commercial” and “Floor Plan - Residential”.

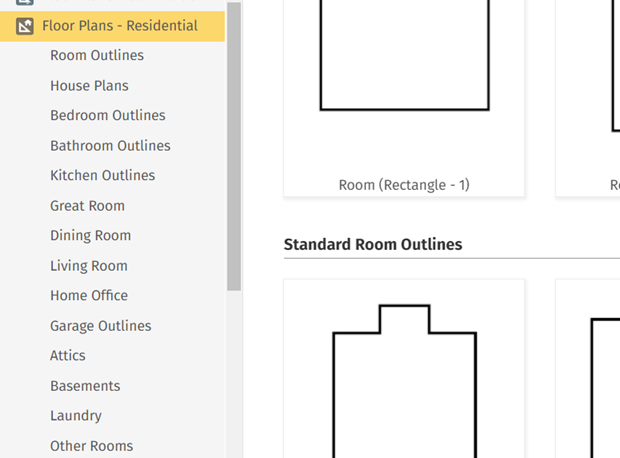
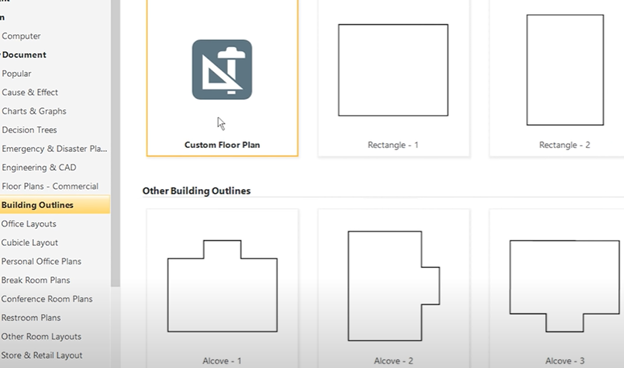
- You can choose from the various template already present in Smart Draw. Or, you can click on the option “Custom Floor Plan”.
- A new editor window will appear. See the editing options at the left and top toolbar. Using those you can easily create a floor plan on Smart Draw.
- Now after creating the basic plan, you want to add a wood floor to your floor plan.
- For this, look for the “Fill” option at the top toolbar. Click on it. Some options with a drop-down menu will appear.
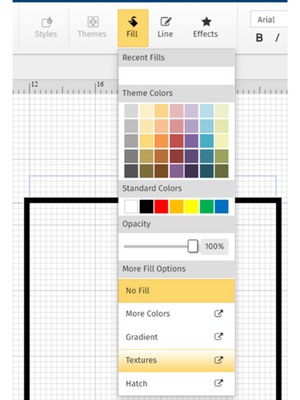
- There you will find an option named “Textures”. Click on it to open a new window with various textures such as Brick, Fabric, Grass, Wood, etc. You can add your desired texture from these.
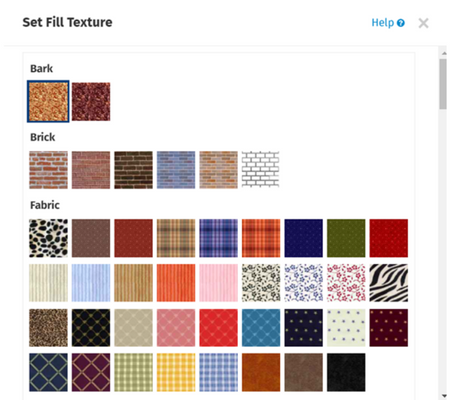
- Move down until you find two options: “Wood - Cabinetry” and “Wood - Flooring”. You can use these two options to add wood texture to your plan.
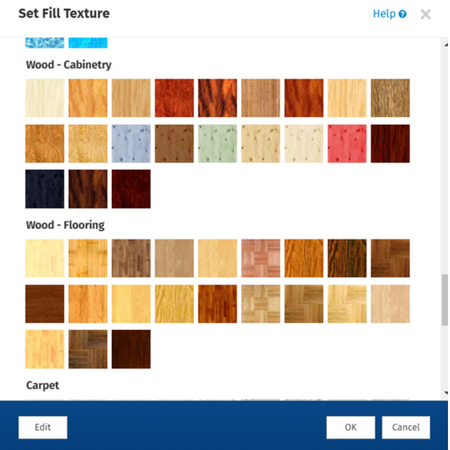
- Select your whole plan or desired room to add wood floor, then go to this wood texture option. Select your required wood texture and click “Ok” to confirm. And, your wood floor is added to the Smart Draw floor plan.
So, following these, you can easily add a wood floor on Smart Draw.
Summary: Do You Add a Wood Floor on SmartDraw
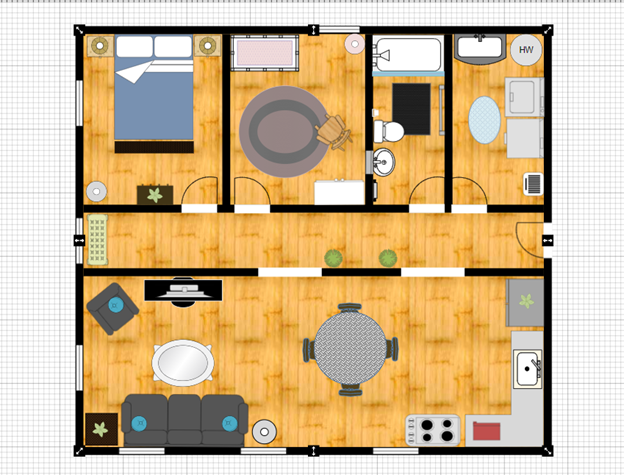
- Wood flooring is the most popular and bring the warmth of nature into your home or office. You can create the flooring you like by adding a Wood Floor.
- Add Wood Floor from the Room Section
- Click on the Room Section at the left side of screen, scroll down to Floors and click on Wood Floor.
- Once you click on Wood Floor you will see different wood floor styles pop up. Scroll through them to find the style that best fits your room.
- When you find the wood flooring style you like, click on it and drag it over to your room. A green box will appear indicating it is ready to be placed in your room. When you are happy with the placement of your flooring, just place the cursor on top of the room so that green box disappears and release the mouse button. Your new wood floor is now an element of your room!
- If you don't see anything in our library that suits your fancy, create a custom wood floor as a Layer by clicking on Create Layer. This allows you to create any style of wood flooring you like! Use this option if you wish to create parquet floors, inlaid designs
