You have finally decided to go for the G Suite. Don’t worry, most people are still not aware of this service or rather unaware of how big it could be for their business. But setting up G Suite is not an easy thing, even if you have good technical knowledge. I have gone through the process of setting up G Suite for my clients and now want to share it with you in the simplest possible way.

G Suite is a well-known professional domain-based email service provided by well known & most popular search engine Google. Other companies that provide official email services don’t give extra facility other than email service but in G Suite you will be allowed to use all kinds of Google services.
Here, you will get more than 15 GB of storage in google drive based on the purchased plan. This is a much easier service to adopt business. This service allows you the same thing with your business domain and will give you the admin control power to manage the users & others.
Pre-Requirement:
- An active domain
- Dual currency Credit or Debit card
Setting up a G Suite Account
- Open any browser on your computer.
- Open a new tab on your browser.
- Click the URL bar and type the address or you can copy the address & paste it to the URL bar “https://workspace.google.com/”.
- Now tap enter and the Google workplace website will open.
- Then click on ‘Get Started’ to open the registration page.

- First Enter the business name.
- Then select Number of Employee
- Now select your country name from the drop-down menu. Click the next button to go forward.

- Enter your name, existing personal email address & phone number as the contact information of the admin and click next.
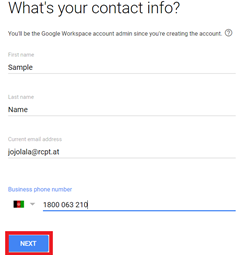
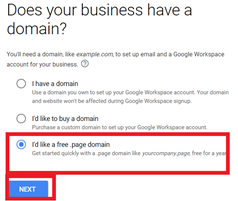
- Select the kind of domain you want to use.
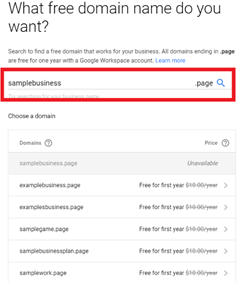
- Enter your desire domain and select the available one.
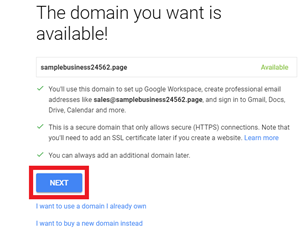
- Confirm the domain & click next.
- Now Enter your business full address.
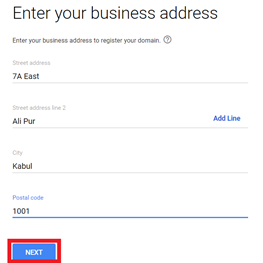
- Choose No Thanks to go to the next window.

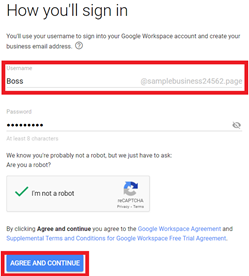
- Now Select your admin email address under the new domain and give a strong password to secure your account. Then tap the ‘AGREE & CONTINUE’ button.
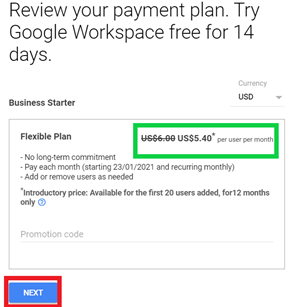
- Now select your currency to see the purchase plan. Give promotion code (if any). Click the next button to continue.
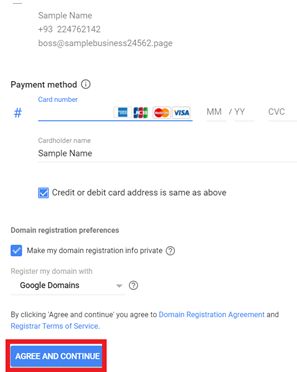
- Fill in the card information. And, tap the ‘AGREE & CONTINUE’ button.
- A successful account creation message will show here. Click the ‘Go to Setup’ button to activate the account.
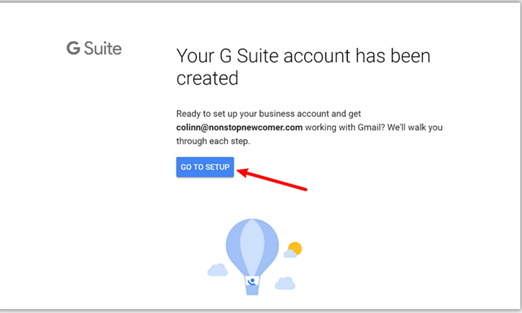
- Now it will transfer you to the admin control panel. Now click next as shown in the photo.

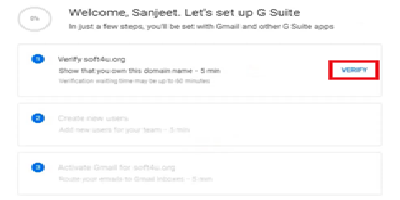
- Now click the ‘Verify’ button from the window.
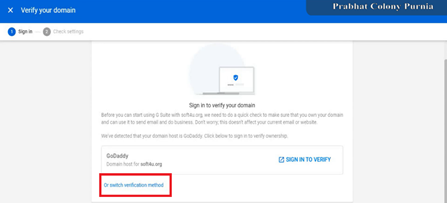
- Now click ‘Or Switch Verification Method’
- Select ‘Create a TXT record’ then ‘Next’ button.
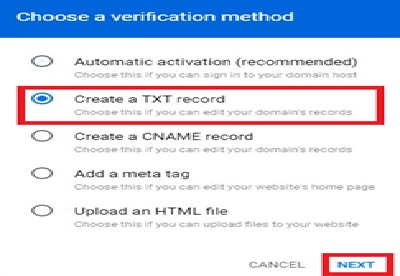
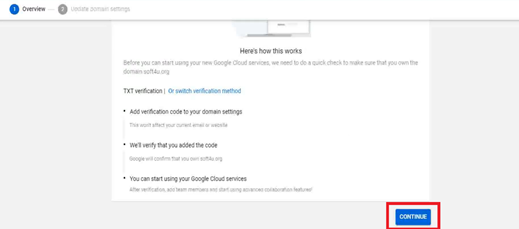
- Now confirm TXT verification by pressing the ‘Continue’ button. If you select another option mistakenly you can change it again from taping ‘Or Switch Verification Method’.
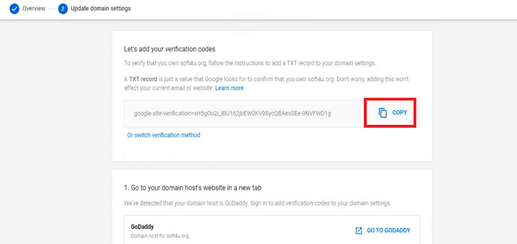
- Now click the ‘Copy’ button to copy the TXT file provided by Google.
- Now create another tab on your browser.
- Go to Domain suppliers’ website and login to your profile.
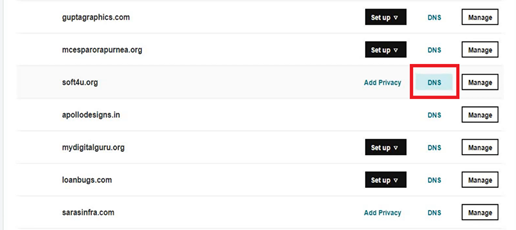
- Select the DNS of your domain to enter the DNS Manager. (Here I am using GoDaddy. Your provider interphase may differ from it. But the function of all the providers is the same.)
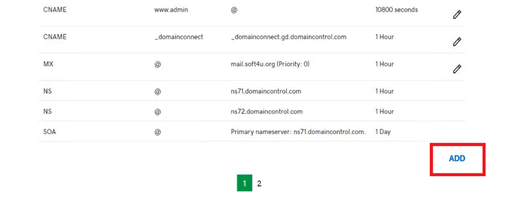
- Now Go to the bottom of the DNS manager and click on the ‘ADD’ button.
- Now Select TXT from type.
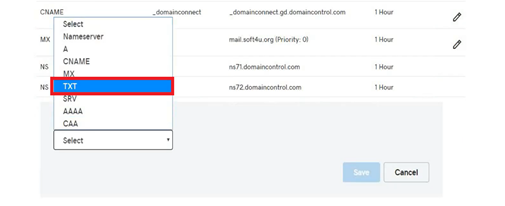
- Type ‘@’ on the host box.
- Now past the TXT Value on its box which was copied from Google.
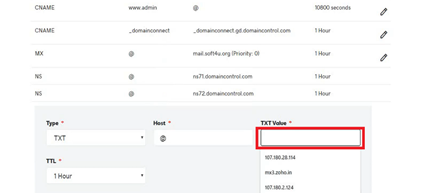
- Click the ‘Save’ and wait for 20 minutes.
- Now go back to the google setup tab and scroll down to the bottom of the page.
- Click ‘Verify My Domain’.
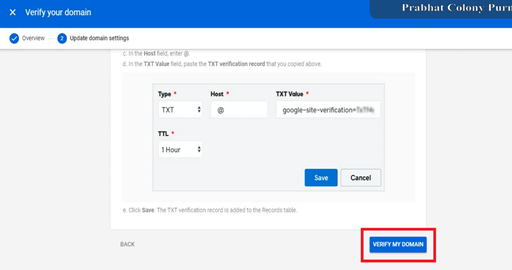
- After completing verification again go to the DNS Manager of the domain provider.
- Click ‘Add’ and Input the MX settings as shown below and save it.
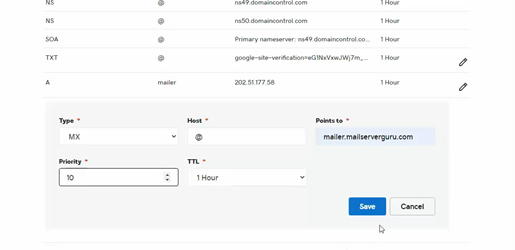
- MX Setting for the G Suite can be found in
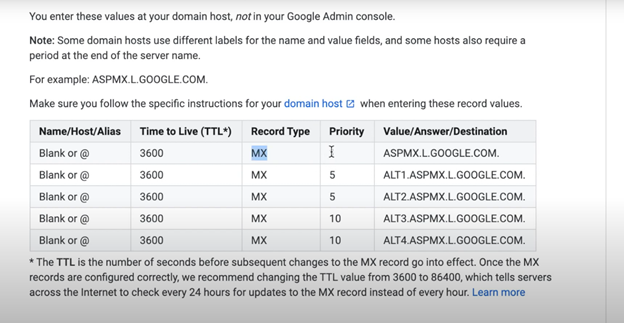
- Input all 5 MX Settings in the DNS Manager.
Finally, Your Suite Account is Ready to Use.
Summary: Set up G Suite
- Note: Only the account owner can sign up for G Suite.
- You can customize your domain name and email address to create a professional image for your business.
- Section: To sign up for G Suite, your domain must use Google’s name servers. If you’re not sure what name servers your domain uses, follow the steps in Check your domain host before you start.
- You don’t need to set up anything with your existing web host or web developer. G Suite works with any website that uses standard hosting services from a third-party host like Bluehost, GoDaddy, or HostGator.
- In most cases, it takes only a few minutes to set up G Suite after you’ve verified your domain and created your G Suite account. However some features might take up to 24 hours to get started.
- If you need help setting up G Suite, ask a Google expert here.