So, you have just gone through setting up G Suite account. You plan to use your own domain name if you have one. Then it is useful to create an additional email address to use when you are expecting important emails regarding your site, like notices from WordPress hosting service providers. Here is how to add an email address in your G Suite account.

G Suite is a professional domain-based email service where you can use all the Google services for your business. The user will get an email ‘username@businessdomain.xy’. Here you will get more than 15 GB of Google drive storage based on your purchased plan.
This service is much easier to adopt a business as almost every person in the world uses the Gmail service & the other service from Google. This service allows you the same thing with your business domain and will give you the admin control power to manage the users & others. Google doesn’t have control over your G Suite account, safely maintain your system as you want.
Why have to add email in G Suite account?
In an organization, there have many employees who have to connect with each other’s officially to transfer their files and communicate among them. To solve this email is the best option. For this, every employee must have an email address under the company domain.
Before you get started
If you want to add email in G Suite service your account has to be the admin account of the organization. By the outsiders & the user’s account of the company, you can’t add any email to your G Suite account. So, check that you have permission to do this.
Adding email
Here we can add email in two way
- Add a Single User at once
- Add Multiple User At once
Add Single User
- At first, open any browser on your computer. (Chrome browser is more suitable for this job).
- Open a new tab and type the address “http://www.admin.Google.com”. Press enter to open the Google Admin page.
- Sign in with your admin account of G Suite.
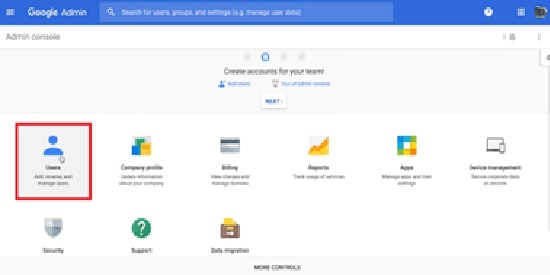
- At first click on the ‘Users’ tab of the admin control panel.
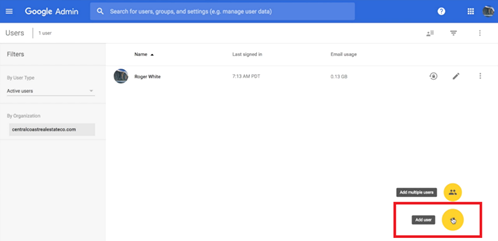
- Now click ‘Add User’ located in the right bottom corner.
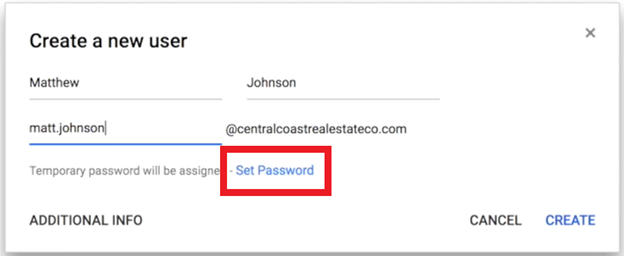
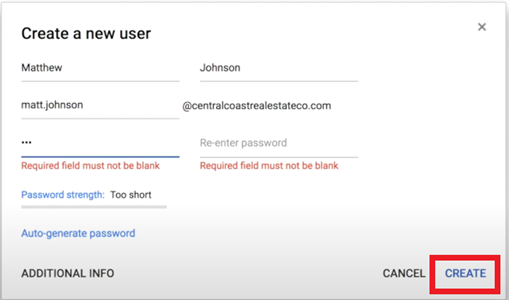
- Enter the user name & email address that wants to create under your domain.
- Click on the ‘Set Password’ & choose the password for the user.
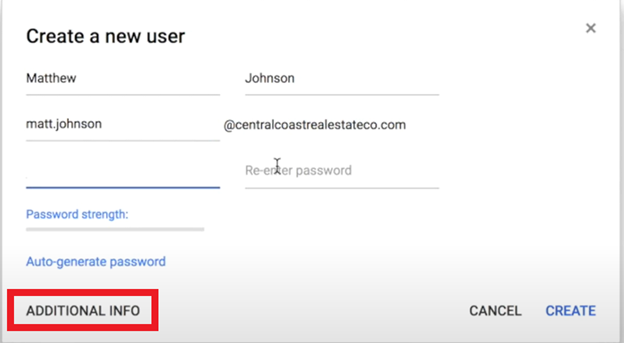
- Then Click ‘Additional Info’ to add the other information of the user. It is not a mandatory option; if you want you can skip it.
- Now Set the secondary email address, phone number & house address Information of the user then click ‘Next’ to go forward.
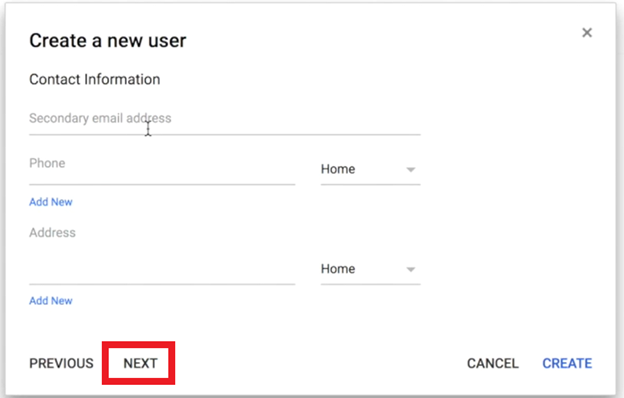
- Fill in the Employee Details and step forward; here you can fill in the all work-related information of the user.
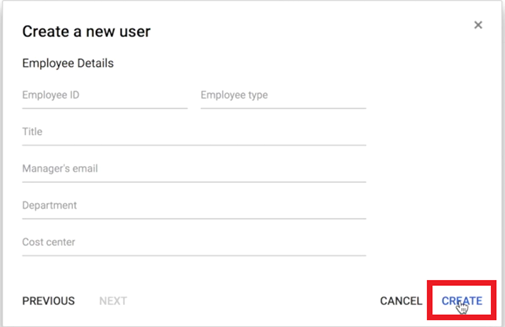
- Finally, tap ‘Create’ to add the user.
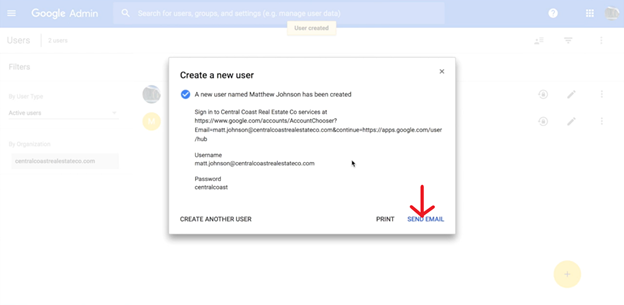
- After completion, this confirmation message window will appear. Then you can email the info to the user; Click ‘SEND EMAIL’.
Add Multiple User
- Follow the first four steps from the ‘’Add Single User” guideline.
- Now click ‘Add Multiple Users’ on the right bottom corner.
- Download the sample CSV file.
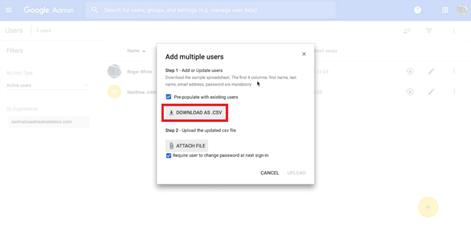
- Now open it with Google Docs.

- Fill in the information below the provided information. Columns A, B, C, D must be filled in. Then Delete the Rows which were already filled with the downloaded file. To delete select the rows and click the right button of the mouse, then click on ‘Delete rows x-y’.
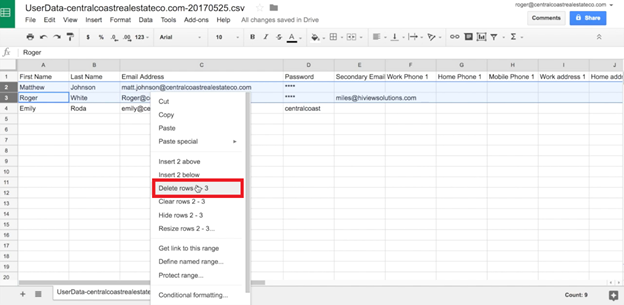
- The final look of the file will be uploaded. Here you can fill more than one row and all the entries from the second row will be added as individual email addresses.

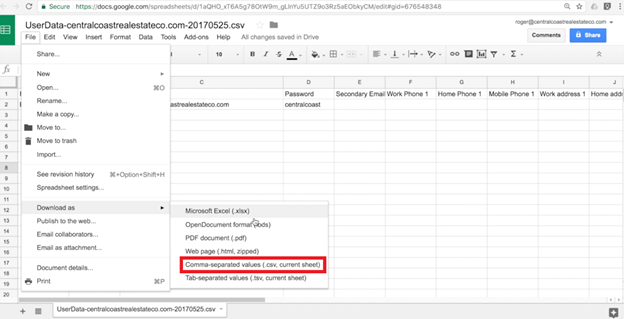
- Now download the file in CSV format. Follow the sequence to download the file: File > Download as > CSV
- Now attach the file and upload it.
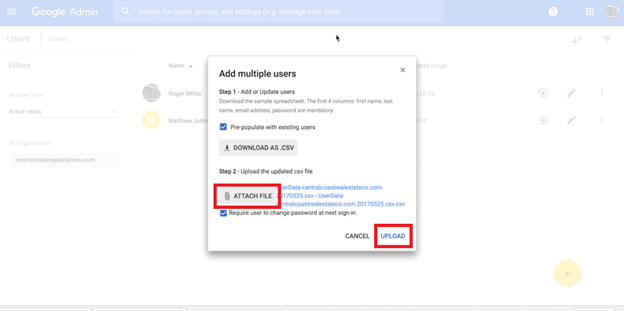
- All the entries of the the.CSV file will be converted to the email address.
Summary: Add an email to G Suite
- Add new users
- Set user passwords and recovery options
- Access the Admin console from Gmail
- This is how you add an email to G Suite.