It's frustrating to not be able to print labels from G Suite, but there are a few different ways you can do it. This article explains how.
G Suite is a professional domain-based email service for your business. The user will get an email ‘username@businessdomain.xy’. Google will provide more than 15 GB of google drive storage based on your purchased plan. This service is much easier to adopt as a business as almost every person in the world uses the Gmail service. This service allows you the same thing with your business domain and will give you the admin control power to manage the users & others.

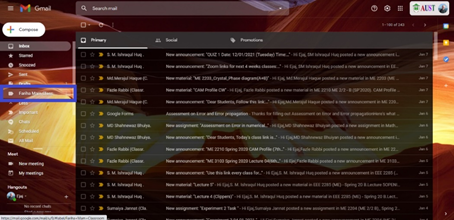
All the G Suite and Gmail account email can check by the http://www.mail.google.com website. Here you can make a level to maintain or view a special type of email together. For this, some specific processes have to follow.
Advantages of labels
If you are a corporate person or businessman you may have to mail many clients and receive mail from them. Before creating the level all the email and conversation appears in the inbox. For the rush mail, some important client’s mail may be missed. Now you can easily create the label by the name of that client and all the mail from that person will appear on that label and will show you the notification on the right side of the label name.
Creating Label
Follow the mentioned process to create or paste the label.
- Open any browser on your computer.
- Now create a new tab if all the tab is occupied.
- Now select the URL bar and type http://www.mail.google.com then press ‘Enter’.
- It will open to Gmail.
- Log in to your G Suite account if not yet. Or change the account to your G Suite account which you want to create labels.
- Then choose a client which label you want to create.
- Open an email coming from that client.
- Now select the email address of that client which is located on the right side of the client name.
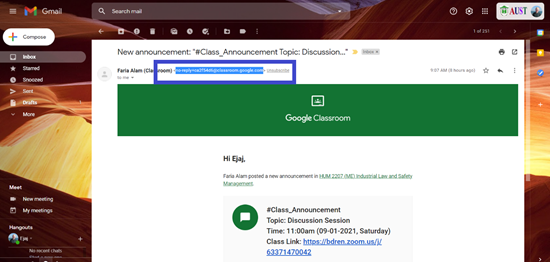
- Now press Ctrl+ C on the keyboard to copy the email address.
- Now click on the right side of the search bar where a little down arrow is located.

- An advanced search toolbar will appear here.
- Now click the ‘From’ box.
- Now press Ctrl + V to paste the copied email address in the ‘From’ box.
- Click on the ‘Create filter’ located on the bottom left corner of the dialogue box.

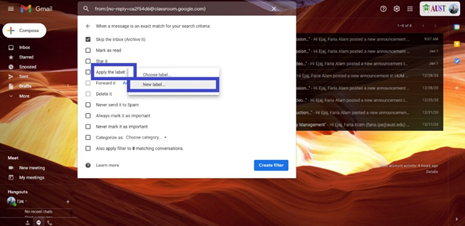
- A new dialogue box with useful features for the labels will open here.
- Now click ‘Apply the label’. Here two options will appear, you can select the existing label from here or can create a new one.
- Click on ‘New label…’ as you don’t have an existing one.
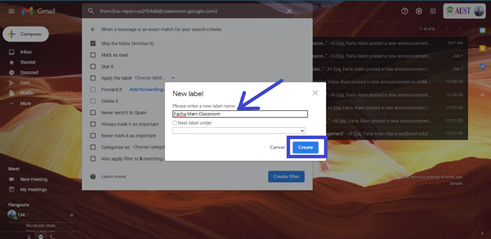
- Now type the label name. You can set where you want to keep the label by ticking the square box under the name box. Then select the position from the ox just below the checked box.
- Now click the ‘Create’ box.
- Check the following point by clicking on the square box located before the point.
* Skip the Inbox (Archive it)
* Never send it to spam
* Apply the filter to the ‘x’ matching conversation.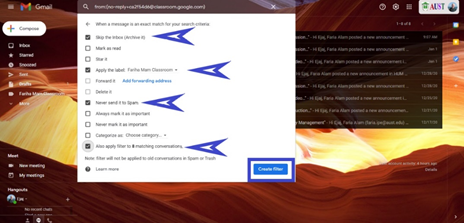
- At last click on the ‘Create filter’ button.
- All your email from that address will be moved to the created label and will be automatically transferred to that label.
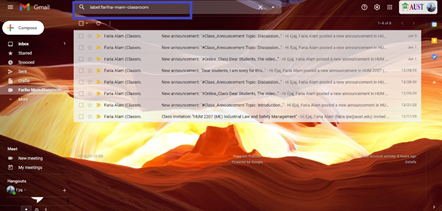
- Your created label will be shown in the menu button. Click on the name of the label to open it.
- And this is the final look inside the label. All emails from the selected sender are here.
Finally, you have successfully printed the labels from G-suite.
Summary: Print labels from G Suite
- Sign in to your Google Account.
- At the upper left, click on the Apps icon and choose Drive.
- Click New and choose New folder.
- Name the folder and click OK.
- Right-click on the new folder and choose Get Sharable Link.
- Copy the link in the Share box.
- On another tab, sign into your Avery Design & Print Online account at avery.com/print.
- Select Open Existing Project or Start From Scratch.
- Click Print from Google Drive. Paste the link you copied from Drive in Step 6 into the open box under "Paste url here".
- Choose private to just share it with those who have access through your Google Account, or choose Public on the web to share it with people you send a link to.
