How To Add Git As Source Code Management Visual Studio Code?
600 Views
You can install a Git source control plugin for Visual Studio or you can use an extension called VS Code extension to connect to multiple source code management tools. In this tutorial, I'll show you how to configure VS Code to use Git source code management. It does not matter if you are using Git from command line or from other SCMs such as Bitbucket, GitHub or any other Git provider, it is all the same procedure in setting them up.

Visual Studio Code (VSC or VS Code) is a popular editor to accomplish coding activities. A good number of friendly features attend notable action to ease the task.
Source Control Integration enables Git to work with the repository, letting you harness the power. It’s likely to push your web development efficiency to the optimum extent.
Using Git means further help on complex coding without wasting time or effort. And the tutorial explains the startup process to add Git to your VS Code.
GitHub Pull Requests & Issues Extension
- You’ll have to create an account on VS Code. Now, install the ‘GitHub Pull Requests & Issues’ extension. After the setup, you’ll have to sign in.
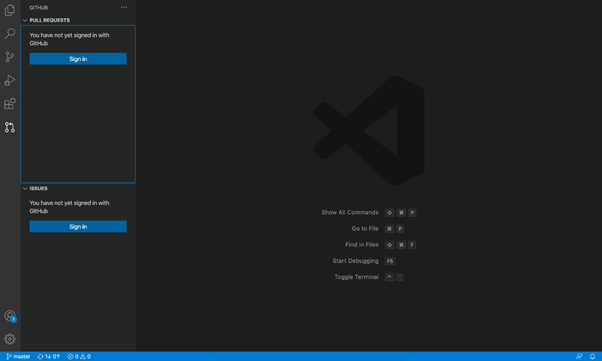
- You’ll have to follow the prompts to confirm authentication from GitHub. Return to the VS Code homepage from your browser window.
- From the ‘Pull Request’ window, you can take action on pull requests. It includes – simple view, necessary management & creation.
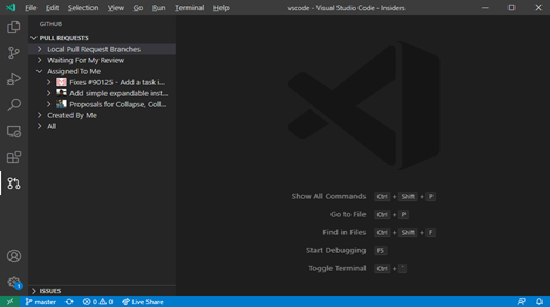
- Either the ‘GitHub Pull Requests: Create Pull Request’ command or the ‘+’ button in the pull request. Pushing the remote branch can’t execute the action.
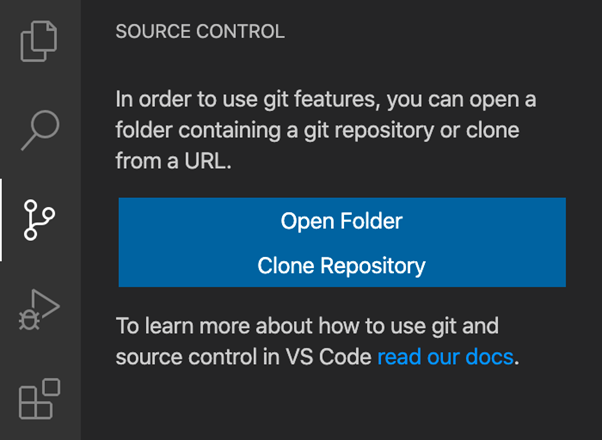
Integrating Git to VS Code
Press the ‘Clone Repository’ button from the opened Source Control panel. Use the ‘Git: Clone’ command in the command palette.
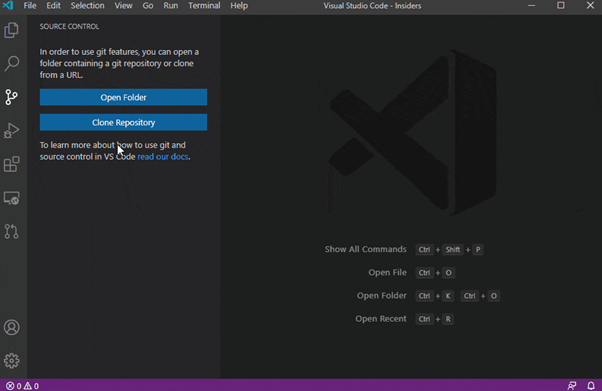
For a particular repository, you’ll need authentication from GitHub. Source control integration lets you initiate a project as a Git repository.
Using Git as Source Code in VSC
- Open VS Code on your PC to access its built-in terminal. Press ‘Ctrl + ~’ to use its keyboard shortcut.
- You can also click the ‘split in the road icon’ on the left panel. It’ll open the Source Control Tab.

- Select the open folder to explore your File Explorer to its current directory. Click ‘Open’ after selecting a suitable directory.
- Initialize repository to figure out the ‘.git’ directory. Use the terminal to navigate the project directory.
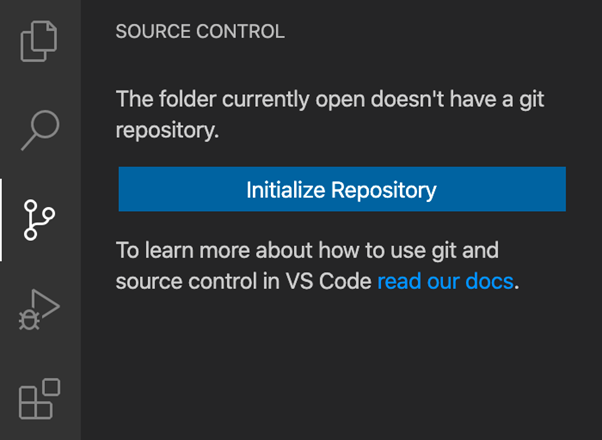
- Or, make a directory for a new web development project. Change the directory to create a Git repository.
- After initializing the repo, you’re to add a file naming ‘index.html’. You need to look at the right corner to get the change.
- Source Control Panel with the file will appear with a green U. ‘U’ stands for untracked file in VS Code.
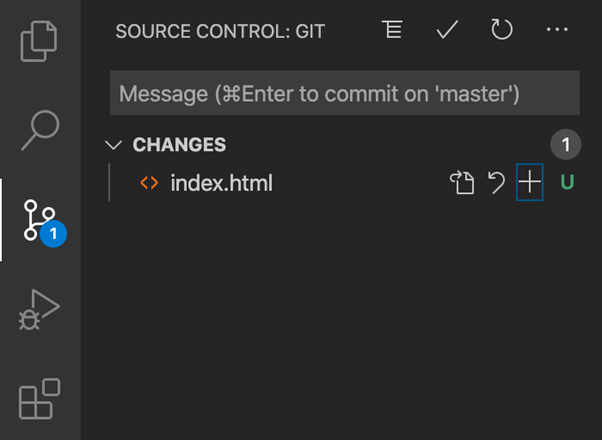
- The letter deliberately reveals its new or changed entity. The file is yet to get added to the repository.
- Click on the plus ‘+’ icon right to the green ‘U’. It should start tracking the file by the repository.
- The letter will immediately change to ‘A’ following the introduction. It presents a newly added repository file.
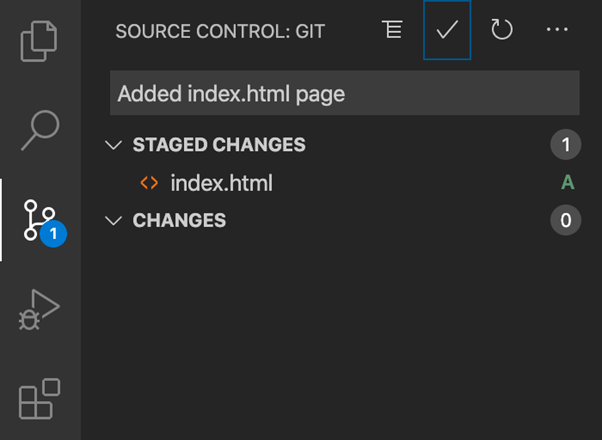
- Start typing a commit message into the input page. It’s a facility available on the Source Control Panel’s top.
- Press the ‘Check’ icon to perform the commit. The executed action comes without any change.
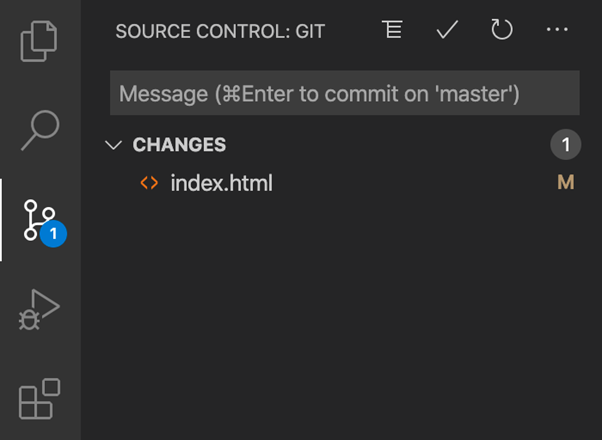
- Now, you’re free to establish the web contents in the body. For practice, you better try simple commands.
- Use Emmet shortcut to initiate an HTML5 skeleton. It requires a press on the ‘!’ key to follow by a ‘Tab’ key click.
- Continue with the coding to add some under the file. After saving, you’ll get to see ‘M’, depicting – modified.
The process is somewhat long enough to learn for any beginner. You can cover the session through primary execution.
Summary: Add Git as Source Code Management Visual Studio Code
- Click settings icon on the bottom left hand side of Visual Studio Code.
- Select Settings from the drop down menu.
- Expand the Extensions section and find GitLens.
- Click install button alongside it.
