RetroArch is an open source project designed to be a 'one-stop-shop' for accessing classic games. It's a great place to start if you're just getting into emulation and want to know what all the fuss is about. First you need to add the libretro core packages from either Arch Linux, or from AUR in Gentoo Linux. You then need to set up samba shares, and download the RetroArch desktop app from HERE . Then you can go into steam and search for retroarch, or go into your games library and install/add it! Before you do this make a backup of your steamapps folder, as it will be replaced with the retroarch one. Once installed, open up the steamapps folder that steam created, then right click on retroarch select edit version details , you will then get a list of game folders like so:
What is RetroArch?
RetroArch is a new app that helps you to play your favorite retro games. It is available on Steam, Apple app store, and Google play store. It is not a retro game emulator in itself, but rather a tool that helps to combine multiple emulators that already exist into one place.
When you open the application, it lets you download and install different emulators (known as “cores” in the app) from its selection. It is really handy since it streamlines multiple cores into one place, and can even connect your emulated games to Steam for greater convenience.
Downloading and Installing RetroArch
The first thing you need to do is download RetroArch through this link or copy and paste https://retroarch.com/?page=platforms to your browser. Select the download button that corresponds to the Operating System, and the processor your CPU has (32-bit or 64-bit). You will see a downloaded zip file called RetroArch.
Extract the files using any unzipping tool you have, and you will see a folder called RetroArch. Open the folder and then search for the RetroArch exe file and then launch it.
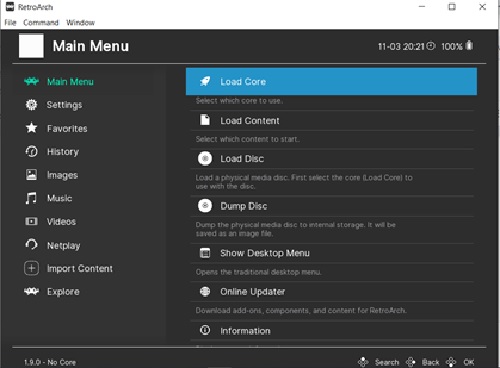
It will open the RetroArch menu, which you can navigate using your keypad’s arrow keys and the enter/backspace button. Here you will see the selection of cores that are supported by RetroArch.
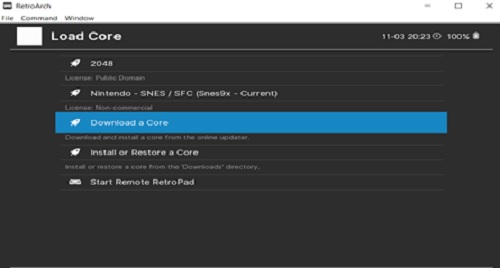
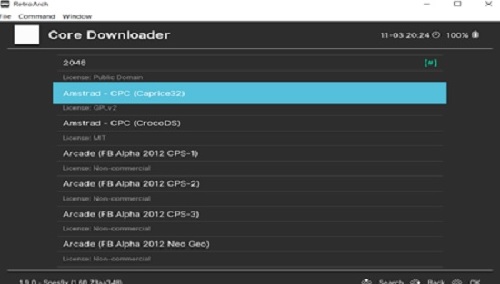
On the Main Menu, select Load Core, click Download Core, then click enter on the core you want to download. Another way to download cores is to click Online Updater, then click Core downloader. It is recommended to try out the different cores for different game systems/consoles to know which one you like best or which ones work best for your system. You can also do some quick research on which emulators people find to be the best.
Downloading and Using Steam ROM Manager
To import your emulator games into Steam, you will need to download and use Steam ROM Manager (SRM). Go to this link or copy and paste https://github.com/doZennn/ste am-rom-manager/releases to your browser and download the latest version of Steam ROM Manager (note: files that end with .exe are for windows, .dmg are for MacOS and .deb are for LinuxAgain). Install the file into your desktop, then launch the Steam ROM Manager exe file.
It is important to note that you should close your Steam app completely when doing this since the changes will not register if your Steam is open. Once you launch it, click “Parsers” and you will see the following menu below:
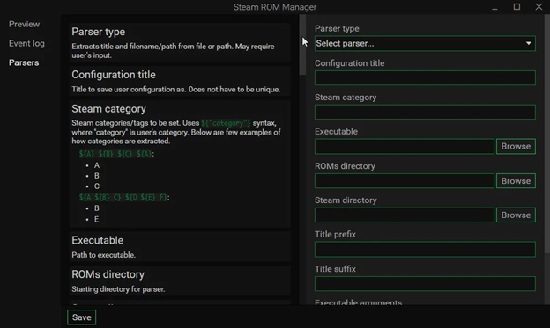
Just type or select the following for each of the sections on the interface:
Parson type: Glob
Configuration Title: SNES (It can be anything you want, but it is highly suggested to input the console’s name for convenience. SNES is just an example.)
Steam Category: ${SNES} (Insert between the brackets the name of the console, as the name inserted will be what appears on your steam. Again, SNES is just an example here.)
Executable: Click the Browse option, then select the RetroArch.exe executable that you used to launch RetroArch earlier.
Steam Directory: Click the browse button, then select the installation folder of Steam.
User’s Glob: Input the code: ${title}.@() *Note: Insert between the parentheses the ROM extension name such as iso, GBA, etc. If you don’t know the ROM extension names, you can find them here or just examine the properties of the emulator you’re using. If you have more than one ROM extension, just insert a pipe character (|) then the extension for example ${title}.@(smc|sfc)
Commandline Arguments: L "cores${/}" "${filePath}" *Go to the RetroArch installation folder, then open the “cores” folder. You will find all the emulators you’ve downloaded using RetroArch in this folder. Find the file that corresponds to your emulator, then copy the file name. Next, type in this code into this section: L "cores${/}" "${filePath}". Insert the file name after the bracket. For example: L "cores${/}snes9x_libretro.dll" "${filePath}". Here, snes9x_libretro.dll is the file name of the SNES core downloaded.
Image Providers: ConsoleGrid, SteamGridDB, retrogaming.cloud
Once you’ve done all that, press the “Save” button on the bottom left of the SRM interface to save that Emulator. If you want to add more Emulators, just press Copy then change the configurations to be in line with the Emulator you will add.
The last step here is adding the games to Steam. Once again, make sure that Steam is not running. First, press the “Preview” on the top left of SRM. Press the “Generate app list” on the bottom left corner, this will make SRM generate previews of your games. Once SRM generates the games, it will start looking for cover art.
You can hover over a game and use the left and right arrows to switch between artworks, or you can press the button on the bottom left of the game to upload a cover art that you’ve downloaded or made. After you’re done with selecting the artwork, just press the “Save app list” button on the bottom left corner, and you’re done.
You can now see a list of your emulated games whenever you open your Steam and go into your games library. Lastly, when playing using Steam, be sure to set a controller configuration once you launch a game. Since they are non-Steam games, the keyboard configuration will always be selected by default unless you change it. You are now finished setting up RetroArch on Steam. Have fun playing all your favorite Retro Games with the convenience of RetroArch!
Summary: Add RetroArch to Steam
- Enter the Big Picture Mode.
- Go to Settings.
- Select "Add a Non-Steam Game" at the bottom of the menu.
- Select "Browse."
- Choose RetroArch from its location on your hard drive.
- Double-click on the RetroArch file and it will add it to the list of games in Steam.