In this article, we will show how to assign a static IP address to a virtual machine running on Windows Server 2012 Hyper-V. The article is primarily intended for users who have a fresh installation of Windows Server 2012 Hyper-V and are looking for a guide on how to assign static IP address to the virtual machines running on that particular host.

A virtual machine is a software program that performs most of the operations of a physical computer while acting as if it were its computer system.
When you set up a VM, it wants to use the DHCP and automatically assign an IP address. But sometimes, if you are going to configure a domain controller or such, you need to give your VM a static IP and explain how to assign that.
Assigning a Static IP Address to a Virtual Machine
To give a static IP address to a virtual machine, some simple walkthroughs can be done in different ways. Follow the procedures to attach the IP address –
- Open the Windows VM. Go to the start search bar. Search for “cmd” and click on the “Command Prompt” program, and it should be run as administrator. Type “ipconfig /all” in the command prompt and hit the “Enter” button. Note down the ipv4 address, Default Gateway, and DNS server address running in your operating system.

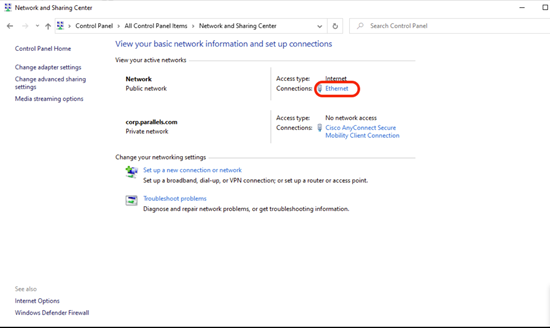
- Go to “Control Panel” from the Windows start menu. Enter “Network and Sharing Center.” Click on the “Ethernet” option.
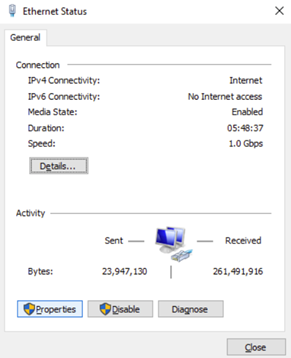
- Click on the “Properties” button.
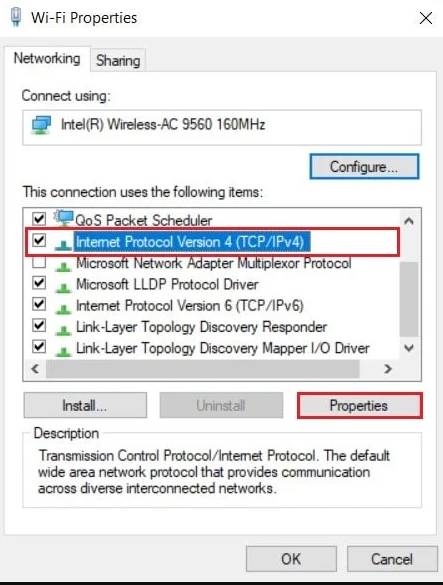
- Under the “Networking” tab, double-click the option saying “Internet Protocol Version 4.”
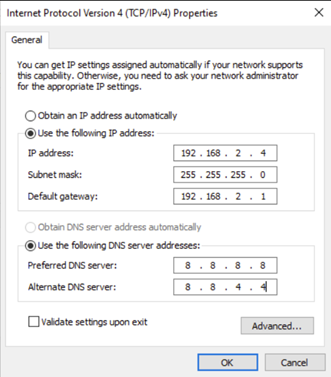
- Uncheck the options for obtaining IP and DNS addresses automatically. Now, you will have to enter the IP address manually there. From the noted ipv4 address, change the last number (if your IP address is 192.168.0.1, then change it to 192.168.0.14, and it can be changed from 2 to 255 in a similar manner) and put it in the “IP address” section. Put your preferred DNS server address; I’m using the Google DNS server address 8.8.8.8, 8.8.4.4.
- Now, restart the VM, and it should contain a static IP.
Assigning a Static IP Address to a Virtual Machine Using the Settings
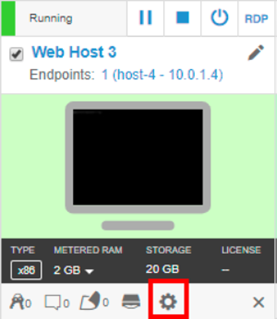
- Enter the Virtual machine settings menu. It should look like a gear icon or can be named just as “Settings.”
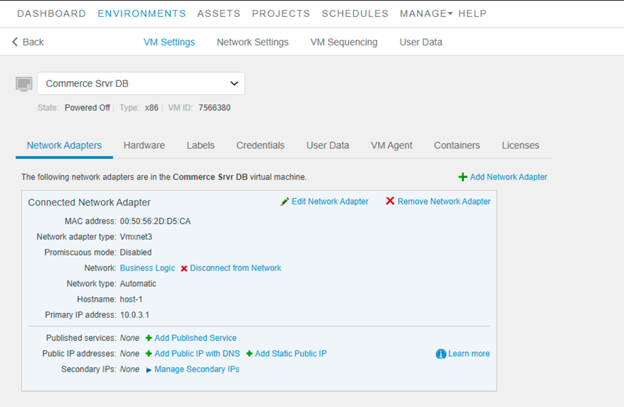
- Under the “Network Adapters” tab, click on the “Add Static Public IP” option.
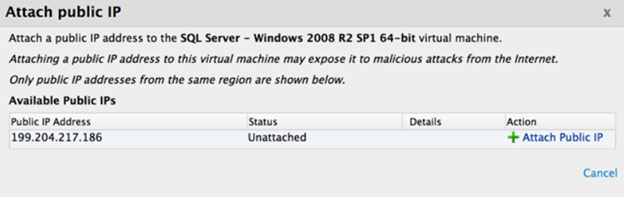
- The available public IP addresses on your operating system will be shown. If the IP address status is “Unattached,” it means the IP is not assigned to any virtual machines. If it says “Attached,” it means the IP is assigned to a virtual machine and can be used on other virtual machines. If the status is “Deployed,” then you can’t use the address on different virtual machines because it is assigned to a running virtual machine.
- Click on the “Attach Public IP” button to attach the available IP address.
Which is the Best DNS Server to Use?
The most OK-free and accessible DNS servers provide a secure alternative to connecting online, with the added benefit of perhaps increasing your connection speed. I’d suggest using the Google DNS server, which is 8.8.8.8, 8.8.4.4, and it’s one of the most used DNS server addresses out there. Other popular DNS servers such as Cloudflare: 1.1.1.1, 1.0.0.1 or Quad9: 9.9.9.9, 149.112.112.112 are good too.
Summary: Assign a Static IP Address to a Virtual Machine
- From the virtual machine view, select the virtual machine.
- Select Edit Configuration.
- Select Network Adapter.
- Select the network adapter you wish to assign a static IP address.
- Select Static Ip Address.
- Type in the static IP address, subnet mask and gateway.
- Select Save Changes.
