Do you want to change your IP address on Mac? You got here! I’m going to show you how to change your IP address on Mac. Nowadays, a lot of people use proxy addresses and VPNs to bypass the Internet censorship and access blocked websites. If you are one of them and you also want to know how to change IP address on Mac, then I have an answer for you. This article will teach you how to change IP address on Mac by using the following methods:
To secure your personal information when browsing the internet, from an IP perspective, or wanting access to a website or service that is not available in your region or current country, you need to know how to change the IP address on your Mac. Changing your Mac’s private IP address modifies the home network’s IP address only. And, after adjusting Mac’s public IP address, you are allowing others on the web to view another IP address on your Mac and cover your Mac’s original public IP address.
Changing IP Address on Mac
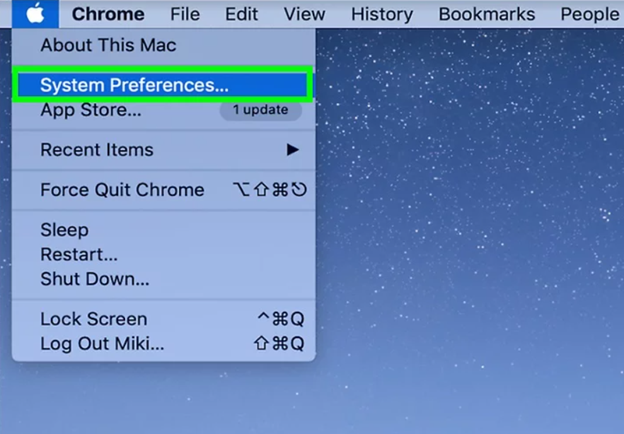
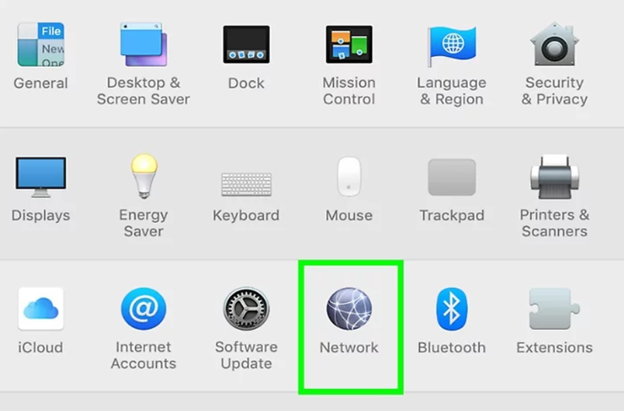
- Select the “Apple” icon from the upper left side of the Mac window. A dropdown menu will show up. Click on the “System Preferences” option.
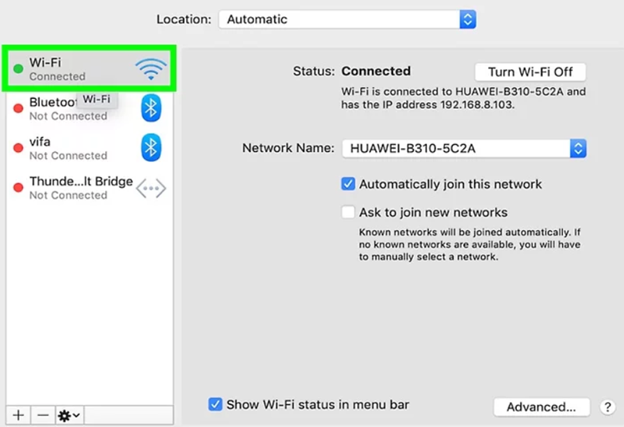
- Locate the “Network” option and open it. The networks you used before or using right now are at the left side of the window. Select the network you are working with at present. If you are using a Wi-Fi network, then select “Wi-Fi.”
- Locate the “Advanced” option from the lower right side of the window and click on it. Access the “TCP/IP” section.
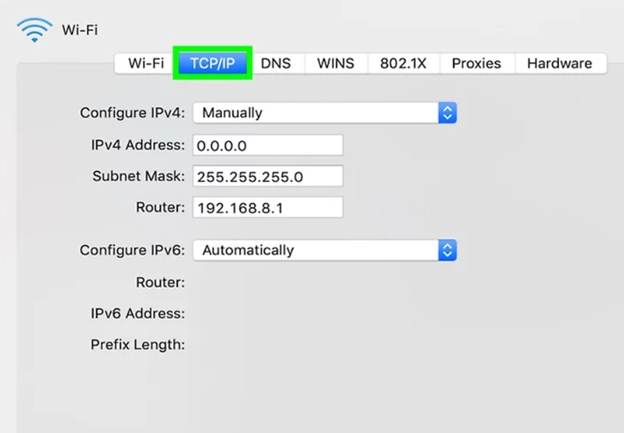
- Extend the dropdown menu of the “Configure IPv4” option and set it to “Manually.” You may also select the “Renew DHCP Lease” option to make your Mac produce a new IP address immediately.
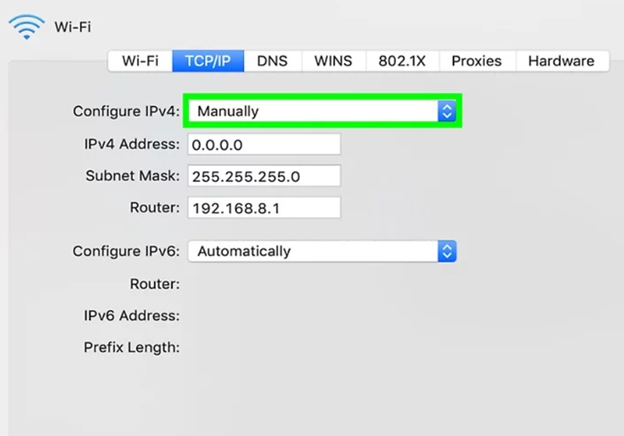
- Select the field beside the “IPv4 Address” option. Put your required IP address, but you can only modify the last number of it. If the present IP address is “12.0.3.4”, you may change it to “12.0.3.53”.

- Select “OK” to confirm the changes and click “Apply.”
Changing IP Address on Mac applying Proxy Server
- Access the “System Preferences” window again and select the “Network” option. Choose the network you are using presently and open the “Advanced” menu.
- Select the “Proxies” section from the top bar. Extend the “Select a protocol to configure” menu.
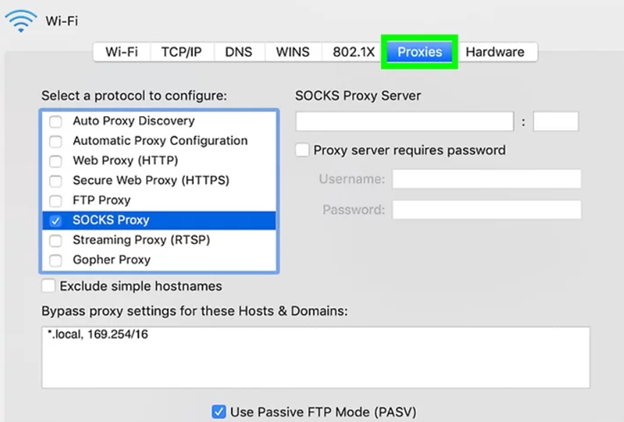
- If you can not pick the appropriate protocol to use, go for the “SOCKS Proxy” option. It routes the network for the servers and users with a proxy IP address, which will give your Mac more safety by hiding your original IP address. Any other option is also less secured than SOCKS proxy.
- Put the IP address you wish to in the field beside the ”SOCKS Proxy Server” option. You may also pick any SOCKS proxy from their official site.
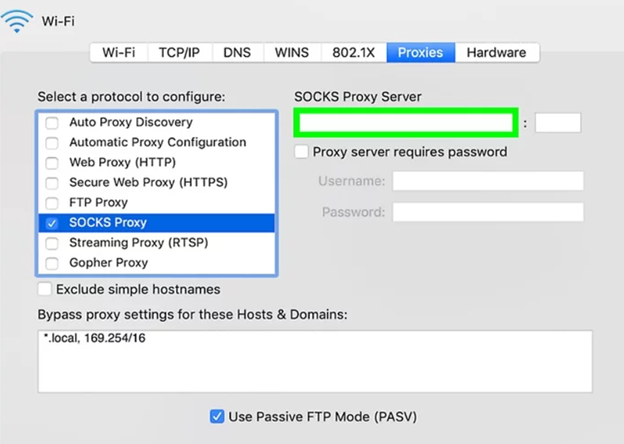
- Select “OK” to save the settings and pick “Apply” to finish.
Changing IP Address on Mac by Shutting Off the Router or Modem
- If the modem and the router are in the same connection, you may switch off both of them together. If they are indifferent connections, then you may switch off any one of them.
- Unplugging them reset the IP address of the Mac. Because the network features the “Dynamic IP Address” setting, every time the router or modem joins the web, it will set you with a new IP address.
- After some time, switch on the router or modem again and reconnect to the web. Then, you can go see the new IP address from the “Network” menu of the “System Preferences” option. If it doesn’t work, then switch on the router or modem after some hours.
Summary: Change IP Address on Mac
- Open System Preferences.
- Click on Network.
- Find and select the network you're connected to from the left panel.
- Click on Advanced...
- Select the TCP/IP tab and choose Renew DHCP Lease
- hit OK and then Apply.
