Microsoft recommends that you can change webcam settings in Windows 10 to your needs. Imagine that you are using an old laptop, or you have just upgraded Windows computer, but the built-in webcam (also known as a frontal camera) is not the best solution for you. This guide will show you how to change default webcam on your PC.
If you find the internal camera of your laptop or the current webcam on your PC lacking, the best thing to do is to replace it with a better, newer hardware. However, this is not an easy process and it requires you to be careful so you can make the right changes. Here are some steps that you should follow to properly change the default webcam.
Step 1: Selecting the Default Camera
- Granted that the camera hardware is attached, and the drivers are installed properly, you can change the default camera with the new one. First, press the buttons ‘Windows key’ and letter ’X’.
- Choose ‘Control Panel’.
- Select ‘Devices and Printers’.
- Check for the webcam on the list. After locating it, right-click on the item.
- Click on the option ‘Set this device as default’.
Step 2: Disabling the Other Unused Camera
Another easy way to set another camera as default is to disable the current one. This will make the newly installed camera to become the default webcam.
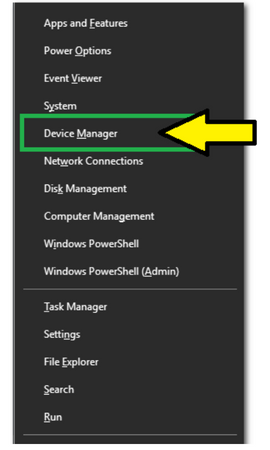
- To do this, press the buttons ‘Windows key’ and letter ’X’.
- Choose ‘Device Manager’.
- From the Device Manager window, double-click on the drop-down list ‘Imaging Devices’.
- Locate the name of the current and soon-to-be-removed webcam and right-click on it.
- Choose the option ‘Disable device’.

- After disabling, try to open an app that utilizes a webcam. Make sure it enables the newly added webcam.
How to Fix if the Webcam Doesn’t Work?
If the newly added webcam doesn’t function even after setting it as the default camera, try the following possible solutions below:
- Make sure the new hardware is functioning or even powered on.
- Give the webcam-using apps permission to access the new hardware.
To do this:
* Click on ‘Start’.
* Choose ‘Settings’, then ‘Privacy’ and finally ‘Camera’.
* If there is a statement ‘Camera access for this device is turned off’ displayed, choose the option ‘Change’ and turn on the camera access. - Update the antivirus software
Look in the settings if the camera access is being blocked or permitted. If blocked and there are no other options, you can disable the antivirus software or uninstall it and replace with another one. - Try inserting the new hardware on another USB port
The other method is to insert a new hardware on another USB port and scan changes on the hardware driver. To do this, follow the steps below:
• Click on ‘Start’.
• Search for ‘Device Manger’.
• Locate the camera in question if it exists. If not, choose the menu ‘Action’ and then, choose ‘Scan for hardware changes’.
• After the process is complete, try to reopen a webcam-using app and observe if it enables the new hardware.
• If the camera exists in the list under the item ‘Cameras, Imaging devices or Sound, Video and Game controllers’ and still not functioning, consider checking driver incompatibility. Right-click on the camera’s name and then, choose ‘Properties’.
• Select the tab ‘Driver’ and then choose the button ‘Driver Details’. If there is a file name ‘stream.sys’, this means your camera is not designed for Windows 7 and other newer versions.
• If there is none, then you might need to reverse your camera driver back to its initial settings. To do this, go back to the ‘Driver’ tab and choose ‘Roll Back Driver’.
• Select ‘Yes’ if the option to roll back exists. Wait for the process to complete and try again to open a webcam-using app to check for changes.
• If there is no option, then you need to uninstall the incompatible driver of your camera. Go back to the ‘Driver’ tab and select the option ‘Uninstall Device’.
• Enable the checkbox ‘Delete the driver software for this device’ and then click on ‘OK’.
• Afterwards, go back to the main window of Device Manager, browse of the menu ‘Action’ and choose ‘Scan for hardware changes’.
• Wait for the reinstallation process. After the process is complete, restart your computer. Once the desktop screen has finished reloading, check the new hardware’s operation by opening a webcam-using app.
Summary: Change default webcam in Windows 10
- Open the Camera app.
- Under Choose which apps can access your camera, turn on the toggle switch for your desired app.
- In the search box, type default programs and select Set your default programs.
- Select the target program and click Choose defaults for this program.Section: To remove a custom icon assigned to a file type, select the file type entry again.
Conclusion
Changing default cameras for Windows 10 and checking on their functionality might be tricky sometimes. For newer hardware, the problem of incompatibility might be less occurring since most of them have plug-and-play mode. We hope that the above tips help you change your Windows 10 default webcam with ease.
