Have you ever wondered how to change Email settings on Kindle Fire? Well, there are many reasons people might want to do that. You can fix issues with all email accounts on your Fire or readjust them for a better experience. This guide will walk you through the process of setting up your Email account on Kindle Fire.
The email app on Kindle Fire supports most email protocols like POP, IMAP, and Exchange accounts such as Yahoo, Gmail, and Outlook.com. Most email accounts use these protocols to send and receive emails.
If you want to change your email setting or manually set up your email account, then you will require the email setting of your provider. Here are the steps for changing the email settings on your Kindle Fire.
- On your Kindle Fire, go to your apps and locate the Email icon (which looks like an envelope). Click on it.
- If you already have an email account, type in your email address, then click Next.
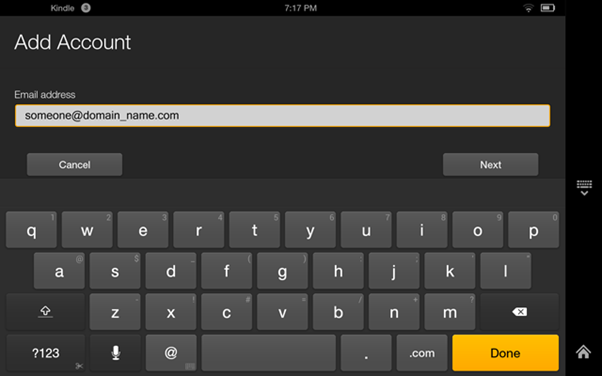
- Now type in your password and tap on the Next button to proceed.
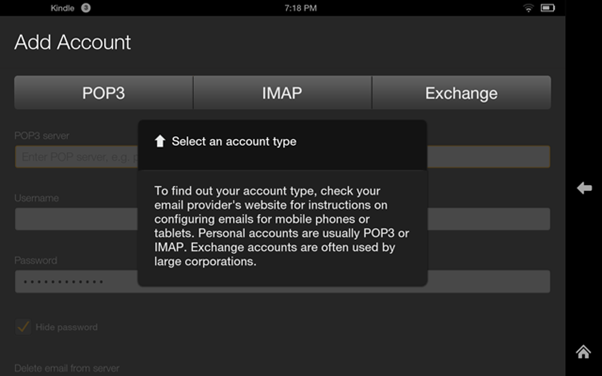
- The Add Account window will display. Select the email protocol that you intend to use, whether it is POP3, IMAP, or Exchange account. If you are uncertain about the protocol your account is using, then it is best to consult your email service provider.
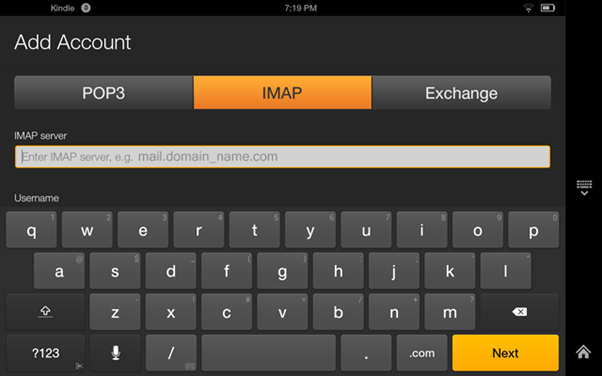
- Then, enter the name of the incoming email server in the blank field below the chosen protocol.
- Once done, click Next to continue and the screen will display a message stating “Checking server settings.” Click on the Cancel button to cancel.
- Click on Next to go through the different email account settings.
- On the Outgoing Server settings, click on the Security Settings and Ports option.
- When on the Security Setting screen, you will see the Incoming Security Settings and the Outgoing Security Settings. By default, you should see that the secure settings are checked.
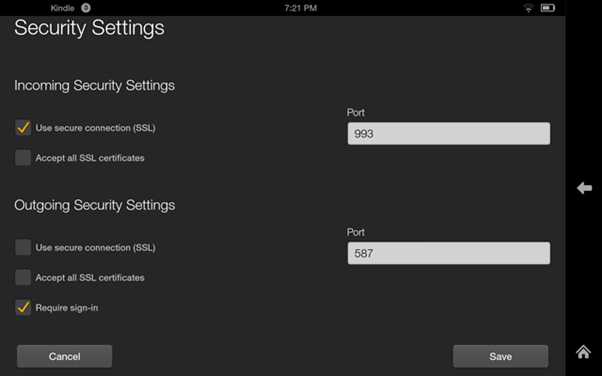
- Choose your preferred security settings and click on Save. After saving, your device will try to connect to the email server to verify your settings and a Setup complete screen will appear.
How to Associate you Device with Another Email Account?
If you want to associate your device with another email account, follow these steps below:
- The first step is to display the Quick Settings. You can do this by swiping down from the top of your screen.
- Click on Settings and then select My Account.
- Once “My Account” window has opened, locate the Deregister button and click on it. A confirming screen will appear. Confirm to proceed with deregistration.
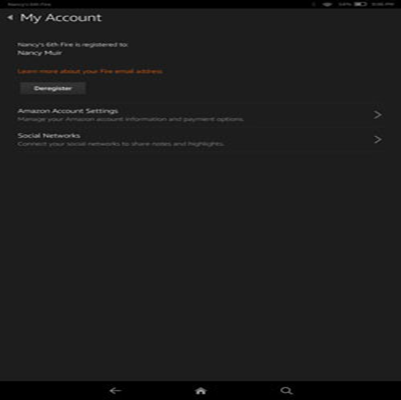
- Once you have deregistered your account, click on the Register button.
- Here, you will be asked to add your Amazon credentials, including your email address and password that you want to use on your kindle fire.
- Tap create account to associate your device with the new email account.
Setting up Email on Kindle Fire
If you don’t have an email account set up on Kindle Fire, then you can set it up by providing information about email accounts that you have already established with providers like Yahoo and Gmail. Here is how:
- Swipe down from the top of the Home screen. This will prompt the Quick settings bar to appear.
- Tap More to display the Settings panel.
- Click on My Account and then tap Manage E-mail Accounts.
- Click on Add Account to display the dialogue box with other providers.
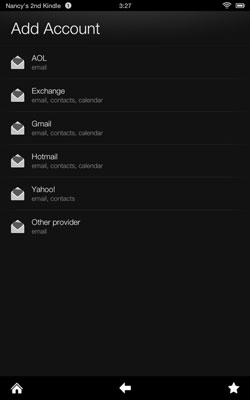
- Choose the provider that you want to sync with your Kindle Fire.
- Input details of your username, email address, and password and then click Next.
- A screen will appear showing two fields: the Name field (where you will the name that will show on outgoing messages) and the Email-Address field (where you will input your address). Input your email-account password in the Password field.
- If you want to set the email as the default email account, check the box next to the Send Mail from This Account by Default option. Then click Next.
- A message may pop up about some accounts syncing with your Kindle Fire. Click Ok to continue.
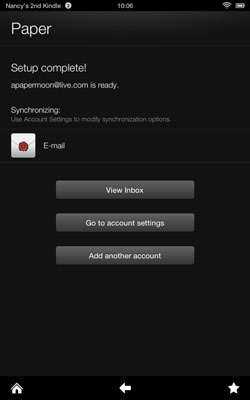
- Once the setup is complete, click on Save.
- You can go to the View Inbox option to access the inbox of the account that you just set up.
Summary: Change Email Settings on Kindle Fire
- From the Home screen, tap Apps > Settings
- Tap Applications > Email and tap the email address or account name you wish to change.
- Tap Account settings and make any changes you would like, then tap Done.
Conclusion
You can easily change your email settings on Kindle fire and add as many accounts as you like. We hope that these tutorials prove useful to help you manage your email account.
