You might be wondering - why would I want to change the RAM speed in BIOS? Well, there are a number of reasons you might want to change your RAM or look at differing RAM speeds. Perhaps you have a new motherboard and need to consider different RAM paths or maybe your current system is having some problems and needs an upgrade. In this tutorial, I’ll show you how to find your current settings and change them so that you can get more from your system.

Some settings go back to their original condition when setting up the system initially or reorganizing the BIOS. It indicates that the CPU overclock in an initial state and the fan speed profile can get disoriented, the boot priority of the hard drive can get mixed up, resetting the RAM to its standard speed of 1333Mhz if your PC has DDR3 RAM. So, you can change the memory configurations in BIOS manually to fix the RAM speed to the actual rate appointed by the manufacturer company.
Changing RAM Speed in BIOS
- First, you should see the memory specifications of your PC. For that, you may check it on the web from the manufacturer webpage or pick any one of the RAM sticks, and the information will be on the label. Such as, the memory speed will be like 2300MHz, the timings will be like 10-12-30, and the voltage 1.64v.
- Before changing the settings in BIOS, it would be best if you access the “CPU-z” application. If you don’t have it on your PC, download it from here – Download CPU-z and install it. Open it and click on the “Memory” section.
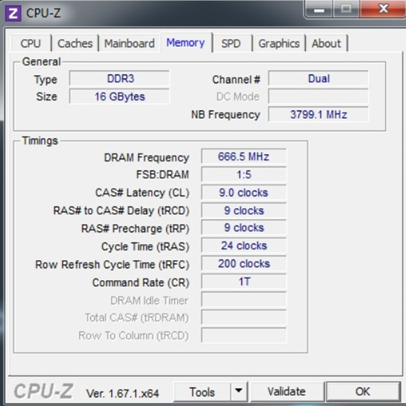
- See the information from the “Memory” window and remember what your PC RAM is right now. As “DDR” means double data rate, you have to double the value it gives here beside the “DRAM Frequency” option. Like, if it’s displaying 666.5MHz, that means the RAM is working at a 1333MHz speed. So, if your RAM had the memory of 2200MHZ originally, then you are not working with the appropriate RAM speed and losing a significant portion of it.
- Now, access the “BIOS” by simply pressing the “Delete” button as you switch on the system. It can be a different key in your PC, so if the “Delete” button doesn’t work, see your motherboard manual to know the correct key.
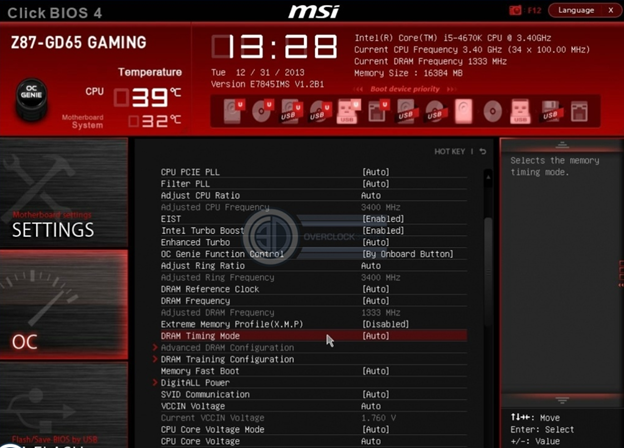
- After accessing the BIOS, advance to the “Overclock” settings menu and then search for the “Memory” section.
- Then, locate the “DRAM Timing Mode” option and select it. From there, access the “Advance DRAM Configuration” menu. It will show up another window where you can put the appropriate number for the Memory Timings.
- Typically, the default is 9-9-9-24, and much 1600MHz memory works perfectly with these Timings. For that, you do not need to put anything. But, if your PC has a higher memory speed like 2200MHz, then the timings will usually be higher. Then, you can adjust the timings manually. Also, keep in mind that the menu and options can have a slightly different title than here. You have to work that out.
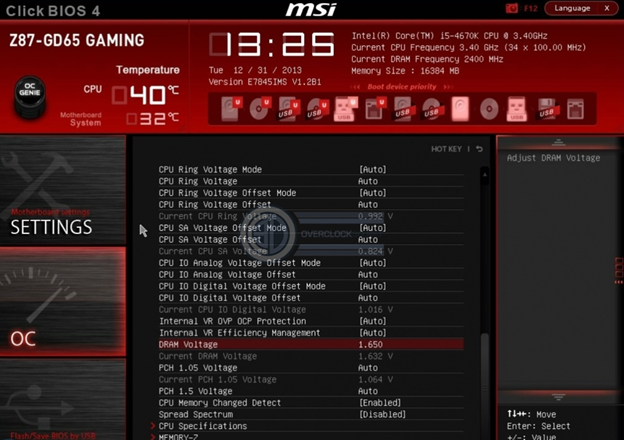
- After that, return to the previous window and search for the “DRAM Voltage” option. Usually, it shows the “Auto” option as default. Replace it with the appropriate value of your PC. The unit will be 1.65v, 1.35v, etc., for DDR3 RAM. It can be different for low voltage RAM.
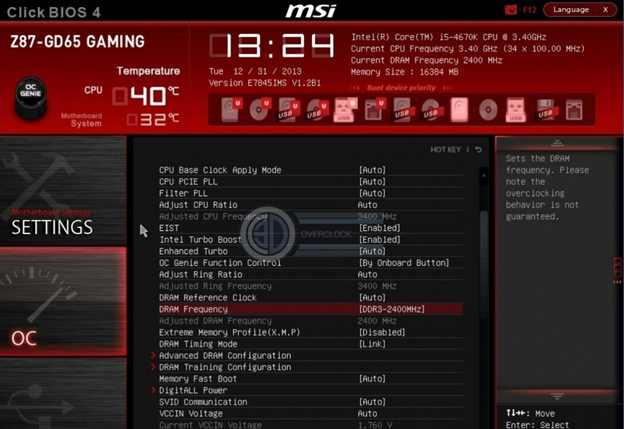
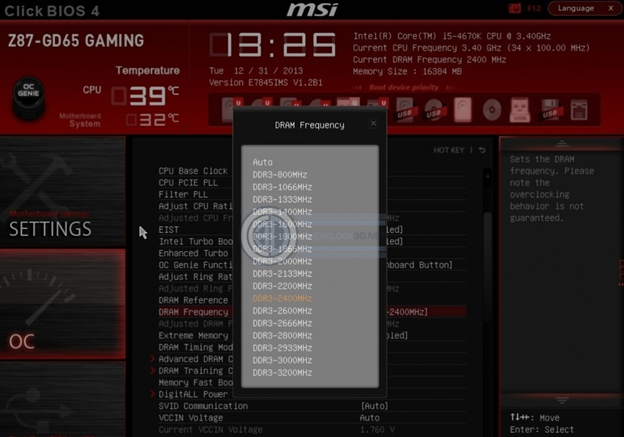
- Then, locate the “DRAM Frequency” option and extend the dropdown list of numbers. Select the appropriate speed for the RAM. Tap the F10 to store the adjustment and restart the computer.
- Now, it should open naturally or maybe at a higher speed if you are fortunate. Open the memory information in CPU-z again and see if the memory value is correct now.
Summary: Change RAM Speed in BIOS
- Make sure you have the latest BIOS update.
- Go to the MIT tab.
- Adjust the Memory Configuration section.
- Change the XMP profile to auto.
- Save your changes in BIOS and exit.
