Microsoft Windows 10 can be considered as one of the favorable operating systems in today's world because of its outstanding user-friendly facilities. Thus, if you're using a WiFi connection for your home or office networks, you might get stuck with the below-listed issues in Windows 10. In this article, we’ll see how to fix the How to Connect to WiFi in Windows 10 error and other connectivity issues while trying to connect a Wireless/WiFi network on your PC running on Windows 10.
Most laptops, desktop computers and even tablets have Wi-Fi connections because it is a very convenient means of accessing networks and using the internet sans messy cables.
Wi-Fi connection is only convenient if you know how to go about it. If you have a Windows 10 OS, there are several ways of connecting to the internet quickly via a wireless connection.
In this guide, we will show you how to access wireless networks with the network menu in Control Panel, Taskbar, Settings, as well as command lines and command prompt.
Method 1: Using Taskbar
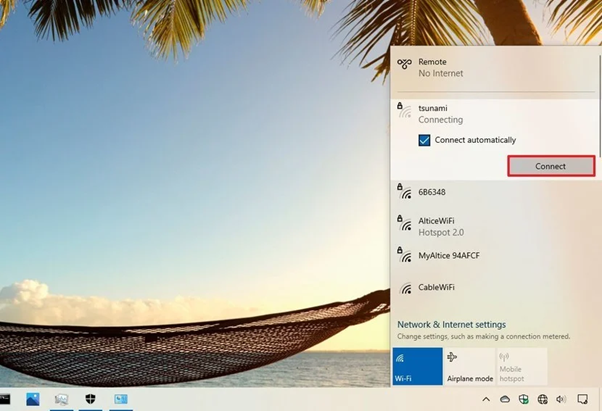
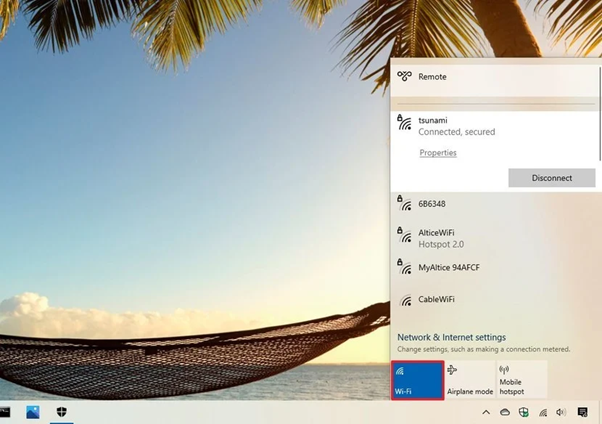
Follow these steps to connect to wireless networks with the help of the network flyout in the taskbar:
- Click/tap on the icon for Network on the right side of your computer’s taskbar. You can also press Windows Key and A simultaneously to open the action center.
- Then, select the Network button.
- Choose your preferred Wi-Fi connection.
- You can also tick the option to Connect Automatically.
- Now, click on Connect option.
 Pro Tip: If no network is listed, check if the Wi-Fi is on. If it isn’t, click on the button to turn it on.
 - Verify the security key of the network (password).
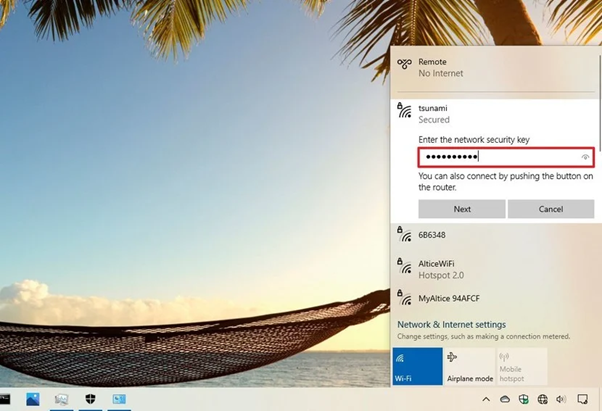
- Click on Next.
Once these steps have been completed, your device will connect to your preferred Wi-Fi. - Reconnect Automatically
Several devices offer the option of reconnecting to the Wi-Fi automatically even after a period of disconnection.
Set Up your Device
To set up your device to automatically reconnect to wireless networks, follow these steps;
- Select the icon for Network on the lower-right side of your device’s taskbar.
- Switch off the wireless connection by clicking on the Wi-Fi icon.
- In the resulting menu, choose the time to re-establish connection: The options provided include manually, one hour, four hours or one day.
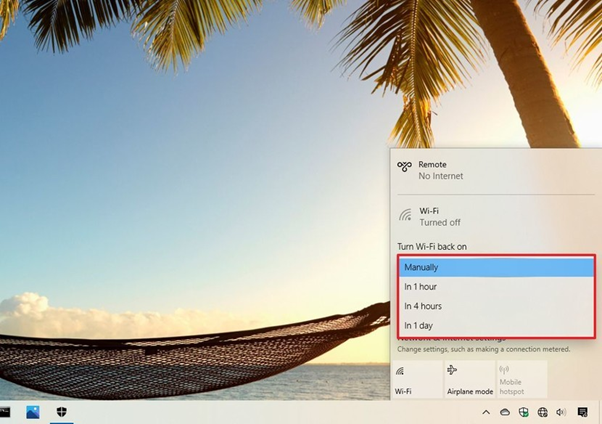
After these steps have been completed, your Windows 10 OS will not attempt to reconnect with a wireless network until the specified schedule.
With this feature, only the networks that were set to reconnect automatically will be connected to by your computer.
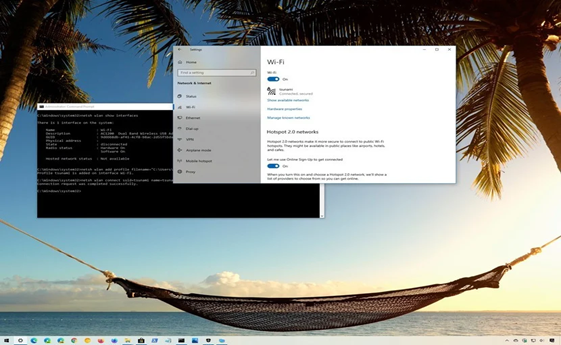
Method 2: Connecting to a Wireless network via Settings
Your Computer’s setting is another route through which you can connect to Wi-Fi. You can manually pre-configure wireless connections and when that particular network is within a connectivity range, it will automatically connect.
Follow these steps to set it up;
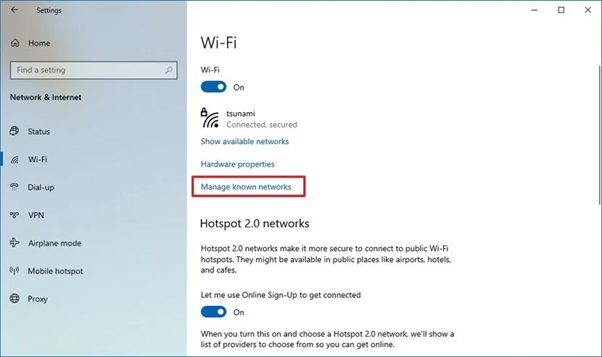
- Open Settings.
- Select Network & Security option.
- Click the Wi-Fi button to turn it on.
- Then select “Manage known networks”.
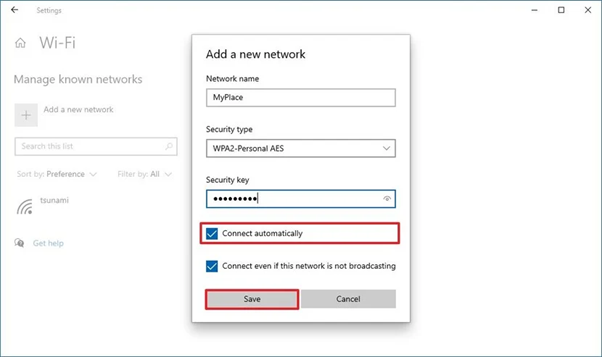
- Select Add a new network.
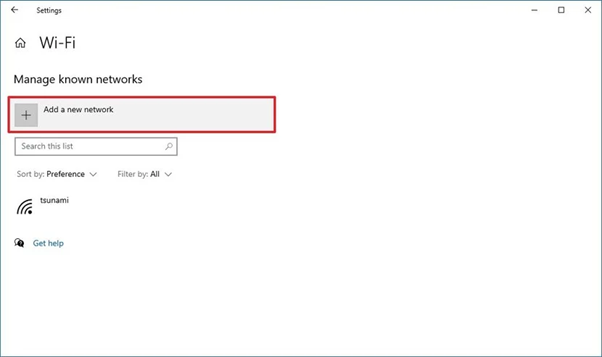
- Verify the network name.
- Using the resulting menu, choose the Security type.
- Verify the password.
- Tick the option that lets you connect automatically, as well as the even if it is not broadcasting option.
- Select the save option.
Method 3: Using the Control Panel
Here are the steps for connecting to a wireless network using the control panel”
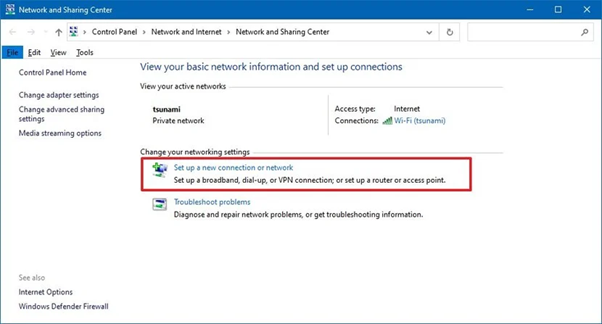
- Open the Control Panel.
- Select Network and Internet option.
- Now, locate Network and Sharing Center and click on it.
- Click on the option to set up a new connection or network.
- Click on the option that lets you connect manually to a wireless network.
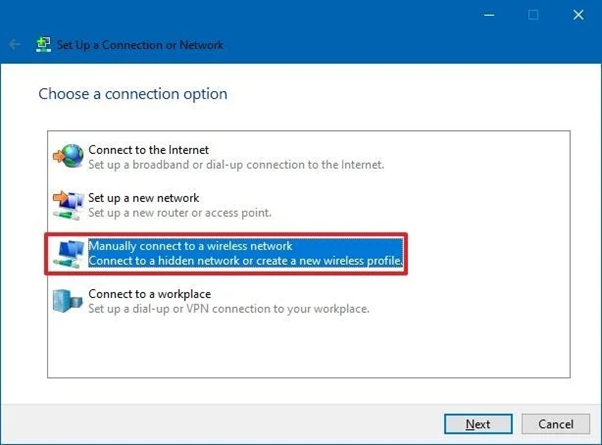
- Click on Next.
- Verify the SSID name of the network.
- With the resulting menu, choose the security type.
- Verify the password.
- Tick the option with, “Start this connection automatically”.
- Tick the option to connect even if the network is not broadcasting.
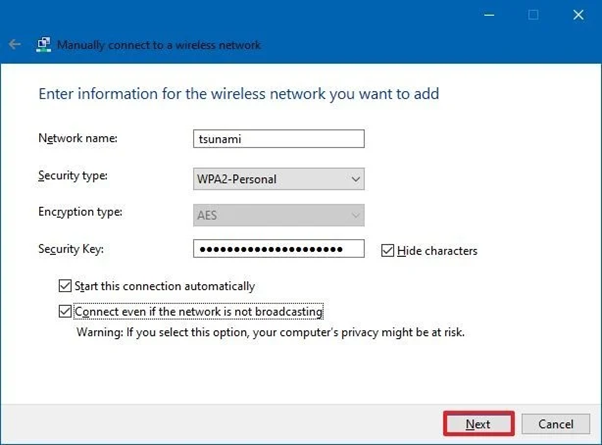
- Click on Next.
- Click on Close.
Summary: Connect to WiFi on Windows 10
- Open Start
- Type "Network and Sharing Center" and press Enter.
- Click Manage Wi-Fi Settings in the left pane.
- Under Manage known networks, click the network you want to remove.
- Click Forget. The wireless network profile is deleted.
Conclusion
By using any of the methods above, your device should now be able to connect automatically to the Wi-Fi. Try each of the methods and see which works best for you.
