Chromebook is a portable computer system. It is actually a personal computer and can be used for different purposes. Some people are only focusing on shopping and playing games while they are using it. They may not ever need the Chromebook Mac Address to find out their location, which means you may not even see the necessity of looking for the Chromebook Mac Address in the first place. When you use your Chromebook, it is necessary that you know how to get connected to the network or Wi-Fi so that you can access various websites like Facebook, Twitter, Instagram and more.
You don't always need the Mac address of any of your devices. This is why most people don't know the process of finding it. But sometimes you have to know the Mac address so that you can connect to different networks securely.
This is not different for a Chromebook. That’s why I have shown some methods for how to find Chromebook Mac address. Check out the methods below.
Finding Chromebook Mac Address Using Settings App
In this method, you can find the Mac address using the "Settings" App in your Chromebook. Note that you have to be connected to the internet via Wi-Fi or Ethernet.
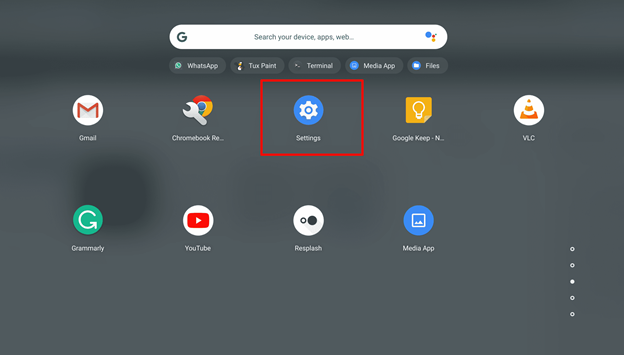
- Launch the “Settings” App (you can find it in the launcher or the app menu).
- You will find the “Networks” button on the right sidebar when you launch the settings app.
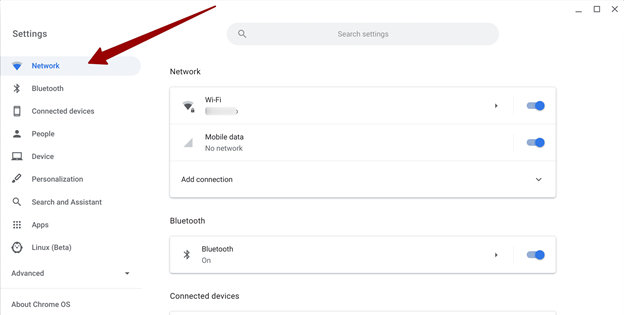
- Now you have to click on the connected Wi-Fi to open its settings.

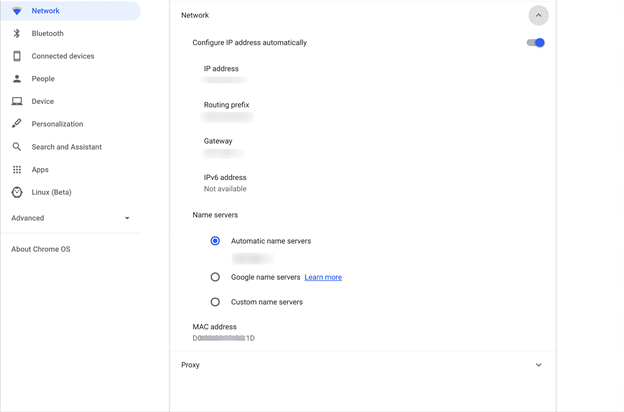
- In this menu, you will find a few sections one of which will be named “Network”. Click on that section to expand it.
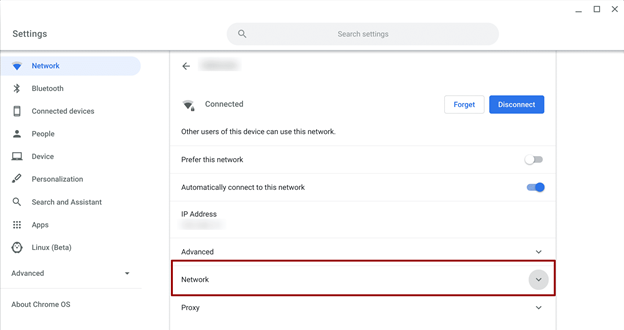
- When the Network section is expanded, you can scroll down and you will find the Chromebook Mac address below.
Finding Chromebook Mac Address Using the Browser
Now I am going to show you how to find the Chromebook Mac address using the browser. This is more complex than the previous method. But you can do it if you want anyways.
- Launch the browser from your Chromebook.
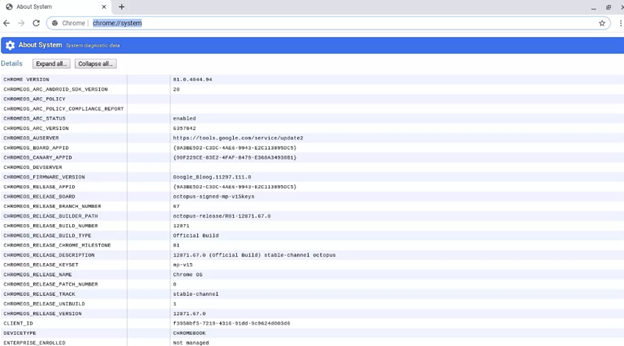
- In the address bar type: “chrome://system” and hit the search button. This will allow you to go to the “About System” page.
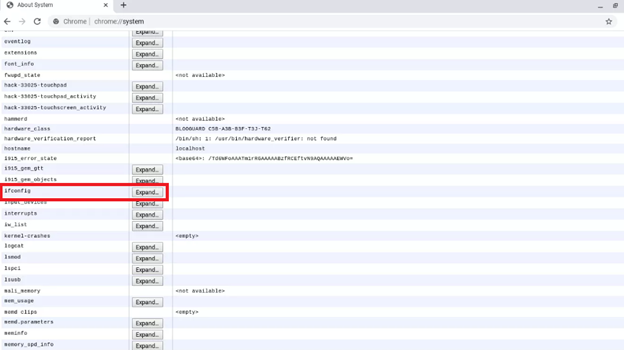
- In the right sidebar, you will find a lot of options with the “Expand” buttons.
- Look for the option called “ifconfig”. When you find it hit the “Expand” button to open the “ifconfig” page.
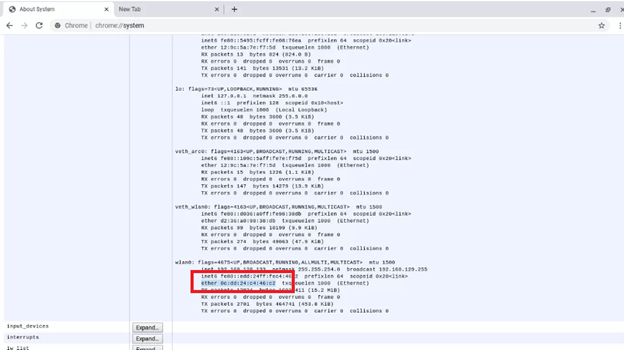
- You will find a few sections or paragraphs on the “ifconfig” page. One of the sections will start with the word “wlan0”.
- In this section, you will find the Chromebook Mac address. The line beside the word “ether” is the address you are looking for.
Finding Chromebook Mac Address Using Chromebook Shelf
This is the easiest method to find the Chromebook Mac address. If you find the other two methods too complicated, follow this to quickly find the Chromebook Mac Address.
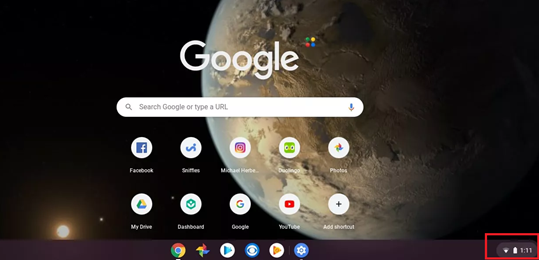
- You will find the “Clock/Time” on the bottom-right side of your screen. Click on it.
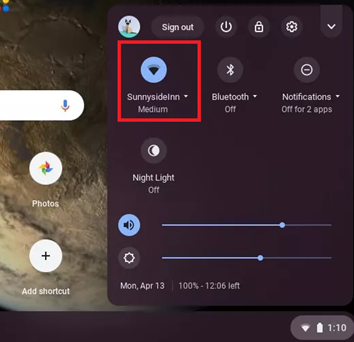
- A pop-up window will appear. There you will find the Wi-Fi symbol. Your Chromebook has to be connected to a Wi-Fi network to proceed.
- Select the Wi-Fi network that you are connected to.
- Now Select the “Network” option in the pop-up window.
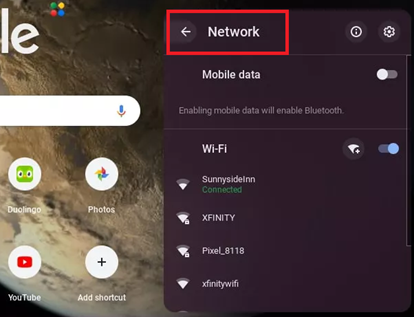
- There will be two icons beside the word “Network”. One is the “Settings” icon and the other one is the “info” icon.
- Click on the “info” icon.
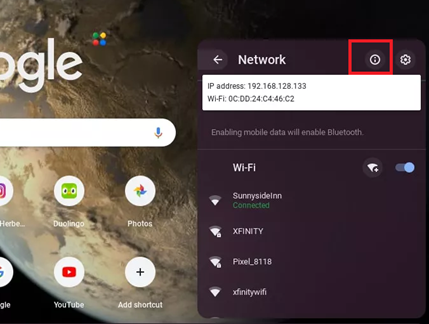
- After clicking, you will see both your IP address and Mac address in a floating caption.
Summary: Find Chromebook Mac Address
- Click on the time in the bottom right-hand corner of your screen.
- A drop down menu will appear and you will select Date & Time Settings.
- Scroll to the bottom of this page and you will see an option to Change Proxy Settings... Select that button.
- A new Window will open, select Advanced in the top right corner.
- Scroll down to the Network section and click on the Change Proxy Settings button that appears below it once again.
- The Settings window will open and you should be in the Network tab of your Internet Settings Window. Next you should select WiFi (or Local Area Connection if you are hard wired) from the left hand side and then click on Details... on the right hand side.
- A window, titled Network Connection Details, will open and display your Mac Address (it's labeled as Physical Address).
