If you are a Mac user and own a Western Digital (WD) external hard drive, then the WD Easystore for Mac is the software for you. However, formatting this external drive with WD Easystore for Mac seems a bit different from your Windows counterpart. You see, the WD Easystore formatted in the Mac OS X is a little different from that in Windows. The instructions below will help you format the WD easystore on Mac OS X Mavericks.
WD Easystore is a portable hard drive that you can use to store your files securely. You can also use this drive to transfer files from one pc to another. If you want to transfer your files from Windows to macOS you can also do it using this hard drive.
If the hard drive is not in the right format, you cannot transfer files from one operating system (OS) to another. The ex-FAT and the FAT32 formats are compatible with both Windows and macOS. This is why if you wish to run this hard drive on both operating systems, you have to format it to either FAT32 or ex-FAT.
In this article, you learn how to format WD Easystore for Mac using macOS and Windows.
Formatting WD Easystore on MacOS
- Connect the WD Easystore hard drive to your mac using a data/transfer cable.
- When you connect it, you will see the WD Easystore icon on the desktop (If it is not in the right format, you won’t be able to transfer anything to it).
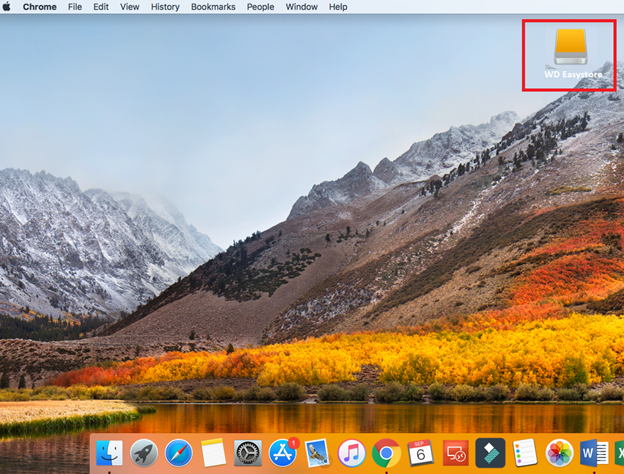
- Now open the “Mac OS Dock”.
- Select the option called “Finder”.
- Go to the menu bar of “Finder” and select “Go” and then select “Utilities”.
- On the "Utilities" page you will find the "Disk Utility" app. Open it.
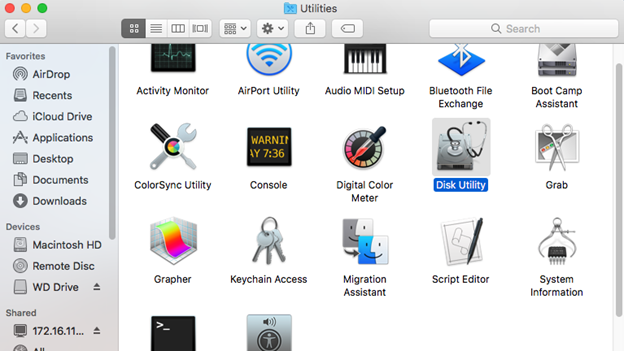
- In the left sidebar, you will see the WD Drive icon. Select it and a dialog box will open.
- On top of the dialog box, you will see the 'Erase' button. Click it.
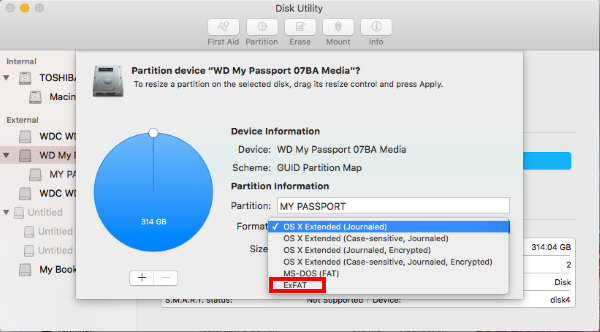
- Now a pop-up window will open and there will be some options. One of the options will be named “Format”.
- Click on the Format option and a drop-down menu will open and show you different formats to choose from.
- From the menu, choose ex-FAT, MS-DOS (FAT), or OS X Extended (Journaled). (Note: MS-DOS(FAT) and FAT32 is the same format).
- Now hit the Erase button and your drive will be formatted for Mac.
Formatting WD Easystore on Windows
If you want to format your WD Easystore drive for Mac on a Windows PC, follow the steps below:
- Connect the drive to your computer.
- Open “This PC” from the start menu or the desktop.
- Select the “WD Easystore” icon from the left sidebar or the "This PC" window.
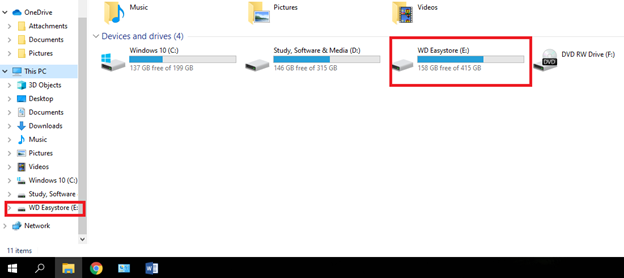
- Right-click on the icon to open a floating tab.
- Now choose the “Format” option.
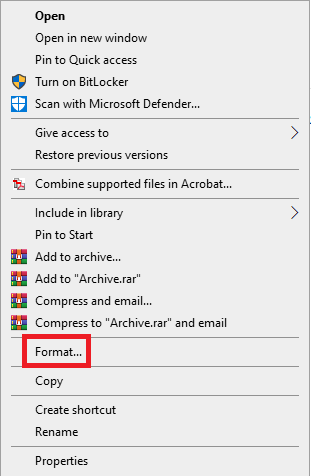
- A new window will open for the WD Easystore drive.
- In this window, click the menu under “File System”.
- From the drop-down menu, choose either “ex-FAT” or “FAT32”.
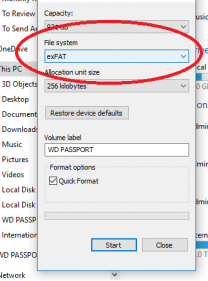
- Check the “Quick Format” box.
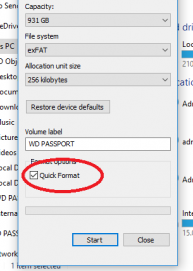
- Now hit the “Start” button below.
- After a while, your drive will be formatted.
- Then you can use this drive on macOS.
An Important Note
When you format your WD Easystore drive in a macOS, you will have an option to choose formats like OS X Extended (Journaled), OS X Extended (Case-sensitive, Journaled), etc. Choosing these formats will also allow you to use this drive on the macOS.
But if you format your drive in a Windows PC, you will have to choose ex-FAT or FAT32 if you want it to work on a macOS. Choosing any other format will not allow you to use it on Mac.
Summary: Format WD EasyStore for Mac
- Open Disk Utility.
- Find your WD Easystore on the left side of Disk Utility.
- Click Erase.
- Name the drive or keep it as Untitled.
- Select Mac OS Extended (Journaled) from the Format dropdown menu.
- Choose GUID Partition Map from the Scheme dropdown menu.
- Click Erase to start erasing the partition and formatting your WD Easystore for Mac use.