- Option 1: EaseUS Partition Master Free
- Option 2: MiniTool Partition Wizard Free
- Option 3: Free Tenorshare Partition Manager
- Option 4: Active@ Partition Manager Freeware
- Option 5: AOMEI Partition Assistant Standard
- Option 6: GParted
- Option 7: Macrorit Partition Expert Free
- Option 8: IM-Magic Partition Resizer Free
- Option 9: DiskGenius Free
- Summary: Increase hard disk partition size backwards
- Conclusion
When you are on Windows and end up having no enough disk space, what will you do? Go out for a new hard disk? Increase disk partition size effectively in Windows systems by following the tips below.
Partitioning can improve your computer's performance. There are many partitions on the disk that are named with letters while those that are marked as unallocated space are marked as *. This means that the disk space has not been put into use and you can sue it to expand partition.
However, to expand the size of your hard disk partition backwards, you need to use third party tools. Here is how to use free third-party tools to increase partition with unallocated space.
Option 1: EaseUS Partition Master Free
To use this tool, follow the steps below:
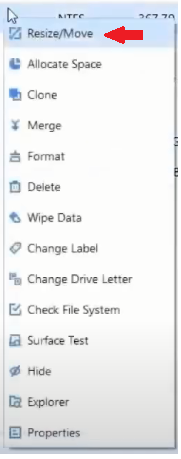
- Right-click on your target partition, then click Resize/Move from the drop-down menu. You can click Resize/Move on the right sidebar as an alternative.
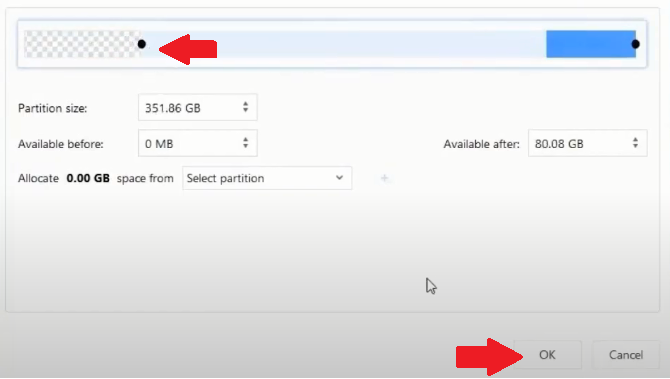
- On the Resize/Move window, drag the left end of the slider to the left and click OK.
- Click Execute Operation on the top-left corner to save the changes you've made.

Option 2: MiniTool Partition Wizard Free
Follow these steps to use this tool:
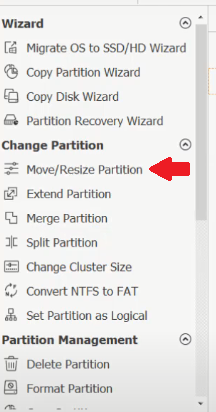
- Click on your target partition, then select Move/Resize Partition on the left sidebar. You can also click on the Partition on the menu bar and then select Move/Resize.
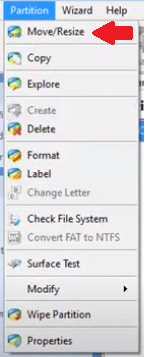
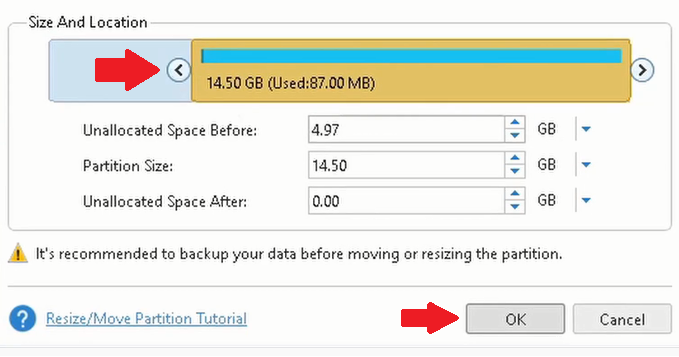
- On the Move/Resize Partition window, drag the left end of the slider to the left and click OK.
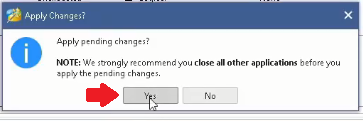
- Click Yes to apply changes and wait for the resizing process to complete.
Option 3: Free Tenorshare Partition Manager
This is another free tool to help you increase hard disk partition size backwards. Here is how to:
- Select your target partition and click on the Move/Resize button in the toolbar. You can also go to Partition on the menu bar, then click Move/Resize.

- Drag the left end of the slider to the left and click OK.
- Click Apply on the toolbar to execute your changes.

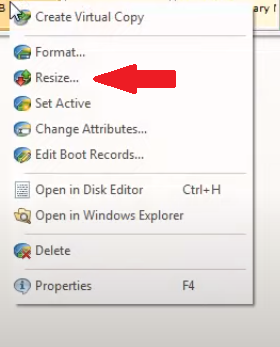
Option 4: Active@ Partition Manager Freeware
Here is how to use this tool:
- Select your target partition and click on the Resize button in the toolbar. Alternatively, you can right-click on your target partition and select Resize from the drop-down list.
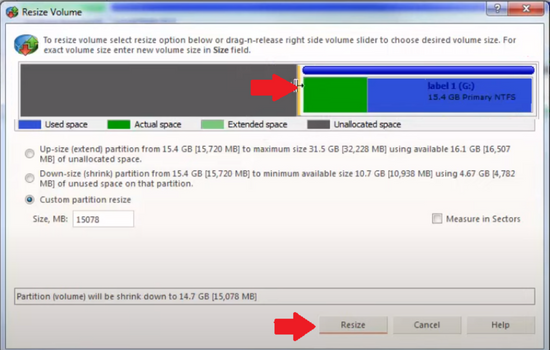
- Drag the left end of the slider to the left, then click Resize.
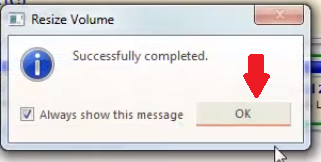
- Click OK once the volume resizing is complete.
Option 5: AOMEI Partition Assistant Standard
This is another good freeware to enable you move unallocated space to the left.
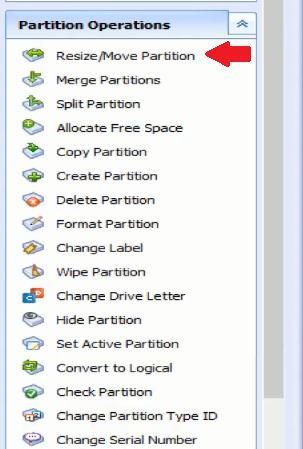
- Right-click on your targeted partition and click Resize Partition or click Resize/Move Partition on the left sidebar.
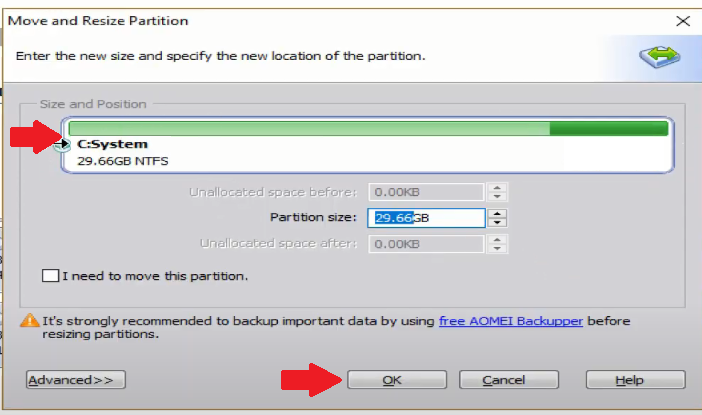
- On the Move and Resize Partition window, drag the left end of the slider to the left and click OK.
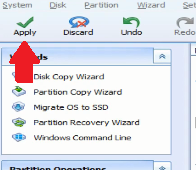
- On the upper left, click Apply.
- On the Pending Operations window, click Proceed.

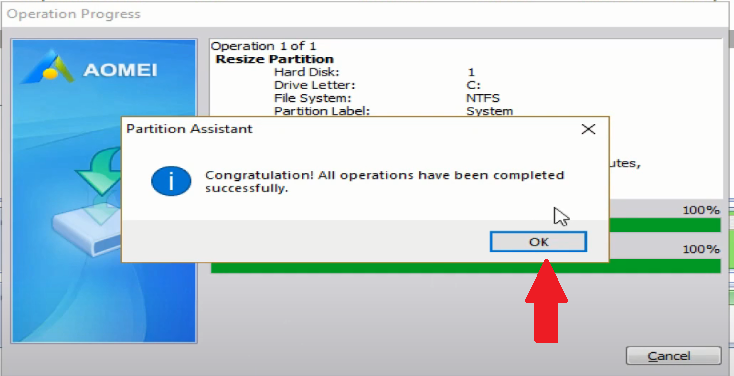
- Wait for the Operation Progress window to execute your changes. Click OK if operations have been completed successfully.
Option 6: GParted
Follow these steps to use this tool:
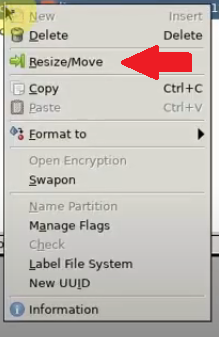
- Right-click on your target partition, then click Resize/Move from the drop-down list or click on Resize/Move from the Partition section of the menu bar.
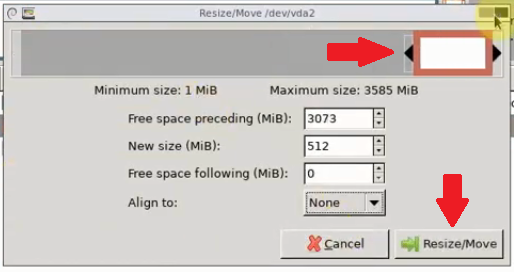
- Go to "Align to" and select None. Drag the left end of the slider to the left side, then click the Resize/Move button.
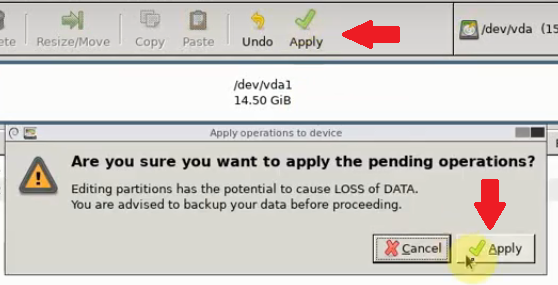
- Click on the Apply button below the menu bar. If you're sure you want to apply the pending operations, click Apply.
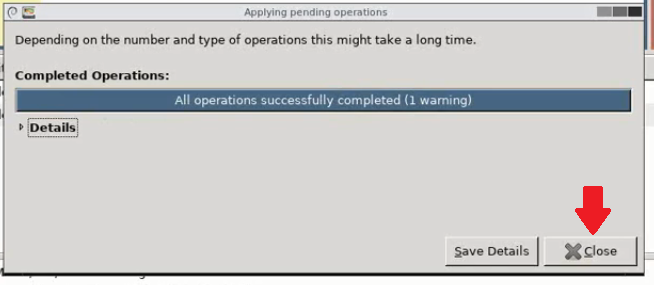
- Once the operation is complete, click Close.
Option 7: Macrorit Partition Expert Free
If you choose to sue this freeware, follow these steps:
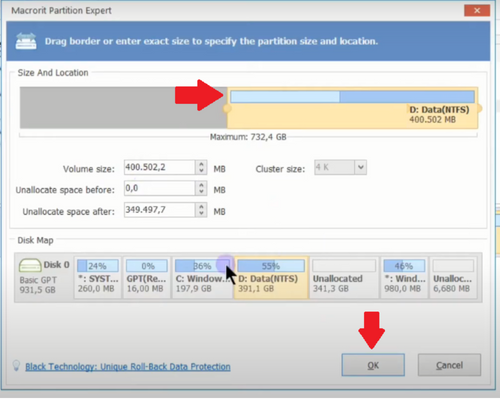
- Right-click on your target partition and click on Resize/Move Volume or click on the Resize/Move Volume on the left sidebar under Operations.
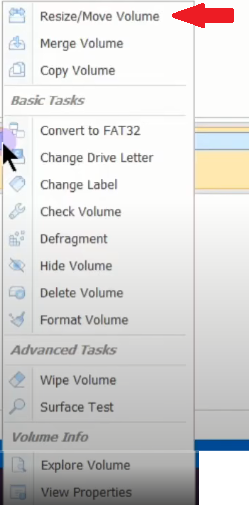

- Drag the left end of the slider to the left, then click OK.
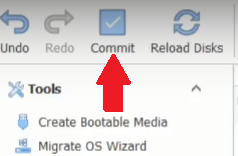
- Click Commit on the upper-left corner.
- On the Commit Changes window, click OK and wait for the resizing to complete.
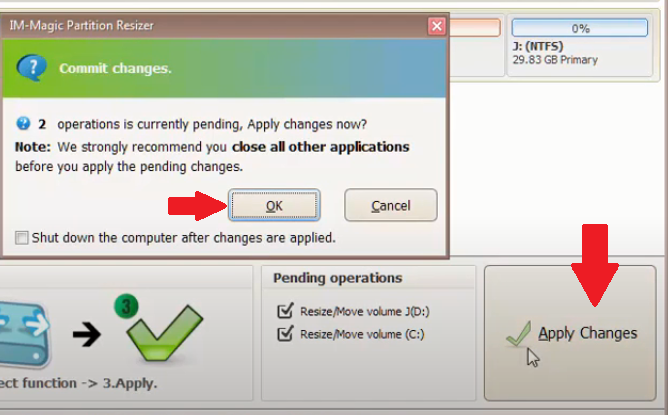
Option 8: IM-Magic Partition Resizer Free
This is another third-party tool that you can use to expand hard disk partition backwards.
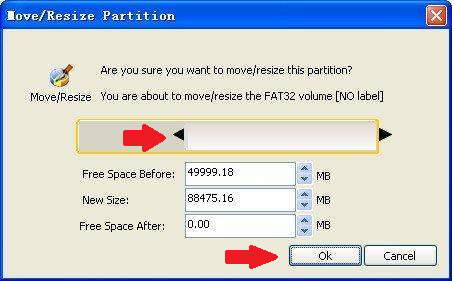
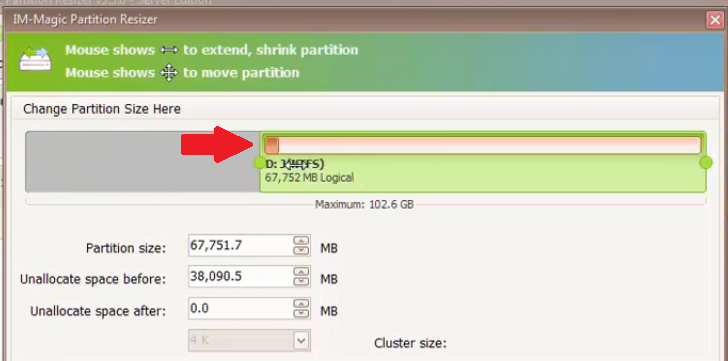
- Right-click on your target partition, then click Resize/Move Partition.

- Drag the left end of the slider to the left and click OK.
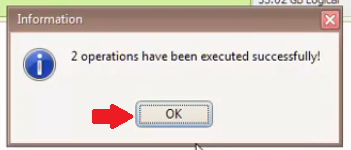
- Click on Apply Changes at the bottom-right corner and click OK to commit changes.
- After the execution is successful, click OK.
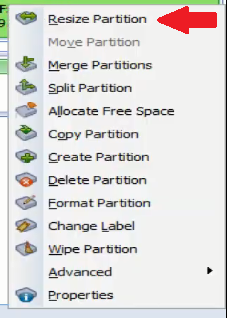
Option 9: DiskGenius Free
Here is how to use this tool:
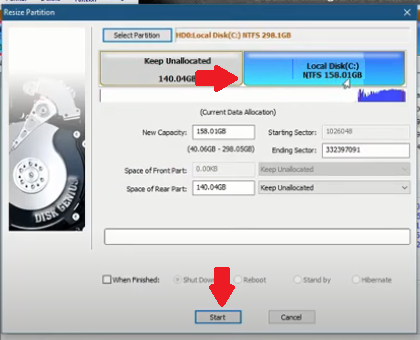
- Right-click on the target partition and click Resize Partition. Alternatively, you can click Partition on the menu bar and click Resize Partition.
- Drag the left end of the slider to the left, then click Start.
- On a new window, DiskGenius will show what steps will happen during the resizing process and the things you need to be aware of. Click Yes after reading them.
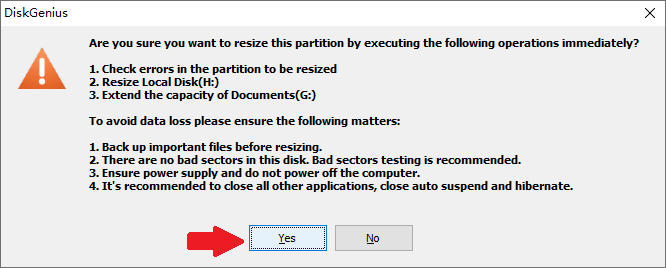
Once the process is complete, your computer will restart automatically.
Summary: Increase hard disk partition size backwards
- Open Disk Management.
- Delete the partition on the right side of the system partition.
- Right-click the system partition and select "Extend Volume".
- Finish deletion of Partition B and extend Partition C as you like in Extend Volume wizard.
- Video tutorial on how to increase hard disk partition size backwards
Conclusion
After using one of these tools, go to your computer's Disk Management. Your target partition should have increased in size and moved to the left in the Disk management.
