Amazon WorkSpaces is a new alternative to running your own data center and cloud computing. It allows you to create and configure computers known as Amazon WorkSpaces in the cloud. Amazon WorkSpaces are virtual, which makes them cheaper, faster, and more secure than traditional IT solutions. They are also very easy to set up and manage.
Workspace is a virtual computer. Here is the process to configure it:
The process to configure & install the Work Spaces.
- First, open a browser on your computer.
- Then open a new tab and go to the Amazon Web service website by clicking on https://aws.amazon.com/
- Now simply log in to your account by providing your username & password if you have already an AWS account before or sign up with our details and card information then sign in.
- Now to make a Workspace you have to make an AD (Active Directory). For this first search directory on the search bar located on the top of the page then choose ‘Directory Service’ from the suggestion list.

- Now you will be transferred to the directory page. Click on the orange color ‘Set up directory’ button on the top right corner of the page.
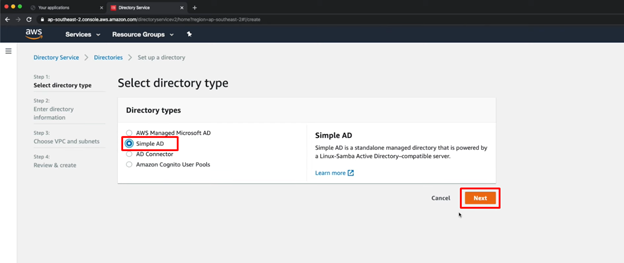
- On this new page, you have four options of directory type. Those are AWS Managed Microsoft AD, Simple AD, AD Connector, and finally Amazon Cognito User Pools. Choose any of those four options and press ‘Next’ to continue to the next page. Here I choose ‘Simple AD’. To know the nature of any directory simply look right at the four-directory name were showing the all details about it after choosing the particular directory.
- You have to fill in the directory information on the new page. First, choose the directory size. There are two types of directory size one is Small and another is Large. Choose one as your requirements because the cost differs with the size.
- Then provide the DNS name of your directory.
- After you can provide the Directory NetBIOS Name if you want or simply skip this box.
- Now choose the administrative password and also confirm the password on the next box.
- Finally, write the description of your directory and click next to go to the VPC & Subnet page. The description isn’t the mandatory step.
- Here on the VPC and Subnet page first you have to choose your VPC name from the list you created before. If you don’t have any click on the ‘Create New VPC’ to create one.
- After that, you must choose two subnets from the list. Here also click on the ‘Create New Subnet’ if you don’t have any subnet. Now click ‘Next’.
- At this moment you have to review your entry from Review & Create page. After review click o the create directory button. You are finished now; it will take about ten minutes to complete the process.
- After the directory status becomes ready click on the Directory ID of the newly-created directory.

- Now scroll down to the new page and select the ‘Amazon Workspaces’ to activate the service.
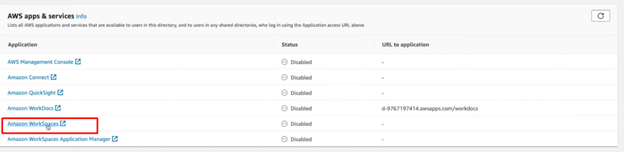
- Now choose the directory and click on the ‘Register’ button under the ‘Actions’ menu.

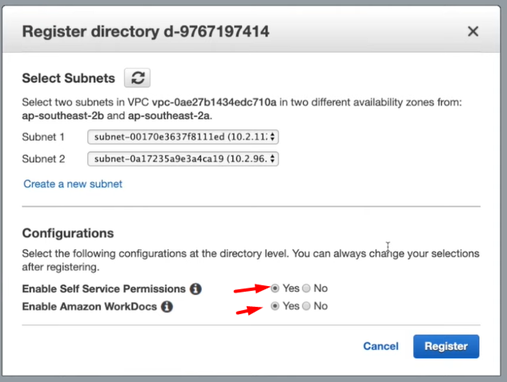
- Select two of your subnet from here then choose the configuration as you want and then click on the register button to complete your registration.
- Now you are ready to launch the workspace. Clock the ‘Workspace’ option from the left navigation menu. After that click on the ‘Launch Workspaces’ located on the top and the right side of the navigation bar.
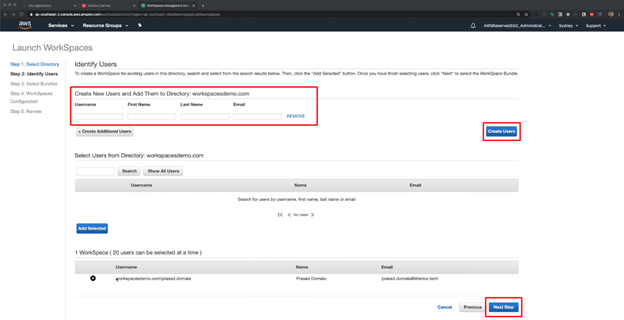
- At first, select the directory where you want to create the workspaces. Then click ‘Next’
- Now fill-up the form of the user and click create. Create as many you want up to 20 persons. Then click the next step.
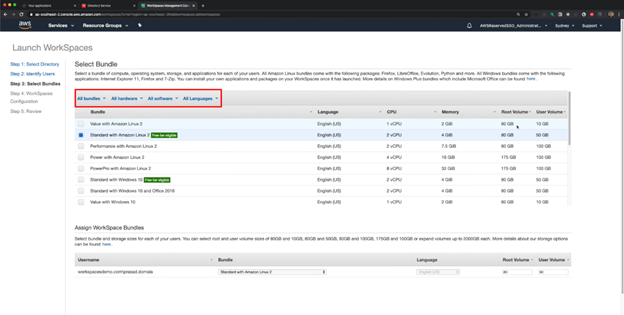
- Now select Bundles, Hardware, Software, and the preferred language from this page.
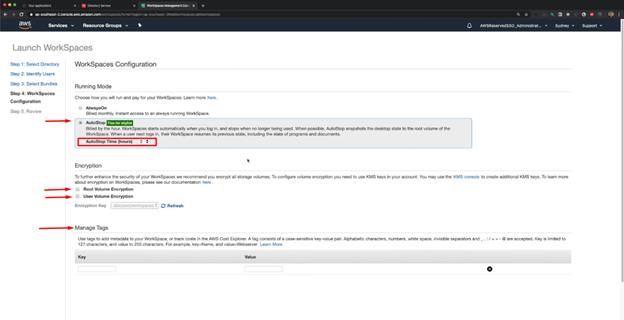
- On this new page, you can configure your workspace to decrease the cost. Choose the AutoStop option and time if you don’t need the service for a long time and set your encryption & tags below the Running Mode option. Click ‘Next to go to the final page of the setup.
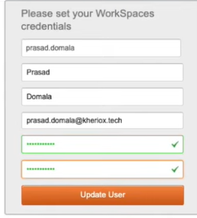
- Now preview the workspace and click on the ‘Launch Workspaces’. About twenty minutes later you will receive an email with your password setup link, registration code, and user id. Click on the password registration link to set a new password indicating by the arrow in the image.

- Now set the password and click on the ‘Update User’. It will take you to the console download page.
- Now download the console by clicking on the device name yours and install it.
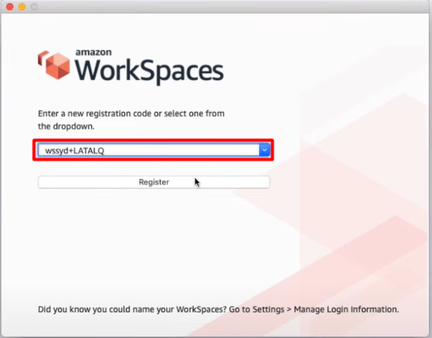
- Open the Console and give the registration code.
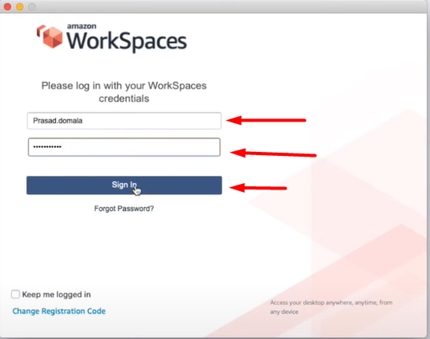
- Login by providing your username & password and your workspace is ready to use.
Summary: Install and configure Amazon WorkSpaces
- Click the Create WorkSpaces button.
- Enter a name for the WorkSpace.
- Choose the operating system for your WorkSpace from the Operating System list.
- Choose the bundle type for your WorkSpace from the Compute Type list.
- Check that the correct VPC and subnet is selected under Network Access.
- Edit the Root Volume Encryption option to disable encryption or use a specific key, if enabled by your administrator.
- Enter an AWS Directory Service directory identifier in the Directory list, if available.
- Choose whether to join a Microsoft Active Directory domain in Directory Service Settings (WorkSpaces joining an AD domain are not supported on Windows 7).
- Add tags to your WorkSpace, if desired, by choosing Add Tag and entering a key and value.
- Click Next Step when you've completed filling out this information. Choose the Microsoft Windows version for your WorkSpace from the Select Microsoft Version list (Microsoft Windows clients only).
- Choose how much storage space you want for your root volume (20 GiB is sufficient for most users).
- Check that the default user name is correct.
