Did you know that Windows 10 allows you to customise its start menu, taskbar and Action Center icons? That feature is useful if you want to make your computer better look. In this blog post, we'll walk you through the steps of how to make a picture a folder icon in Windows 10.
![]()
If you take a lot of photos in a folder, Windows will choose one photo and set it as the default for thumbnail view. However, most Window 10 users are very selective about the appearance of their folder icons and look for ways to customize them.
People change or include pictures in their folder icon to keep the contents of the folder hidden from prying eyes or to simply enhance the icon’s appearance.
Luckily, it is possible to modify the contents and change the folder picture and icons in Windows 10. Below are some simple steps for making a picture a folder icon on Windows 10 of your computer or device.
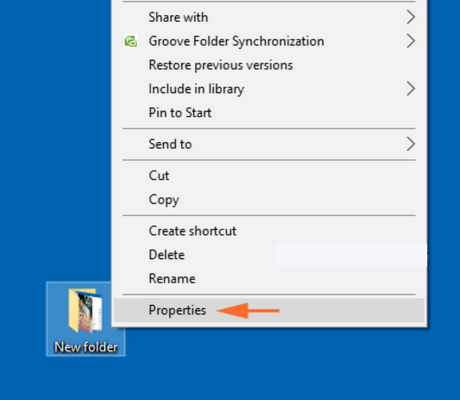
- Go to the folder that you want to change the picture and make it a folder icon. Right-click on it and tap on Properties from the context menu. To do this, you can also press and hold the ALT key even as you double click on the folder and press enter. This will open the Properties for the chosen folder.
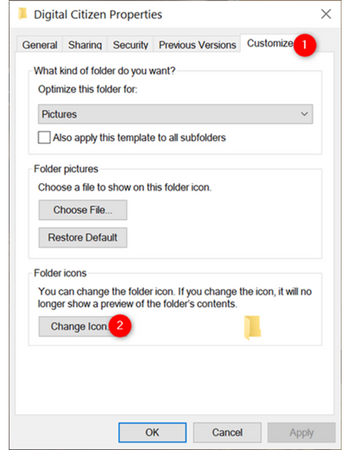
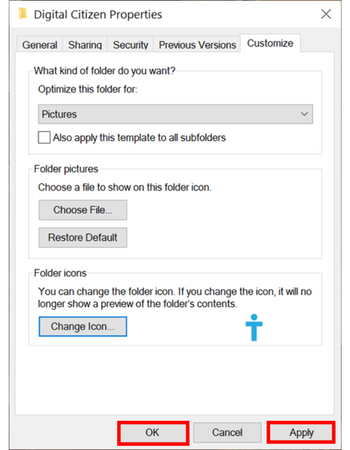
- Then click/tap the Customize tab. Once it is opened, navigate to the “Folder pictures” button below Folder pictures and click on Choose file.
- Now go to the location of the image you want to use and choose the correct image. You can find the image in the same folder or in the Cloud storage like Dropbox or OneDrive.
- Once you have selected the image, click the Open button and this will change the folder picture.
- After making the changes, the folder with your selected image will have the Thumbnails view.
- The next step is to restore the default folder picture to its original appearance. To do this, go to the Properties window and click on the Customize tab.
- Navigate to the Folder pictures and select the Restore Default button.
Steps for Changing the Folder Icon
Now that you have made your picture a folder icon, you may now want to know how to change the icon. To do this, follow these steps below:
- Open the folder’s Properties window and go to the Customize tab.
- In the Customize tab, click on the Change Icon button below the Folder Icons.
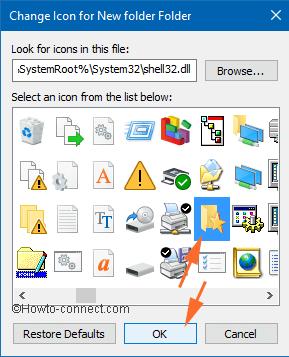
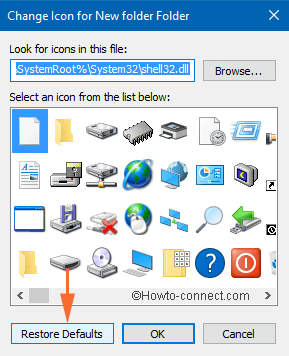
- This will open a new window that will allow you to change the icon for your chosen folder. By default, you will see the current that contains the icon being used.
- Navigate through the list of icons provided and click on the one you like then click OK.
 Alternatively, you can tap on Browse if you have a specific icon that you had downloaded or made yourself.
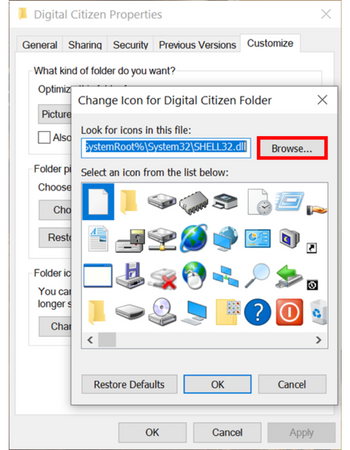
- Go to the file holding your new folder icon and choose the icon file you want to use and click Open.
- You will then be shown the contents of the files. Basically, ICO files usually contain one file while other files offer more icons to choose from.
- After selecting the icon, click OK to go back to the Properties window.
- Here, you should see the new icon shown in the Folder icons section. Save your changes by clicking Apply or OK.
- If you change your mind in the future and want to restore the default icon, go to Change Icon under the Properties dialog and click/tap on Restore Defaults button.
Summary: make a picture a folder icon in Windows 10
- Right click on the folder and select Properties.
- Go to Customize tab.
- Select Change icon...
- Select Browse...
- Choose Select this file and click OK
- Click OK to all opened windows.
Conclusion
Making a picture a folder icon in Windows 10 is an easy process as we have seen above. This is also the case for changing your folder icon. We hope that this tutorial helps you customize your folder icon with your favorite picture.
