Do you have a printer connected to your PC with a cable? You might be wasting time and money. Find out below how to make a printer wireless and save yourself valuable amounts of time and money.

Regardless of what brand and model your printer is, this device will surely occupy a significant portion of your desk. And if you are a person who needs a spacious area to function optimally, then all the clutter and tangled wires must be taken away. The problem is that it can be almost impossible to obtain a wire-free, clutter-free area with your essential electronics around.
Moreover, these tangled wires crossing across your floor and bare walls might cause anyone who enters your working space to stumble. Aside from being an eyesore, printer wires can be potentially unsafe, too, especially for your kids. Good news, there are two methods to transform your wired printers into wireless ones.
Method 1: Use a USB printer that is router-connected
- Check if there is any USB port at the back part of your modem. If your modem has a port at the back of it, your printer can be connected to it by utilizing a USB-to-USB cable. This USB cable usually comes with the printer when you bought it.
- Purchase a USB cable that can connect to the Ethernet adapter. This is only applicable if you cannot find any USB port at the back of the modem. This USB adapter has an Ethernet adapter at the first end and a USB adapter at the other end. This will be used to plug or connect your printer to one of the router's ports. You may find these USB adapters in reliable online shops such as eBay and Amazon. You can also find them in Best Buy.
- Position your printer beside or anywhere near the router. It must be placed close enough to the router so that you will be able to easily connect your USB adapter without bending the connection of the cable.
- Connect the printer to the router. You can do this by plugging the USB adapter into your printer's port and plugging the adapters’ other end to your router's port as well. If you are using a USB-Ethernet adapter, you must plug the cord first in one of those Ethernet ports located at the back of the router.
- Plug the printer into a nearby electrical outlet. If there is no nearby electrical source, you may use an extension wire to proceed to the next step.
- After, turn on the printer.
- Wait for approximately ten minutes. This will give the router ample time to process and execute the connection. Expect your internet connection to slow down a bit within the first few minutes. This is because the router is still working on installing drivers for your printer.
- Lastly, make sure that the PC is connected to the same network as your router (which is where the printer is connected). After that, you may now execute one of these, depending on the operating system of your computer.
Mac
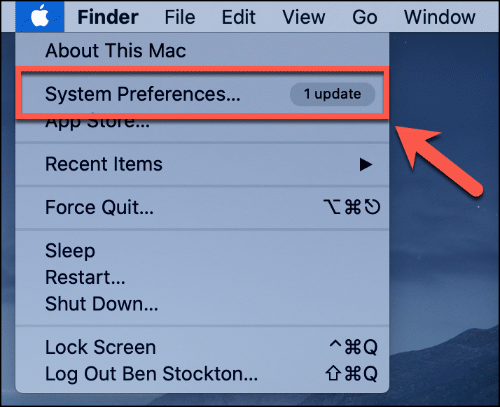
- Click the Apple icon to open the menu.
- Then, select System Preferences.

- Select Printers and Scanners.
- On the page's left part, you will see "Wireless printer." Click it.
- Click Add.
Windows
- Open the Start menu.
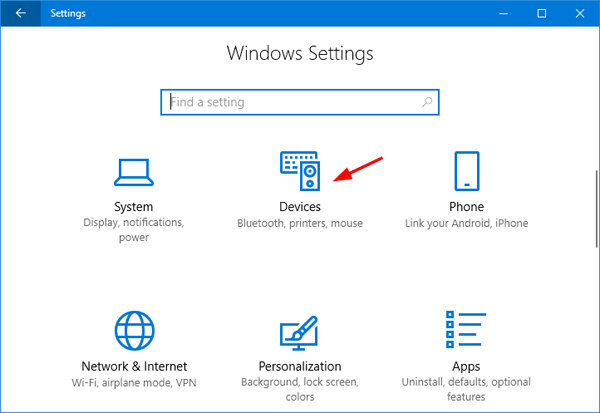
- Click Settings.
- Select Devices.

- Select Printers and Scanners.
- Select Add a scanner or printer.
- Choose a wireless printer.
- Lastly, select Add device.
Method 2: Buy Bluetooth adapters
There are plenty of Bluetooth adapter brands available in the market. You may purchase them online or in physical tech stores. These items are usually add-ons or bought together with other electronics such as notebooks, laptops, and printers. Most of them cost about forty dollars.
With one of the methods above, you will be able to connect your printer to your wireless network and enjoy a wire-free workspace. This wireless setup will allow you to maximize your room’s space, optimize the available technology, and promote safety in your home.
Summary: Make a Printer Wireless
- Obtain the wireless network name, along with the network password.
- Plug in the printer and turn it on.
- Wait for the printer to power up and stabilize.
- Open your computer's wireless setting screen.
- Choose your printer's name and enter your password, if needed.