How to Connect Ricoh Printer to Computer - Smartphones and tablets definitely have their advantages over computer, but sometimes we still can't hide the need for a laptop or desktop computer. If we are looking for a way to print a document, then we just connect our printer to the computer. But in this article, we will teach you how to connect Ricoh Printer to Computer manually. Now continue reading, so that by the end of this article you will find out how to setup a wireless network on your computer and how to connect a Ricoh wireless printer.
Ricoh printers are multipurpose printers that may also be used as scanners or copiers. This printer allows it to link to a wireless connection. It has a unique feature - it was created with an integrated development plan. If you configure this printer correctly, you can access it from multiple locations.
You can connect your Ricoh printer via USB or with a wireless connection to your computer. It takes a few steps to connect it, and I’ll explain how.
Connecting Ricoh Printer to Computer
I’ll give you a brief detail on how to connect the Ricoh printer wired or wirelessly. Go along with the following
Connecting Via USB
To connect your Ricoh printer using USB
- Keep your printer turned off.
- Turn on the computer, then open Windows.
- Remove the sealing from the USB port on the printer’s backside.
- Firmly put the USB wire’s type B (hexagonal) plug into the port.
- Put the type A (rectangular) plug into your computer’s USB port. Be cautious when doing it to avoid any hardware harm. Your printer will be primarily connected to your PC.
Notes: The USB cable’s end should be inserted with the USB symbol pointing down. Check if the wire is completely inserted. Check that the USB cable is correctly configured, mainly if the bypass tray is linked to the printer since the tray can make attaching the connection difficult.
Connecting Using Wireless Connection
To join the Ricoh printer using Wi-Fi
- Press the power key to switch on the printer.
- Then, for 2 to 3 seconds, push the power key on your printer. If the indicator light on the printer goes blue, it will indicate that the Wi-Fi function is on. Now, the printer will be available to use using Wi-Fi.
Connecting Manually
Now, you have to connect the printer from your computer manually to use it completely. Connect your printer using USB and follow the instructions below to join the printer from Windows
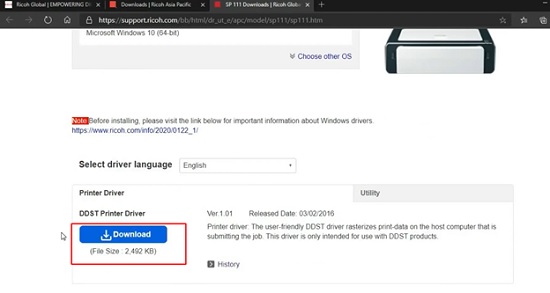
- First, download the printer driver from the official Ricoh website. Please search for your printer model no. and download the driver for it. You have to download the latest version.
- Save the driver files on your pc and note the file location.
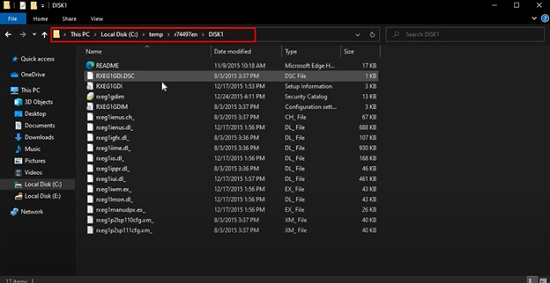
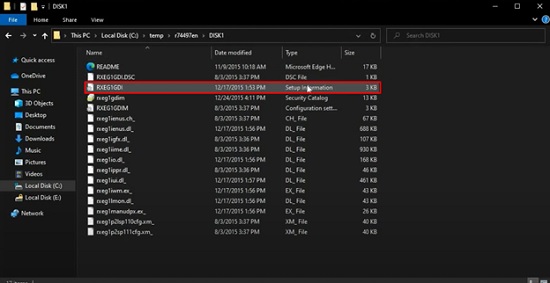
- Right-click on the “RXEG1GDI” and click on “Install.” Close the tab after installation is completed.
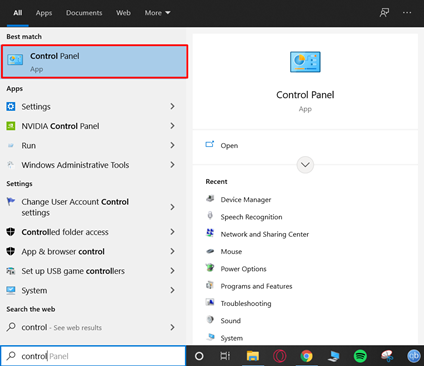
- Type “control” in the Windows search bar and click on “Control Panel”.
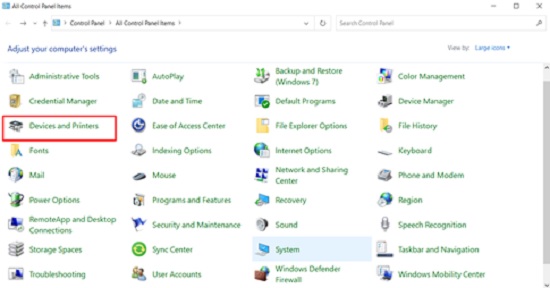
- Sort the menu view by large icons and navigate to “Devices and Printers”.
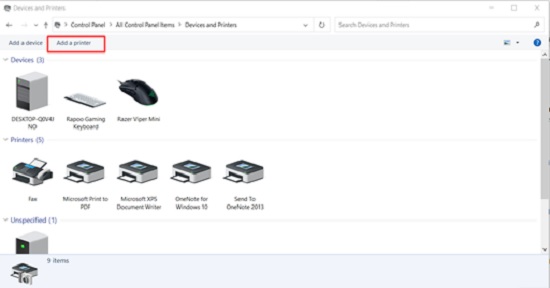
- Click on “Add a printer”.
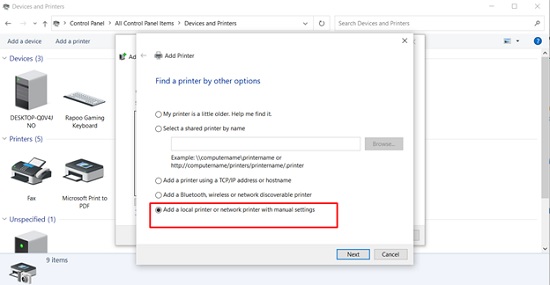
- Click on the “The printer that I want isn’t listed” option.
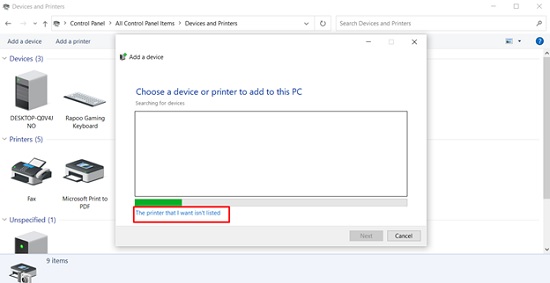
- Choose the last option that says, “Add a local printer or network printer with manual settings”.
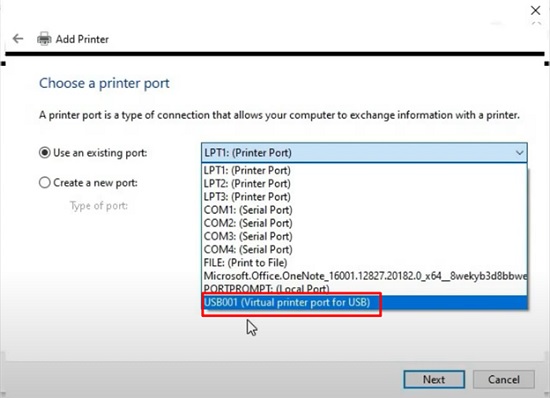
- Select the “USB001” option for the existing port. Then, click on “Next”.
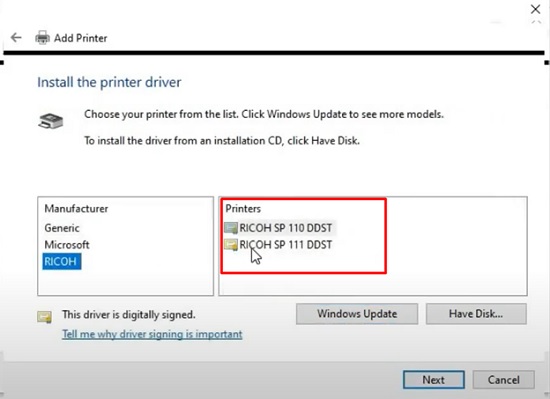
- Select the “RICOH” option and choose your printer model. Click on “Next”.
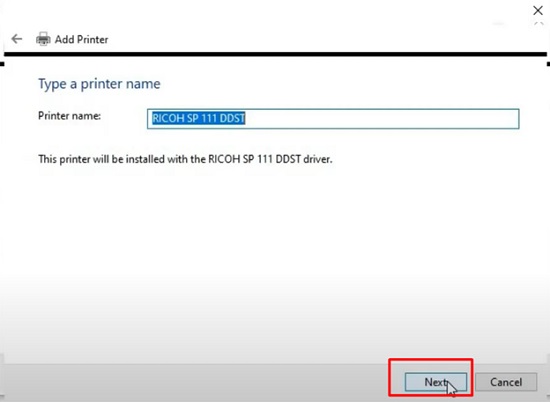
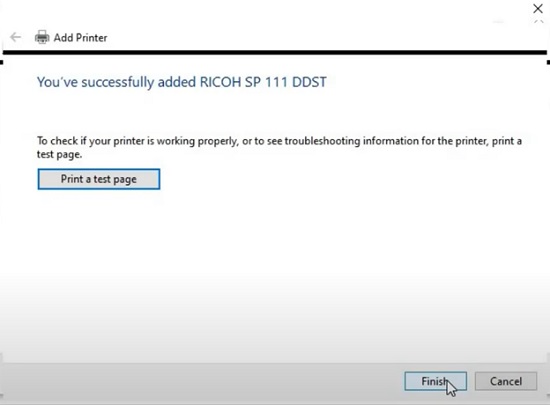
- Give your printer a name and hit “Next”.
- Click on “Finish” after the installation is completed.
Note: If you turn on the Wi-Fi function on your Ricoh printer, it should be visible in the printer search list. You can add your printer directly from there.
Summary: Connect Ricoh Printer to Computer
- Open the Start menu on your computer, and click "Devices and Printers".
- Click "Add a printer".
- Click "The printer that I want isn't listed".
- Select "Add a printer using a TCP/IP address or hostname," and click "Next".
- Select the option to "Find a printer in the directory, based on location or feature." Click "Next".
- Choose the manufacturer of your Ricoh printer, select the model of your printer, and choose whether or not you want to set it as your default printer. Click "Next," and then click "Finish".
