Quick And Simplified Way To Connect Two Windows 10 Computers Wirelessly
448 Views
In this article, we'll learn how to connect a Windows 10 computer to another Windows 10 computer wirelessly. At times you might wish to connect two PCs on your network but you don't have a wired connection between them. This can happen if you have a desktop PC in one room and a laptop in another room of your house without any means of connecting them with a cable. Connecting two Windows 10 computers wirelessly requires that you do the following:
One way to make your current office setting more efficient is to learn how to connect two computers wirelessly and rearrange your setup. Not only will this allow you to easily share equipment like printers and scanners, but it will also speed up the process of file sharing and transfer.
Mainly, there are many methods in establishing a wireless network connection. You can connect with a wireless network that already exists, establish a connection using an ad-hoc network, or use your Bluetooth connectivity. Let’s discuss the first option in detail.
How to join a wireless network using Windows Set-up Wizard?
This is a simple process to follow, and we have provided a step-by-step procedure for your guidance. However, here are a few things you need to secure before we begin the configuration.
- A wireless network port, or a wireless NIC (network interface card) for a reach of the computers to be connected.
- A network hub, access point, or wireless router.
Also, you may need to disconnect your computer from the Internet and disable the firewall software. This is to ensure that nothing will interfere with your set-up. After the process, you can always reconnect your Internet and enable the Firewall.
Step 1: Connect the cables from the computer to the router
You can do this by opening a web browser, and typing in the IP address of your router. This information is provided by the manufacturer. Here are common addresses from popular brands.
D-Link http://192.168.0.1
Linksys http://192.168.1.1
3Com http://192.168.1.1
Netgear http://192.168.0.1
Step 2: Configure router settings
As you establishing this connection, you may need to key-in some prompts. Here are some important guidelines to keep in mind:
- For your SSID of Network Name, put it a new one and refrain from using the default.
- Set-up the type of security as wireless. For example, WPA, WEP, or WPA2.
- Enhance your security by putting in a password of at least 8 characters, including numbers and letters. Avoid leaving the password blank.
- The administrator's name and password should always be taken note of. In the case that the admin is not removed as the default, we encourage a password change.
Step 3: Run the Windows 10 Network Set-up Wizard
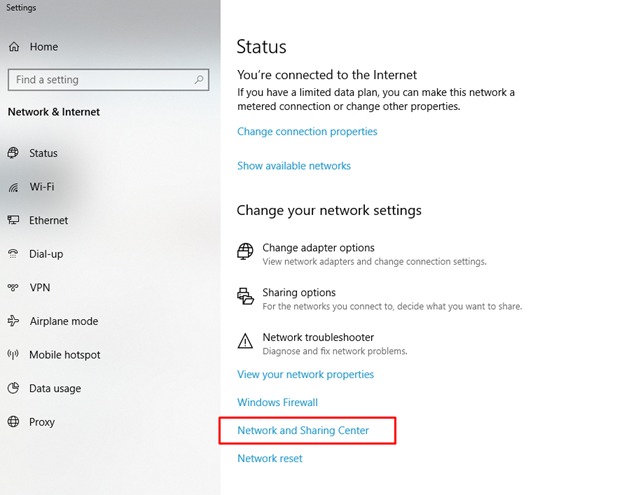
Located at the lower left side of your screen is a connectivity icon. Left-click on an icon in the system tray and click the Open Network and Internet Settings option.

Once you’re on the Status page, open the Network and Sharing Center.
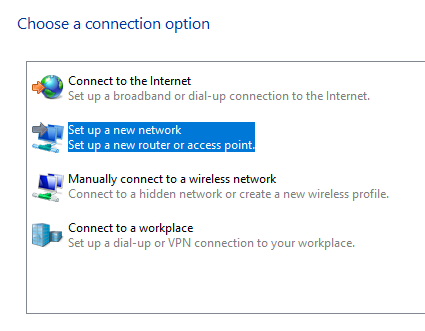
After that, click the option to Set-up a New Connection or Network. Then click next on the page that follows. This will start the network set-up.
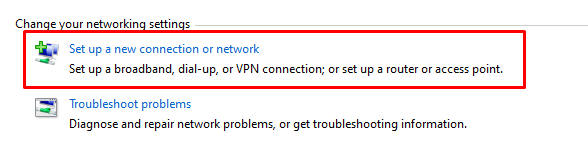
This will allow you to establish a connection using your wireless router or access point.
Once the set-up is completed, you can then connect to a local network by heading over to the connectivity icon at the system tray. From the network list, pick the network you want to connect with and choose Connect Automatically.
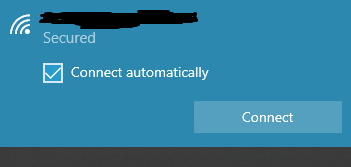
Type in the password or the security key, and just like that, you’re already connected to the network. Aside from being simple, this is a process that you can repeat on multiple computer units, so you can create a larger network.
Establishing a network isn’t exactly rocket science, but getting through it can be quite an achievement. There are indeed other ways to approach this problem, but acing just this one procedure can go a long way. That being said, we hope that your attempts at network connectivity will be successful, so you can work more efficiently within a localized network.
Also, don’t forget to always keep a copy of your passwords and security keys just in case you forget. Good luck!
Summary: Quick and Simplified Way to Connect Two Windows 10 Computers Wirelessly
- Right click on the Windows 10 start menu.
- Choose "Network Connections".
- Choose "Change Adapter Settings".
- Right click on the network adapter, and go to "Properties".
- For the Windows 10 computer you want to connect to another Windows 10 computer, choose Internet Protocol Version 4 (TCP/IPv4), and then choose Properties.
- Set the IP address of your first Windows 10 computer's static IP address. For example, if your first Windows 10 computer's IP address is 192.168.0.2, then set your second Windows 10 computer's IP address to 192.168.0.3.
- Set the subnet mask of your second Windows 10 computer to 255.255.255.0, or whatever subnet mask you used for the first Windows 10 computer.
- Click OK in all windows until you are back at Network Connections screen again (right click on Start menu, then choose Network Connections).
- Repeat these steps for every additional Windows 10.
