Are you a Mac user who wants to make the periods in your Microsoft Word bigger? It appears that Microsoft has not included this as an option. However, there is an easy work around by using a text expander (software on your computer). There are multiple options to choose from and some are free, meaning you have nothing to lose.
Sometimes when you use a small font size for your "Essay Writing" or "Assignment Writing", the period symbol can hardly be seen. Also, there are times when you want your essay or assignment to look longer than what you have written.
In such cases, you only want to change the size of the periods without changing the size of the letters. So how can you do it? This guide will help you to know how to make periods bigger on Microsoft Word Mac.
Making All the Periods Bigger at Once
You will learn how to make all the periods in your writing bigger at once in this method. Follow the steps below:
- Launch Microsoft Word on your Mac computer.
- Open an existing document (.doc file) that you want to edit in Microsoft Word.
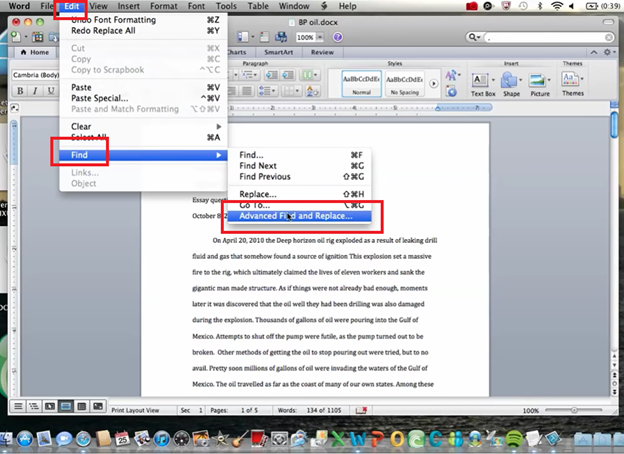
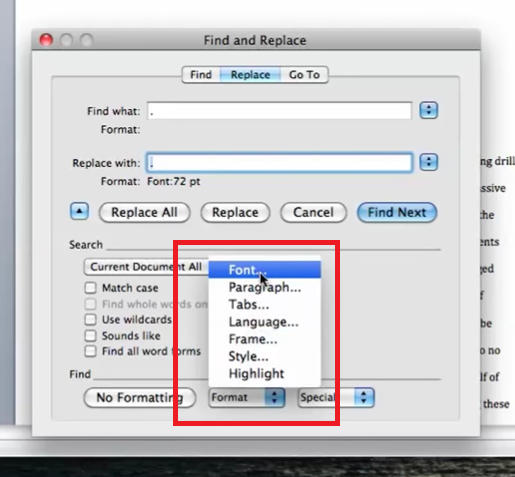
- While the document is open, on the top bar find the button named “Edit”. Click on it.
- When the pop-up menu opens hover the mouse over the “Find” option.
- A side pop-up menu will open. Click on “Advanced Find and Replace” that you will find on the new pop-up menu.
- A new window will open. On the top of this window you will see three buttons: “Find”, “Replace”, and “Go To”.
- Click on the “Replace” button. There will be two fields: “Find what” and “Replace with”.
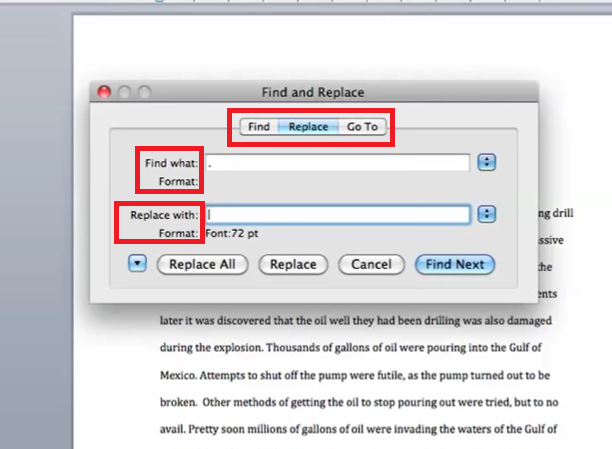
- Type the period symbol (.) in both the field mentioned above.
- Now click the “down-arrow” button that you will see on the bottom left corner of the window. Some new options will open.
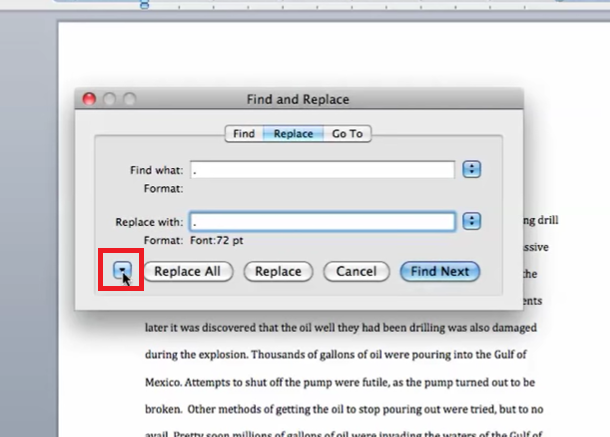
- In the bottom middle part, you will find the “Format” box. Click there and a few options will come up.
- Click on “Font…” from those options. A new window will open.
- Now go to the top right side of the window to find the “Size” box. In the box, type a font size bigger than what you already see.
- Alternatively, you can choose a font size that you will find in the list below.
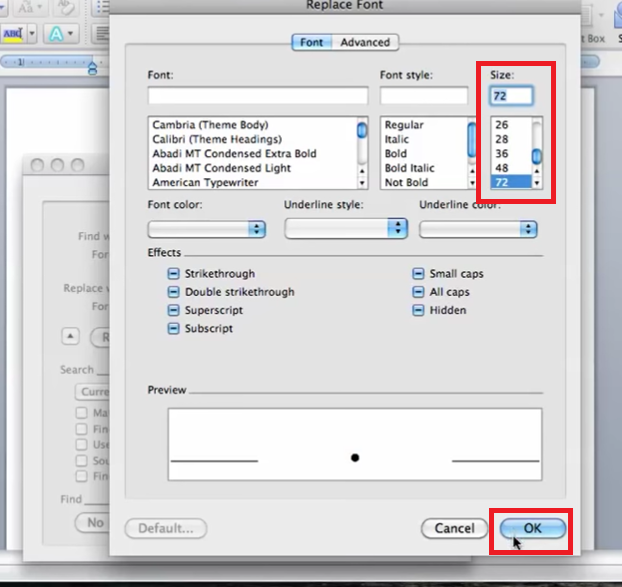
- After selecting your desired font size, click on the “Ok” button in the bottom right corner.
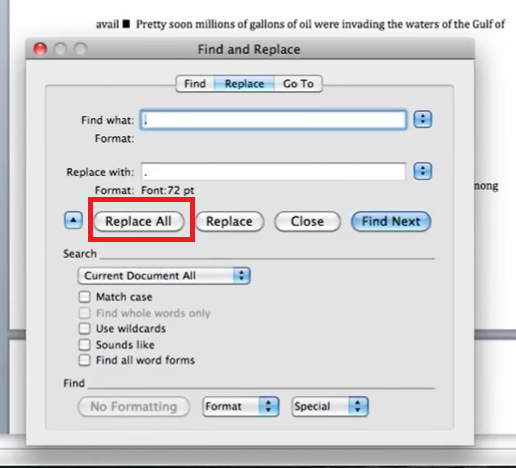
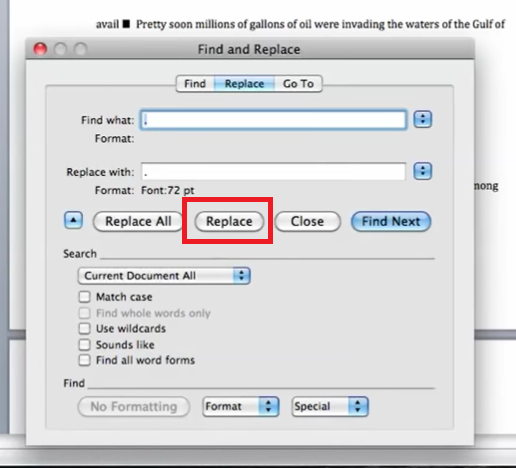
- Now, click on the “Replace All” button.
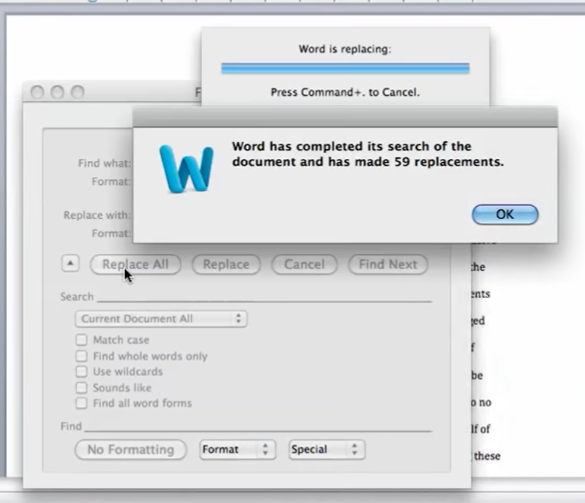
- A dialogue box will open and confirm that you have replaced all the periods with bigger periods.
- Click “Ok” to close the dialogue box.
Making the Periods Bigger One-by-One
If you don’t want to make all the periods bigger at once, you can do this instead:
- Follow the above method until you reach the 14th step.
- Now instead of clicking on the “Replace All” button click on the “Replace” button. The very first period of your text will get bigger.
- Then click on the “Find Next” button to edit the next period.
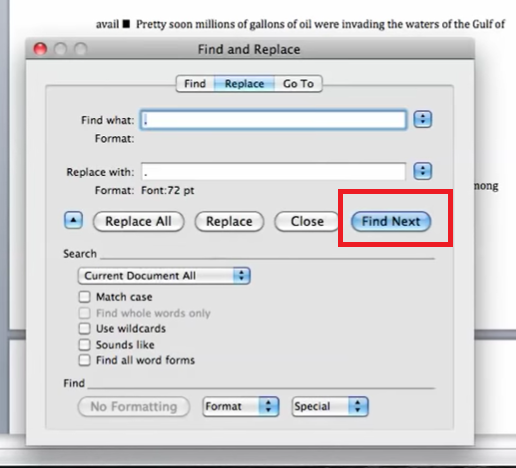
- If you want to skip a period, instead of clicking on the “Replace” button, click on the “Find Next” button. That way you will go to the next period and then edit it.
Remember that the second method will take longer. So if you don’t have a problem with changing all the periods at once, simply use the first method instead of the second one.
Summary: Make Periods Bigger on Microsoft Word Mac
- Open Microsoft Word.
- Click on the "Home" tab at the top of the screen.
- Click on the small arrow in the bottom right corner of the "Font" section.
- Scroll down to "Effects" and check the box titled "Small caps."
- Click on the box next to "100%" until you reach your desired percentage size.
- If you want it to be larger, type a number bigger than 100. If you want it to be smaller, type a number less than 100 into this box.
