Did you know that Mac is best suited for making PowerPoint? I made my PowerPoint presentation on a Mac and was very impressed with how easy it was. I had a lot of fun putting them together. So, in this blog post, I will discuss how to make power point presentations on a Mac.

PowerPoint presentation is one of the best ways to express a topic and make the viewers understand what you are saying. In the slides of the presentation file, you can add animations, charts, tables, photos, even videos to clearly point out a topic.
However, it is easy to make PowerPoints on “Windows” using MS Office. But for the “macOS” you have to take a different approach. Many people are not familiar with making PowerPoints on Mac. That’s why today I will show you how to make PowerPoints on Mac.
Making PowerPoints Using “Keynote”
On macOS, the default app for making PowerPoints is the "Keynote" app. It's free on the "Apple App Store". Below are the steps for making a presentation using "Keynote":
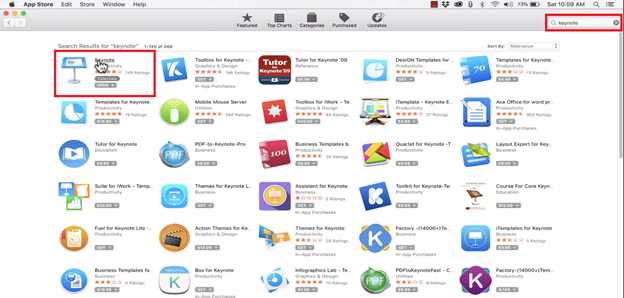
- Go to the Appstore and search for the Keynote app.
- Click the “Get” button to download the app and then install it.
- Now launch the Keynote app.
- The beginning interface will appear. Choose a theme from this window.
- You will see two buttons on the top middle named "Standard" and "Wide". (Note: It is better to choose the wide view because most devices nowadays have a widescreen).
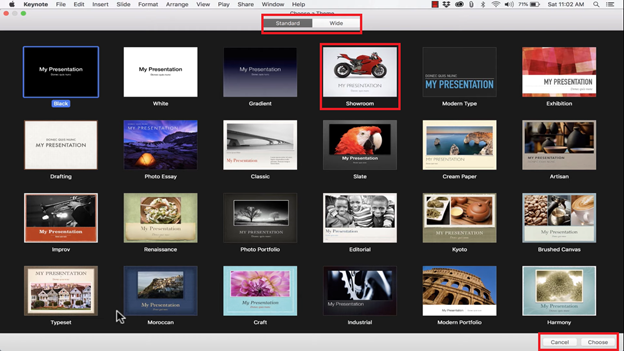
- After choosing a theme double click on it. A new page will open with all the options to edit.
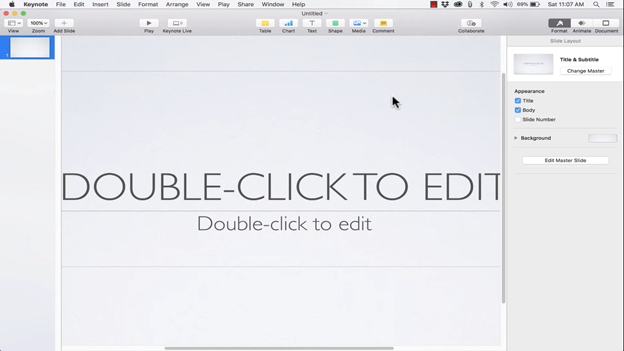
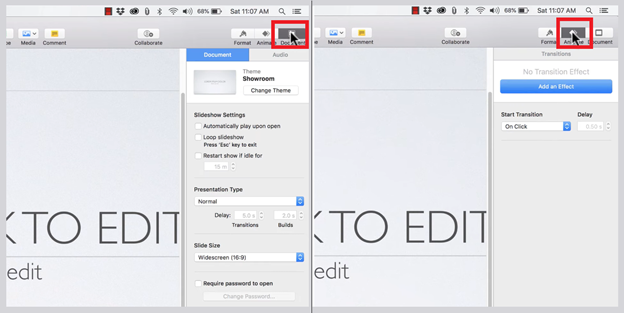
- On the top right corner, you will see three buttons: Format, Animate, and Document.
- Use the “Format” tab to change the format of your slides.
- Change the background by clicking on the “Background” box.
- Check or uncheck the “Title”, “Body”, and “Slide Number” boxes to add or remove these from the slide.
- Use the “Animate” tab to use animations on the slides that you make.
- The “Document” tab will allow you to change the themes, presentation type, screen size, etc.
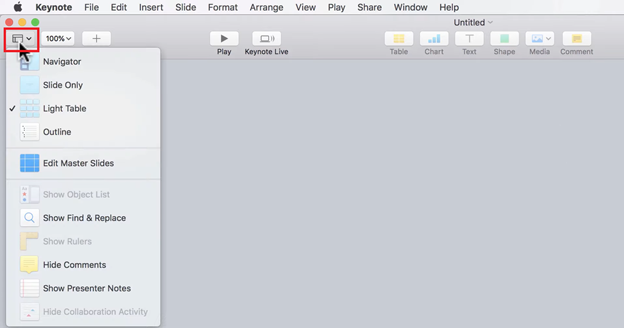
- On the top left corner, you will find the “View” button. Click on it and change the views according to your need.
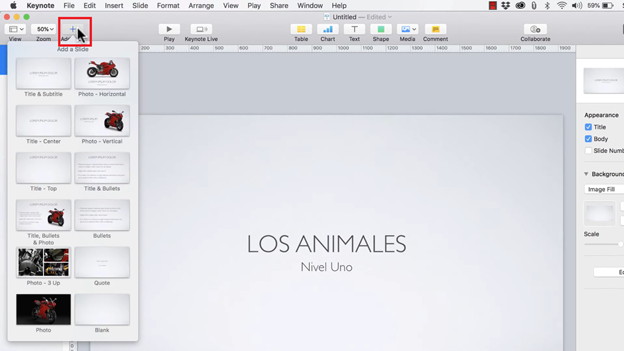
- Change the zoom of the page using the “Zoom Percent” box beside the “View” button.
- Click on the “+” icon beside the “Zoom” button to add new slides.
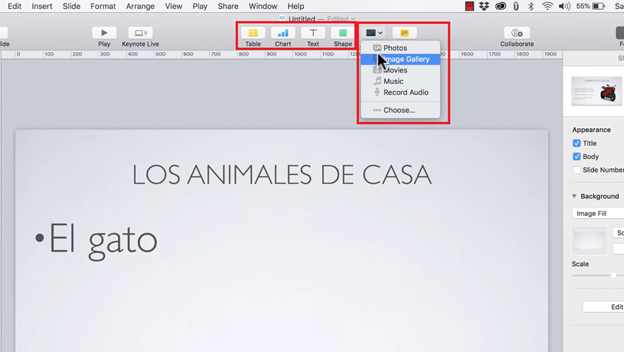
- On the top middle part of the toolbar, you will find options to add media, texts, shapes, tables, and charts. Click on the dedicated icon, and add whichever you need from these options.
- When you are done, use the "Command + S" keyboard shortcut to save your presentation.
- Alternatively, you can click on “File” on the top corner and save the file from there.
Exporting the Keynote File to MS Office PowerPoints
If you want to export your Keynote presentation to MS Office PowerPoint, use the following steps:
- Make a keynote presentation using the above steps.
- Now Click on the “File” menu on the top left corner of your screen.
- Click on the “Export…” button.
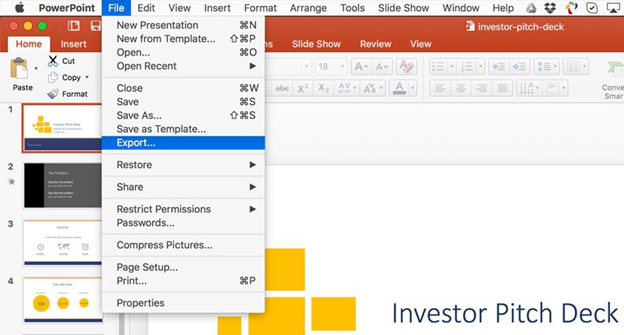
- A pop-up menu will open. Choose file format as “PPT” and then click “Next”.
- Choose where you want to save your file.
- Now click on the “Export” button and your file will be exported as .PPT file.
Summary: Make PowerPoints on Mac
- Open Powerpoint.
- Select a template to get started, or start with a blank document.
- Replace the placeholder text and images with your own.
- Select what you need and right click to change font size, color, layout, and more.
- See different slide views by selecting the option at the top of your screen.
- Select the View tab at the top left to see all of your options.
