Do you find it hard to create shapes with Snip and Sketch, one of the most popular screen capture tools by Windows? Whether you're a beginner or an expert, creating shapes is often one of the trickier tasks to work on, especially when we're not familiar with the tool.
On a Windows computer, you can use the PrtScr (Print Screen) key to copy what is on the screen. Besides this, Windows also has the Snip & Sketch app to snip parts of the screen.
This app also has some rudimentary editing tools to add lines and highlights to a screengrab. Let us see how the tool works.
Starting Snip & Sketch
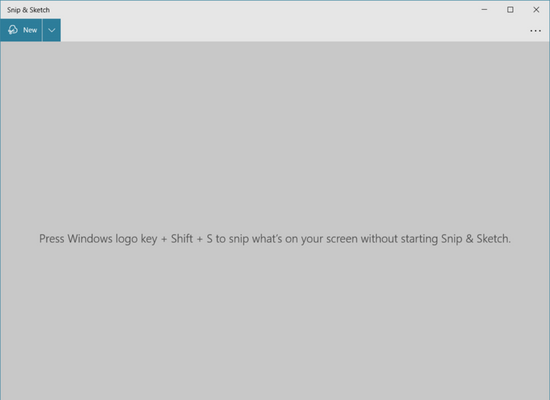
To start Snip & Sketch, click Start and type Snip. From the flyout menu, select Snip & Sketch and click on the app to open it. Here is what you can see.
Grabbing a Full Screen or a Part of It
Now, to do a snip or screengrab, press Ctrl + N. Alternatively, you can also press Windows key + Shift + S. Either way, you will see the following at the top of your screen.

The five options displayed allow you to do a Rectangular Snip, a Freeform Snip, a Window Snip, a Fullscreen Snip, or close the window. If you select Rectangular Snip or Freeform Snip, you can draw a rectangle or a freeform shape around the area you want to capture.
If you select Window Snip or Fullscreen snip, you capture the current window or the full screen. If you choose the Window Snip option, you can choose which visible window you want to capture.
Once you have selected what you want, it gets captured and displayed in the Snip & Sketch window. This is what happens if you selected Ctrl + N.
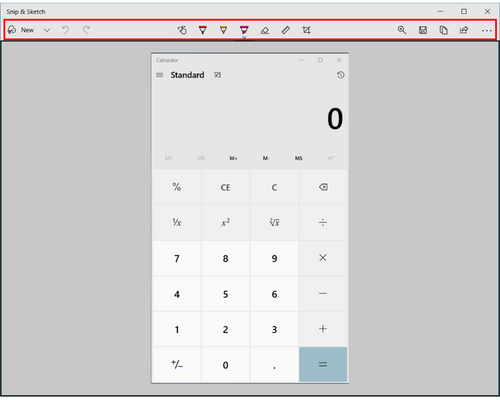
We had the Calculator open when we snipped the window. Notice the menu that appears on top.

The menu options are in three groups:
First, you have the New option to snip a new area of the screen, and the Undo and Redo buttons. Then you have the middle section of buttons: the Touch Writing, Ballpoint pen, Pencil, Highlighter, Eraser, Ruler/Protractor, and Crop image options.
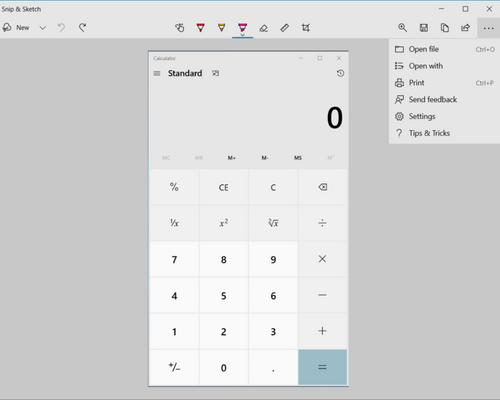
The final set of options are on the right-hand side: the Zoom, Save as (Ctrl + S), Copy (Ctrl + C), Share, and See more. The ‘See more’ option has these sub-options:
Drawing Basic Shapes on the Snipped Picture using Snip & Sketch
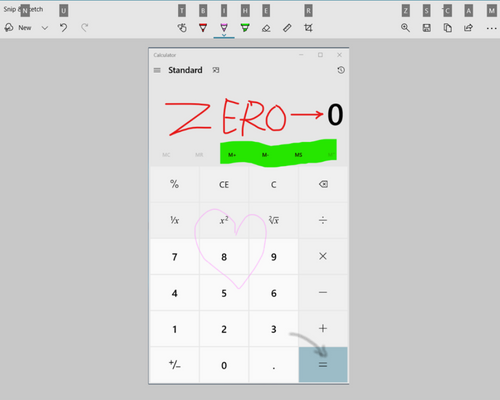
You can draw basic rudimentary shapes on the snipped picture using the Ballpoint Pen, Pencil, and Highlighter tools.
The ‘Touch writing’ option will work on touch screen versions. These options will work better with touch screen devices and devices with a stylus where you can ‘write’ on the screen.
You can use the Eraser to erase what you wrote. It’s also possible to erase just a selected part of it on the snipped piece of your screen.
The Ruler/Protractor option displays a Ruler or Protractor on the screen to draw straight lines or arcs. The Ruler can be turned if you have a mouse with a scroll wheel.
For the Ballpoint pen, Pencil, and Highlighter options, you can select different colors and pen sizes. For now, let us use the Ballpoint Pen. Just click on the tool to select it. Then click on the tool once again to set its options. See the options below:
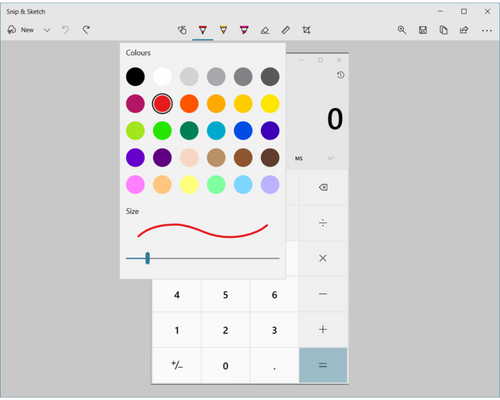
You can select the pen color and the thickness/size of the pen. After you have done that, you can draw on the screengrab, like this example.
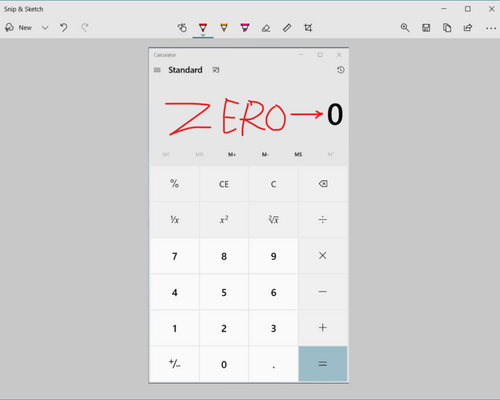
Let us add a few more drawings and doodles using the Pencil and Highlighter.
Drawing Straight Lines Using the Ruler
Let us see how the ruler can be used to draw straight lines. Please notethat the ruler can be moved by dragging it. It can also be rotated if you have a touch screen or a mouse with a scroll wheel.
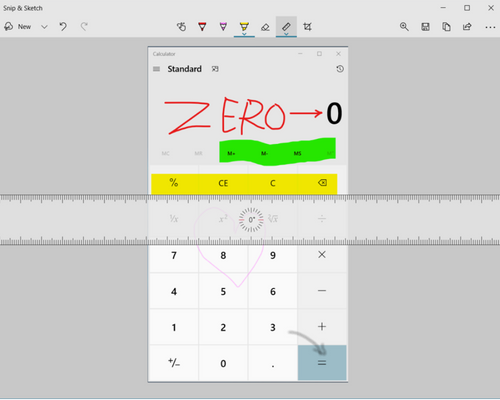
We used the Ruler with the Highlight set to yellow. In the picture below, we turned the ruler and drew a line with the Ballpoint pen.
Using the Protractor to Draw Arcs
Just click on the Ruler/Protractor option to select Protractor. Then use it to draw arcs.
Summary: Make Shapes with Snip and Sketch
- Open Snip & Sketch.
- Take a new snip of your screen or use an existing image.
- Click Draw on the toolbar, then select your color and pen size.
- Select the shape you want to draw on the toolbar.
- Drag and drop to draw the shape on your image.
Conclusion
To conclude, if you want to use Snip & Sketch to draw shapes, you can draw basic shapes on the screenshots. These options make work better on touch screen devices with a stylus.