Want to know how to move tracks in Audacity? Read this article and you will find an answer for your question.
Content creators who are starting off need all the software and tools they can get to kick off their content making career. All of them require a great audio editor to help make their long recordings a lot more concise and refine their song tracks even more.

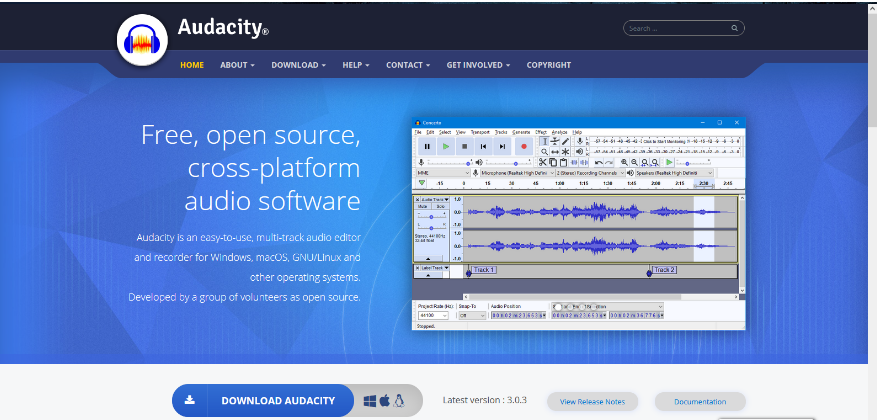
Audacity is a very good audio editing software for beginners who are looking to practice and become better at the basic skills. It is great for beginners because of its simple features, and you can even use it for free without any additional costs at all. This makes it very appealing for content creators that have small budgets.
In this short step-by-step guide,
We will show you how to move tracks around the Audacity software
Step 1:
Download and install Audacity. You can download Audacity for free on their official website. Make sure to pick the right version for your operating system. Visit their website here. Once the download is finished, click on the installer file and let it install automatically.
Step 2:
Moving and reordering tracks in Audacity is very simple. Every separate track loaded in Audacity will sit on its own timeline. There are multiple ways you can go about doing this. Here are some ways you can follow to move tracks manually in Audacity:
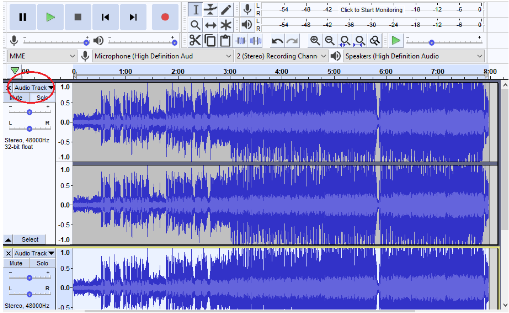
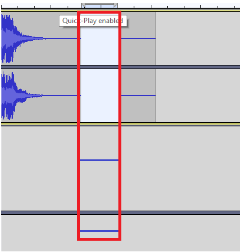
One way is to click the Audio Track you want to move around on the left side of the program. Refer to the image below for a clear visualization.
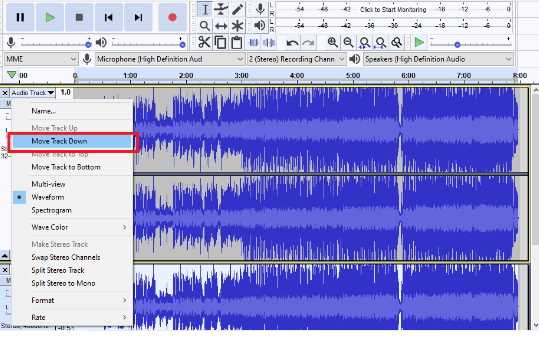
Once you’ve clicked the audio track, a menu will pop up. You can choose to move the track up or down. Check the screenshot below for a better visualization.
Another way you can move tracks around is to left click, hold, then drag the audio track up or down. This is one of the quicker and more convenient ways you can move whole tracks.
Step 3:
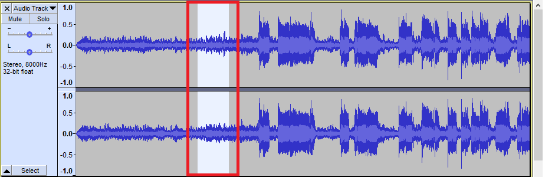
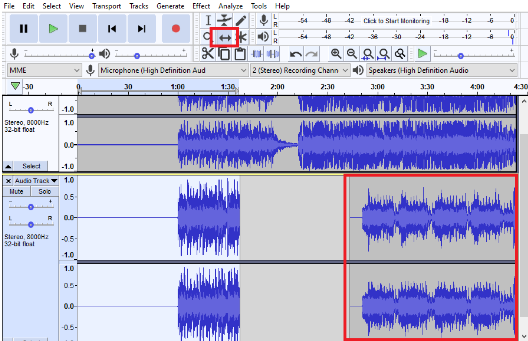
One way to move a part of a track around is to highlight the section you want then press Ctrl + Alt + I. This is a shortcut to move the highlighted section to another timeline.
Step 4:
Once you press Ctrl + Alt + I, your selected track will be taken out and moved to another track below it. This is a great shortcut to separate a certain section of a track conveniently. This is a handy way to quickly get rid of an unwanted track without deleting it entirely.
Step 5:
Another great way to move around a track that is isolated is to use the “Timeshift tool”. Highlight the part of the track you want to move around then click on the Timeshift tool. You can now drag the highlighted section around horizontally across the timeline. This makes it easier for you to rearrange your spliced tracks.
Summary: Move tracks in Audacity
- Importing the music
- Download Audacity
- Install Audacity
- Open Audacity
- Select the tracks to import
- Import one track at a time, then export the new track.
- Import all tracks, then edit and export each one separately.
Conclusion
These are some of the ways you can easily move tracks in Audacity. You can utilize these easy techniques to quickly edit and enhance your recordings as much as possible. We hope that this short informative guide will help you in your journey to become a successful content creator one day.
You can use Audacity freely, and it will serve you well until you need a more advanced audio editor for more intensive workloads. We highly recommend checking Audacity out if you’re looking for a free yet feature-rich sound editor.
