All modern smartphones have touchscreens, but these are fragile devices and they break easily. Some users may even accidentally scratch the screen, break some internal parts of the phone or drop it from a high place. You should learn how to replace iPhone 4S screen if such thing ever happens with you.
An accidental crack on your beloved iPhone display—it’s probably the situation you’d never expect to happen. An awful truth—Phones are highly vulnerable to fall over and suffer damage on the display. When the display gets cracked, multiple problems can appear like a black screen, vertical lines across the screen, touch malfunction, or discolored pixel. Don’t worry, still you can get it replaced or repaired successfully.
However, if you find out that the display still works, and perhaps the touchscreen controls too. Then, changing the display panel may have solved the issue. But it’s not an easy task. All you need is time, patience, and the proper tools. If you have all those, then following our step-by-step guidelines will let you have your sleek and shiny display back. Let’s go on.
Tools you need
- iPhone 4S LCD Touch screen digitizer replacement
- SIM Eject Tool
- 5-point screwdriver set
- Standard #000 Phillips screwdriver
- Nylon Spudger/ Guitar Pick
- Tweezers
- Scotch Tape
Follow the steps
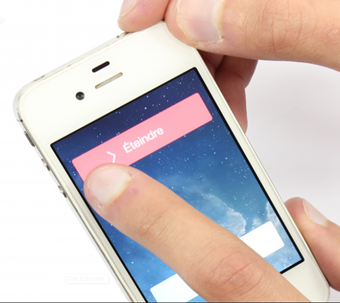
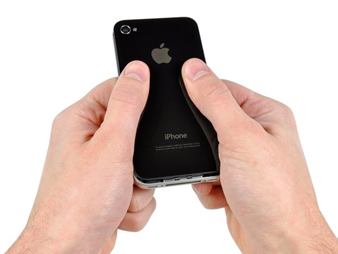
- Switch off your iPhone 4S.
- Put a piece of tape over the cracked screen and it will keep the glass pieces all together.

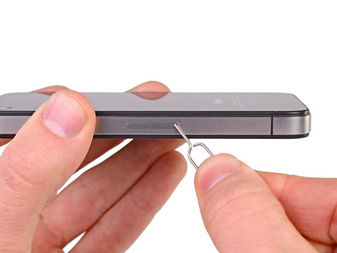
- Remove the SIM card by using the SIM Eject Tool.
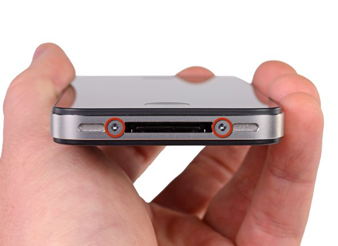
- Remove the two bottom screws next to the dock connector.
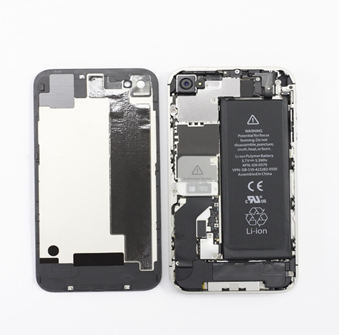
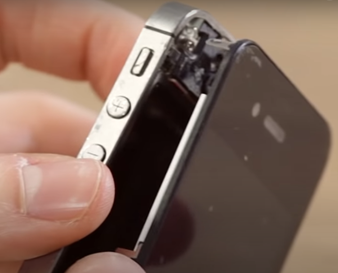
- Slide up the back panel using your thumb.
- Lift the back panel and keep it aside.
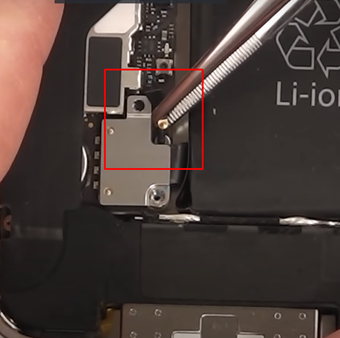
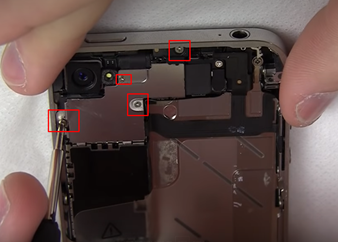
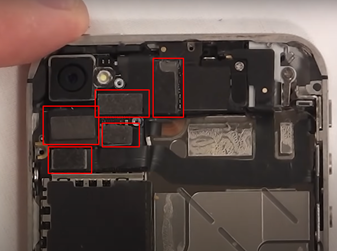
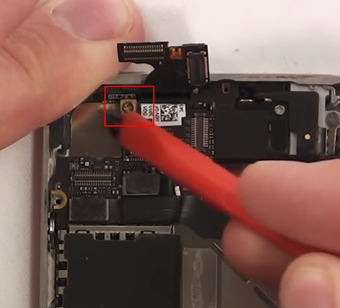
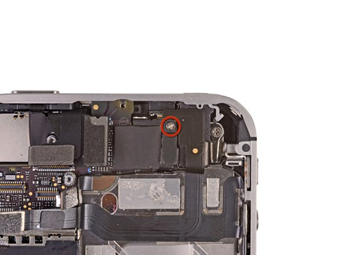
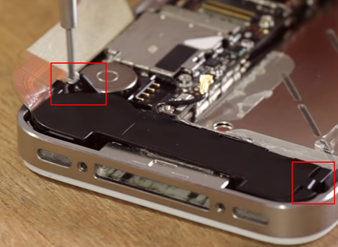
- Remove the two screws as shown in the picture below.

- Grab the little black piece from underneath the screw and keep it safe.
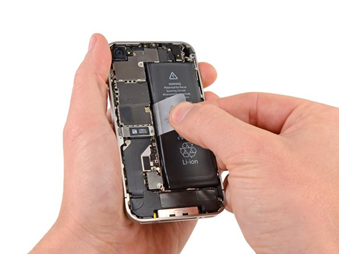
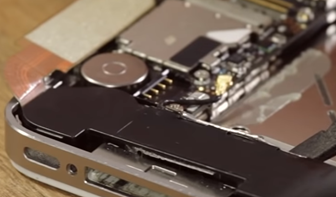
- Detach the battery clip from the logic board by using the nylon spudger.
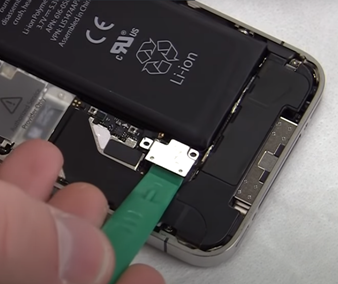
- Remove the battery using the pull tab. Also, you can use the nylon spudger to lift the battery.
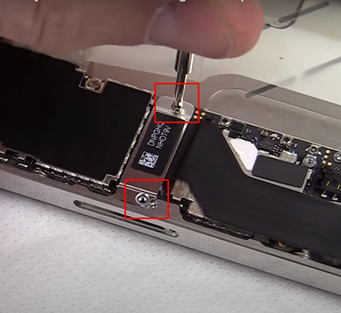
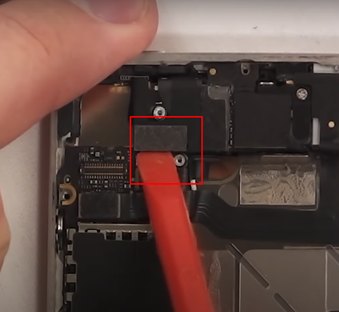
- Remove the little shield with two screws that holds the dock connector ribbon.
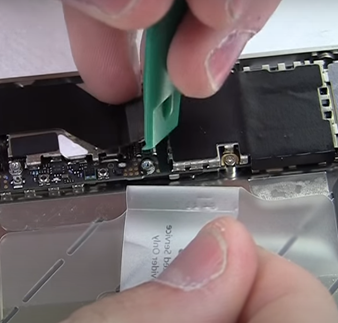
- Gently disconnect the ribbon and pull it aside.
- You will see another shield with four screws at the top. Remove the screws and open the shield.
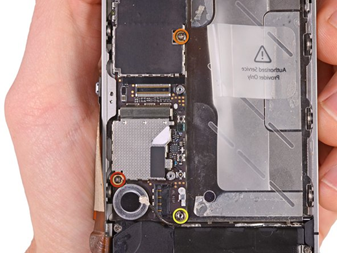
- Use the nylon spudger to disconnect the five ribbon cables as shown in the picture below.
- Unclip the Headphone jack/volume button cable.
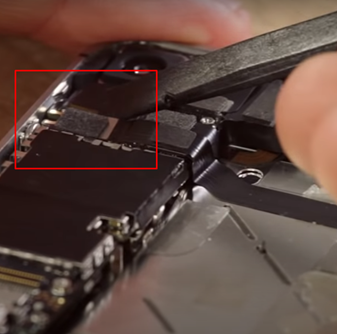
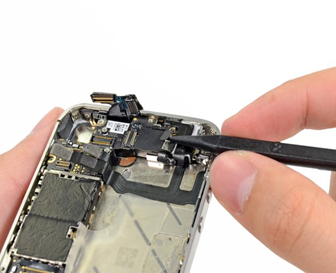
- Unclip the Rear camera cable and grab it with tweezers and put it aside.
- Unclip the Front facing camera cable.
- Unclip the Digitizer cable.
- Unclip the Display data cable.
- Unclip the Power button cable (located underneath the headphone jack/volume button cable).
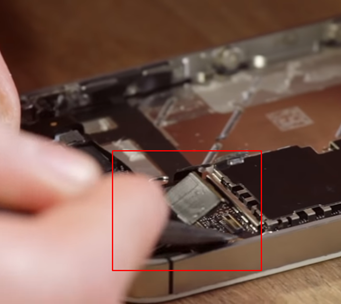
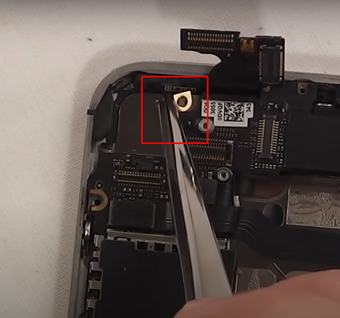
- At the top corner, you will see a little black sticker covering up a little screw that you have to remove also.
- Collect the gold piece underneath the screw and put it aside.
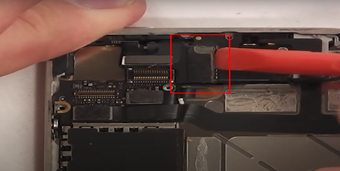
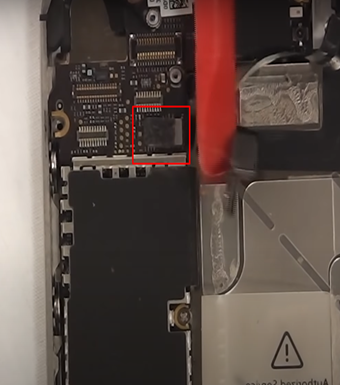
- There is another small shield covering a single connector remove that as well.
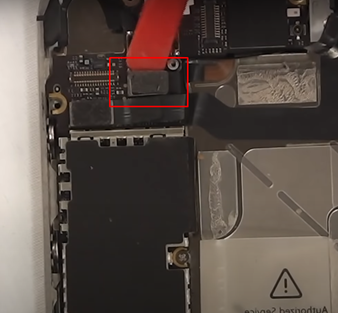
- Open the two screws of the bottom speaker. You will find a black triangle under one of the screws. Keep it safe.
- Unclip the wire cable of the speaker. Now lift the whole part and keep it aside.

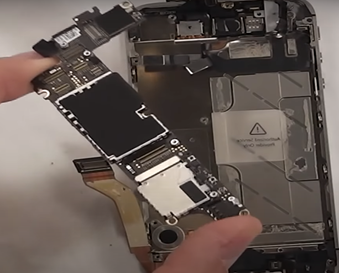
- Three remaining screws are holding the logic board. Remove the screws and lift the whole part.
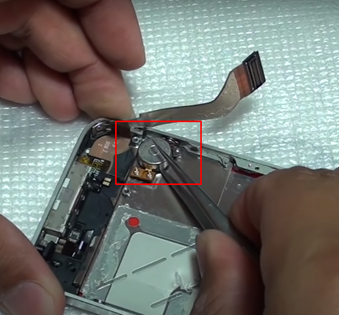
- Remove the round-shaped vibrator with the tweezers and keep it aside.
- There are four screws in the corner of the iPhone 4S holding the screen. Remove all of them.
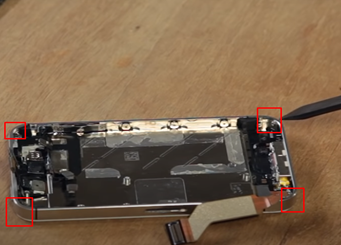
- There are six other screws along the sides. There is a tiny washer in each. Remove all of them and keep the washer with the screws.
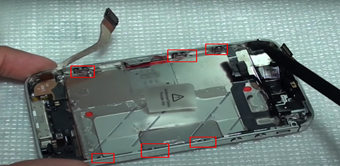
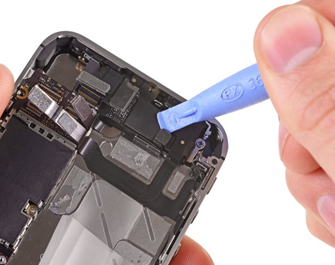
- Using the nylon spudger/guitar pick gently pry the screen off the frame.
- Now clean the frame and slide the new screen into place.
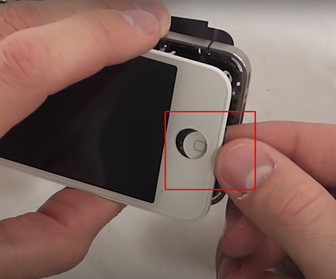
- Take off the home button from the old screen and replace it on the new screen.
- Now we have to put it all back together. To reassemble your iPhone 4S, you have to follow all these directions in exact reverse order.
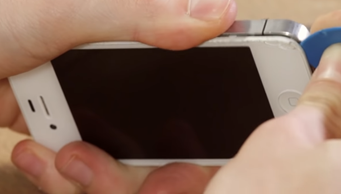
After, completing the reassembly of the phone, turn the power button on. When the bootup will complete, check every function of your display. If everything is okay then you are done! Enjoy your new iPhone 4S display.
Summary: Replace iPhone 4S Screen
- Purchase the new screen.
- Remove the two screws at the bottom of the iPhone with your Phillips screwdriver.
- Pry open the phone with the suction cup.
- Unscrew the metal plate covering the connectors at the top of the phone.
- Unplug the connectors by pulling on the plastic tab next to each connector - use your spudger to help unstick them if needed.
- Unscrew and remove battery connector metal plate.
- Disconnect battery connector with spudger or fingernail - a metal opening tool can also be used for this step.
- Disconnect digitizer connector and front-facing camera connector (both have tabs).
- Disconnect LCD connector and home button connector (both have tabs).
- (Optional): Peel off battery adhesive strips, and remove old battery. If you plan on re-using your old battery, skip this step.
- At this point you can place your new screen on top of your old one to make sure it fits correctly
