Setting Google Chrome as your default browser can be simpler than you think. I have gathered some information for you that will hopefully make the task even easier. I hope you find this helpful!

Google Chrome is one of the most popular and most powerful browsers these days. Besides being sleek in design and fast in performance, there are many extensions that can allow you to bring out the best in your daily browsing experience.
Why you should set Google Chrome as your default browser?
Setting a particular web browser doesn’t necessarily mean that you are not allowed to use any browser. In fact, you still can. The purpose of the default browser setting is to help your computer system determine which pre-selected option or program should process web pages.
This means that if you do make use of Google Chrome as your default, every webpage link you open will redirect you to that website through Google Chrome. That said, if you’re looking to download Chrome and set it as your default browser, this is the perfect guide for you!
Here are five easy steps to follow to get your system to recognize Chrome as the default browser for any of your website links:
- Open Google Chrome by launching it on your computer. Note that you need to have Google Chrome installed on your computer in order to set it as your default browser.
If you haven’t downloaded it, you can visit Google’s website and grab a copy of Google Chrome.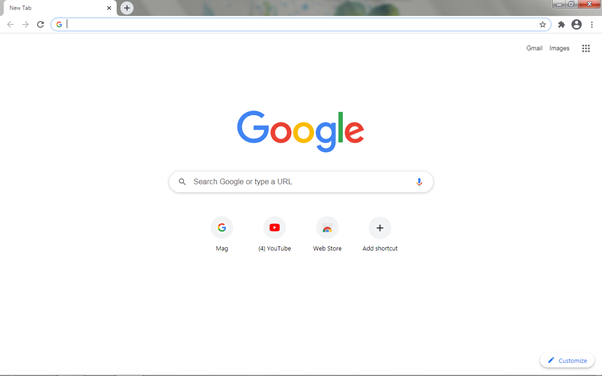
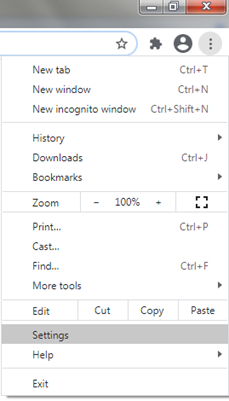
- Head over to Google Chrome’s Settings by clicking the kebab menu or the icon with three vertically aligned dots on the top-right corner of the browser. Once you’ve clicked on it, you can select “Settings” which will lead you to a new page.
- Chrome will now take you to its settings page. You’ll recognize it by checking if the address bar states “chrome://settings”.
Then, you should click the “Default Browser” section on the left side of Settings in order to proceed to change your default browser to Chrome.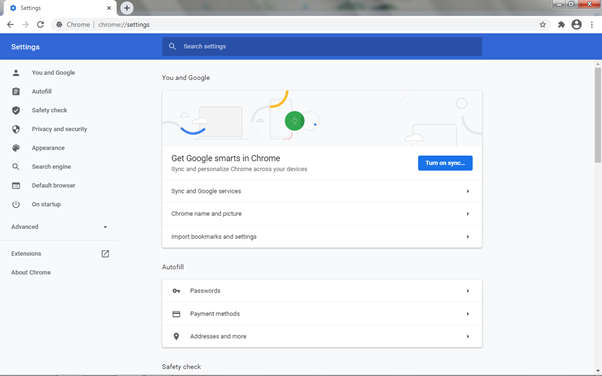
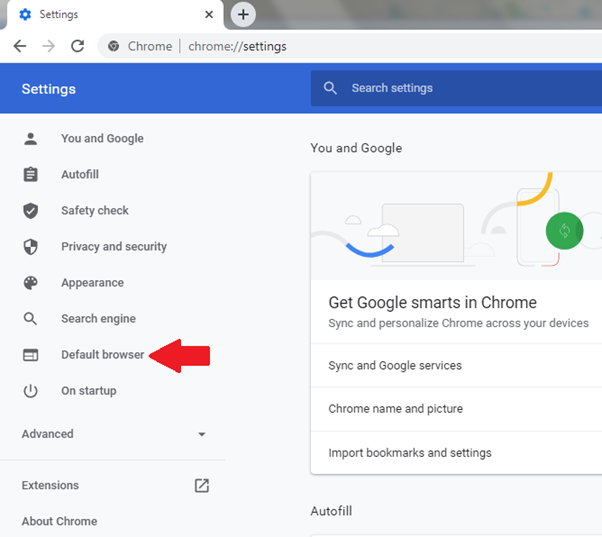
- In this section, you will see two headings: “Default browser” and “On startup”. Our focus is on setting Chrome as your default browser, so head to the Default browser heading and click on “Make default” at the right.
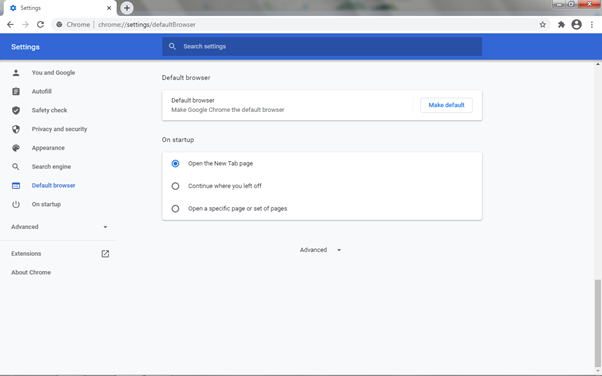
- If you followed the guide correctly, the “Default browser” heading should change its text to the following: “Google Chrome is your default browser”. Check the image below to check if you have done the job correctly.
This is a sign that you have now set your default browser to Chrome, and all links now will be opened through Chrome by default!
That said, you can do the same thing and make Google Chrome your default browser on a Mac operating system.
Bonus: Steps to Set Google Chrome as your Default Browser on Mac OS
In this case, we have a few quick steps you can follow:
- Start Google Chrome.
- Head over to Preferences which can be located at the menu bar. If you’re not sure where to find it, a shortcut you can do is to press Cmd+ and this will lead you up to the Chrome settings page directly.
- Once you click on Preferences, a panel will appear. Among the list, you will see the default browser option. Once you click on it, you will get a pop-up to confirm if you really are choosing Google Chrome as your default browser of choice.
Confirm it, and just like that, Chrome is now your default browser for your Mac OS.
Summary: Set Google Chrome as your Default Browser
- Open Google Chrome.
- Click on the vertical three dots at the top right of the window.
- Select Settings from the drop-down menu.
- In the Settings page, scroll to the bottom and click Advanced.
- Find the System section and click Open proxy settings.
- In the Internet Properties window, click on the Programs tab, then, under Default Web Browser, click Make default.
- If there is no Programs tab, find and click Make default under Web browser in General tab.
Conclusion
In just a few easy steps, you are now able to reap the benefits of having Google Chrome as your default browser. All that said, we hope that this is helpful to you. Good luck!