How to Take a Screenshot on an iPhone 7 plus? You may have heard that the new iPhone 7 Plus lets you take a screenshot so you can easily share your photos with friends and family. A screenshot is the process of copying what's on your screen to the Photos app. So if you want to quickly share a photo or save something for future reference, a screenshot works great! This feature is mostly reserved for Android devices, but iPhones are getting better by the day. In this article we'll show you exactly how to do it.
Sometimes it is difficult to take a screenshot in an iPhone 7 plus, especially when we have a lot of new iPhone and IOS versions nowadays. Taking a screenshot or screen capture is very helpful in many situations like when we have to share some information and any new app with a friend or a colleague on our iPhone 7 plus. After saving the screen you will be able to edit/share/delete the captured screen in the IOS gallery.
Now that the Home button in the iPhone 7 Plus has been replaced with a new pressure-sensitive button, powered by Taptic Engine, you may be wondering how you can take a screenshot on your new iPhone.
The new Home button is capacitive, giving you the feeling of a real home button. Thanks to the built-in Taptic Engine. But it also means that the method we used to enter DFU (device firmware upgrade/update) mode or perform a Hard Reset will be different.
Here are the 2 different methods – “How to take a screenshot on iPhone 7 plus”. In the below steps, we will learn about taking a screenshot on your iPhone 7 plus. Follow this process step by step.
How to Take Screenshot on iPhone 7 Plus with the Home and Power Button
You can easily capture your iPhone screen with the help of the home and power button. All you need to do is follow the subsequent steps and you’re all set to take a screenshot.
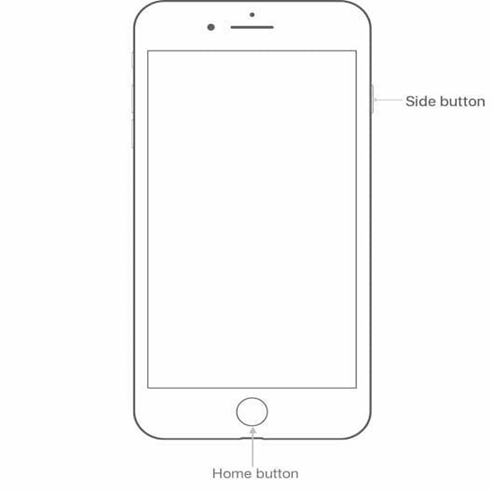
First of all, you have to choose which screen to capture (e.g. home screen or a web page). After that, you will have to press the home and power buttons simultaneously.
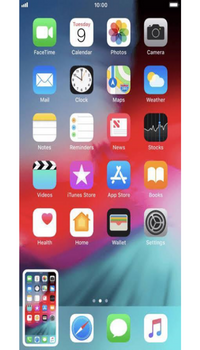
You will see a quick white flash that aims to notify you that the screenshot is captured successfully.
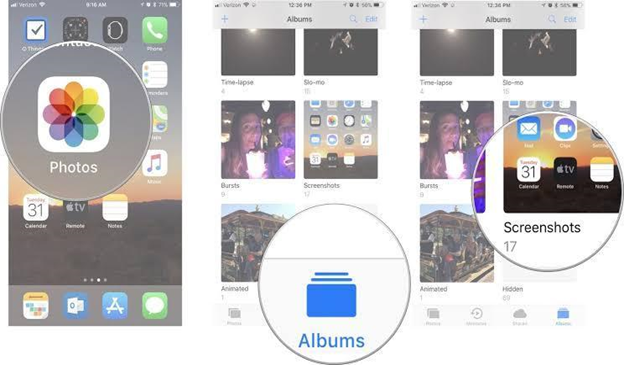
Now, your captured screen has been successfully saved in the ‘photos’ in the screenshot folder.
How to Take a Screenshot with Assistive Touch?
If you don’t want to go through the hassle of pressing the power and home button together, then you can use Assistive Touch to take a screenshot with a single hand.
The first thing to do to enable Assistive touch is going to the ‘Settings’ app on your iPhone 7 plus then go to ‘General’. Here, you will see the ‘Accessibility ‘option, click on it, and then you will see the ‘Assistive Touch’ option. Turn on the Assistive Touch.
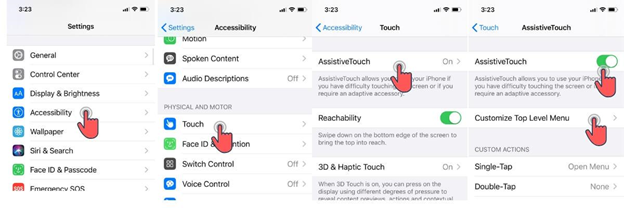
Now you will see the ‘Customize Top Level Menu’, tap on it to open. Here, you will see the custom button indicated by a star icon, tap on this icon, and then choose the screenshot from the list.
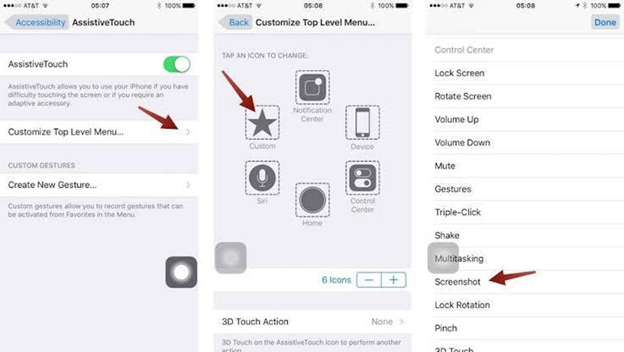
This is one of the easiest methods as you can capture screenshots with one hand.
Where are the Screenshots Saved in an iPhone 7 Plus?
After taking a screenshot, the screenshot captured will be saved automatically inside the photos app inside the folder named ‘Screenshots’ on all iOS devices.
To view your newly captured screenshot, you need to navigate to the “Photos>Albums>Screenshot” on your iPhone.
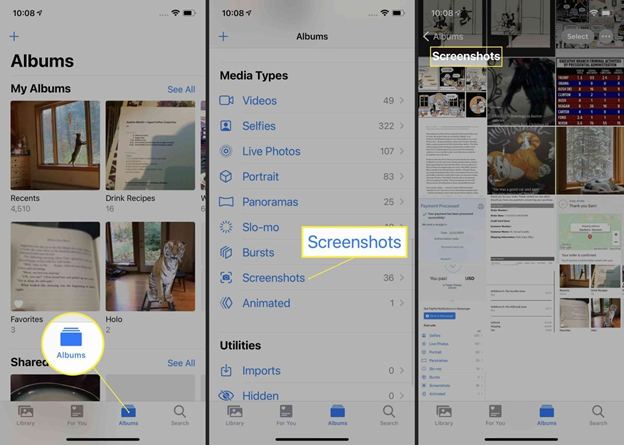
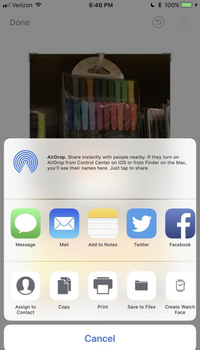
Scroll to the end of the album and you will find the saved screenshot. Tap on it to open. Press on the ‘Share’ icon in the bottom left corner, indicated by an upwards arrow icon, to share the screenshot with other apps. E.g., WhatsApp, Facebook, Twitter, etc.
Summary: How to Take a Screenshot on an iPhone 7 plus?
- To take a screenshot or screen capture with the iPhone 7 and iPhone 7 Plus, press the Sleep/Wake or On/Off button located on the right edge of your iPhone.
- Press the Home button below the display at exactly the same time.
- This will capture the entire screen of your iPhone 7 or iPhone 7 Plus, and save it to your Photos app.
- The screenshot will be saved in Camera Roll.
- Taking a screenshot is very easy on any Apple phone.
Conclusion
And with that, I hope you’re able to capture your iPhone 7 Plus screen. As you can see, screenshots capturing steps are going to be identical for almost all models of the iPhone. What do you think about our today’s informative post?