How To Transfer Files From One User To Another In Windows 10?
383 Views
Are you one of those people who has a need to merge data from two users in Windows 10 into a new one? Are you puzzled where to find the File Transfer Settings in Windows 10? Have you ever wondered how to transfer files from one user account to another? If so, then keep reading.
Transferring files from one folder to another is already a basic function that a computer has. However, transferring files from one user account to another can be tricky. If you don’t have access to the administrator’s account, your options in the PC may be very limited.
If your Windows only has one user account, then you don’t need to perform the following steps except when you ant to transfer files via a local network. If you have multiple accounts, then please follow these steps carefully as they can be very useful.
Sharing Files Through Public Folders
- On a single computer, no matter how many user accounts are made, there is a “Public folder” located at the file address C:Users. Files found in this computer can be freely accessed and modified by any user from any account logged in. If you want a particular file to be shared with all other users, save a copy on that particular file address.
- You can either make a copy on that folder or move the original file into the “Public folder”. There are also other public folders dedicated to common file types like “Public Music”, “Public Pictures”, “Public Videos”, and “Public Documents”.
- If you want to share the public folders on a local network, you can do so by opening the Control Panel.
- Next, from the items listed in Control Panel, click on the “Network and Sharing Center”.
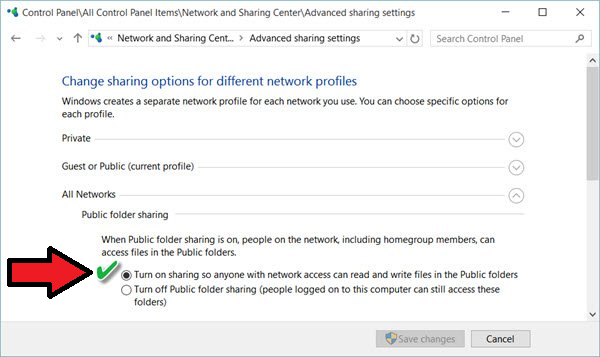
- Afterward, select “Advanced sharing settings”.
- Locate “Public folder sharing” and check the option “Turn on sharing so anyone with network access can read and write files in the Public folders”. Next, select “Save changes”.
Copying An Entire Profile Via Control Panel
- Click “Start” and search for “Control Panel”.
- Among the items listed, choose “System”.
- Next, select “Advanced System Settings”.
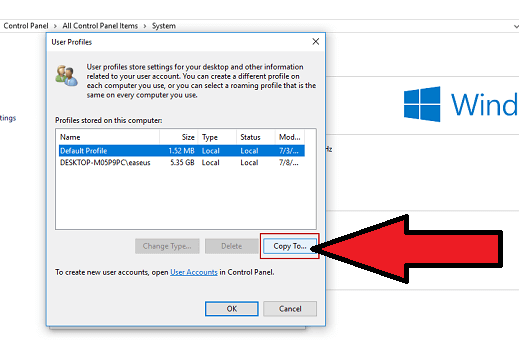
- Under the “User Profiles”, select “Settings”.
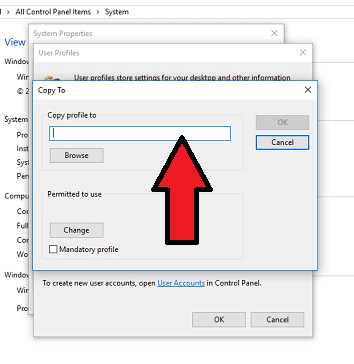
- Select a profile that you wanted to copy. After selecting, click “Copy to”. Make sure to reconsider the size capacity of the profile. The profile of the current user account will be copied to the profile you have selected in the procedure. Afterward, click on “OK”.
Transferring Selected Files From Current User Account To A Particular Account
- You need to login to the Administrator account to transfer specific files towards a particular account or set of accounts without much hassle. After Windows has loaded and before entering the desktop screen, choose to log in to the administrator account and enter the appropriate password.
- In case if you don’t have the password or forgot about it, you can reset the account. It will be bothersome but in the end, having to do so will be worth it.
- After logging in to the administrator account, familiarize yourself with the different folders for each user under the directory C:Users.
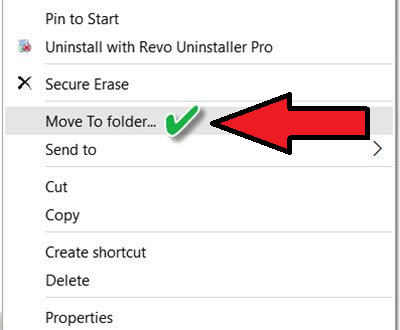
- Then, you can now proceed to transferring any file of choice to any account of choice. To transfer swiftly, select the file or set of highlighted files and perform right-click.
- Afterward, select “Move To folder…” from the menu.
- Enter the file address you want the file to be moved to. Take note, the action is “move”, meaning it will transfer the file without making a duplicate. This action is different from “copy”.
- After entering the file address, click “OK”.
Summary: How to transfer files from one user to another in Windows 10?
- Open File Explorer.
- Navigate to the file you want to transfer to another user's account > Right-click on the file and select Properties.
- In the Properties window, got to the Security tab.
- Here, click on Advanced .\n5. Click Change link, next to the Owner section at the top of the window.
- Now type in the name of the user account you want to transfer the file or folder to, or click on Advanced and then Find Now to select from a list of users and groups on your PC.
- Select Check Names and then OK when done making changes.
- Now back in the Advanced Security Settings window, you can also enable the check boxes next to Replace owner on sub containers and objects and Replace all child object permission entries with inheritable permission entries from this object if needed before clicking Apply and OK to confirm changes and exit the window.
- Close the Properties window when done making changes, exit File Explorer and try opening the file again with another user account to ensure ownership was transferred successfully.\n10. Simple way: move files from one account to another is by simply adding your other accounts as additional users under.
Conclusion
You have different ways of transferring files from one user to another. You can utilize the public folders but there is no designated destination. You can also copy the entire profile of a user account to another. And lastly, the most flexible method, you can log in to the admin account and transfer any type or number of files to any user account you choose.
