You are trying to add files and folders to Windows Defender's protection list, but you can't. Why? Well, you can't make an exception to Windows Defender app for the files you need to protect. Take a deep breath and follow this tutorial. Here is how to add an exception to Windows Defender with pictures so you can see how easy it is. You won't believe how simple it is after this.

Windows defender system is a built-in antivirus program that blocks all harmful moreover malware files automatically. Well, it’s a great initiative to protect your computer until it blocks necessary files from running.
Adding an exception to Windows defender is the solution to running essential files on your PC without interruption. Go on reading to explore the Windows defender exception adding process.
Adding Exception to Windows Defender
Here is what to do when you need to add an exception to the Windows defender system.
- Click on the “Start Menu” and navigate “Settings” from there.
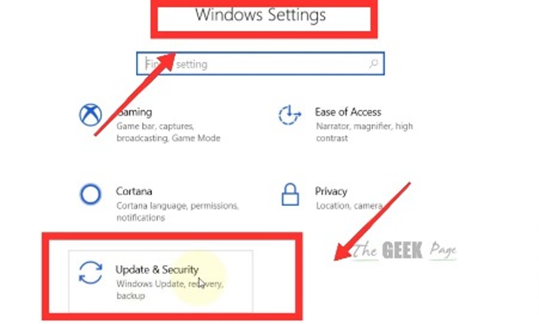
- Find and click on the “Update and Security” option from “Windows Settings”.
- Scroll down and select “Windows Security” from the left-hand side of the screen.
- On the right side of the tab, there is a “Protection areas” header. Click on the first option underneath the title named “Viruses and threats protection”.
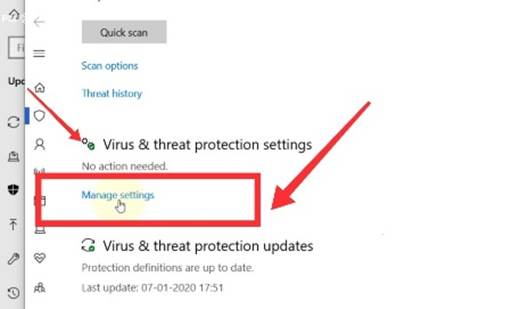
- A new tab will open up. Scroll down and find “Viruses and threats protection settings”.
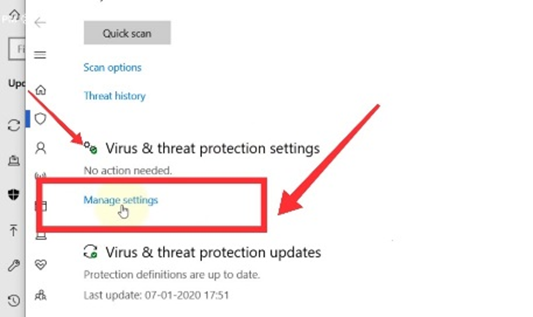
- Click on “Manage Settings” from the header “Viruses and threats protection settings”.
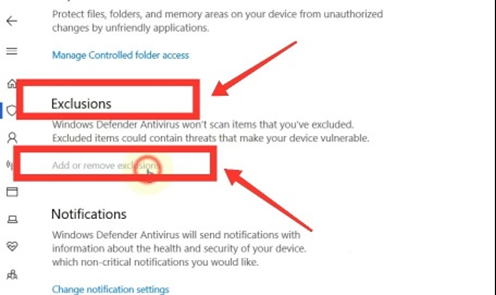
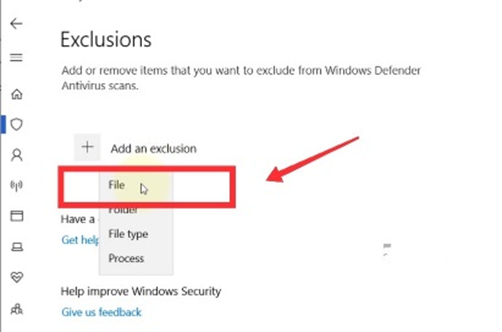
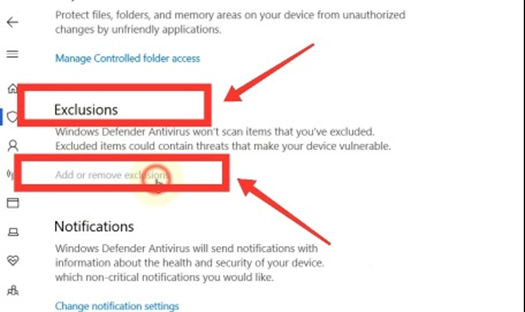
- Scroll down to find “Exclusion.” Click on “Add an exclusion,” and you will get four options to add your needed file.
- Choose “File” from there, and the files available on your Pc will be shown.
- Choose your needed file and click on “Exclude this file” from below.
Adding Multiple Files At Once
We have already told you how to add a single file to the Windows defender system. However, if you want to add multiple files or a folder to the Windows defender, follow the instructions below.
- Go to the “Start” menu and open “Settings” from there.
- Find “Update and security” from the “Settings”.
- Click on “Windows security” and find “Virus and threat protection” visible on the right. Click and open it.
- Scroll down and choose “Virus and threat protection settings.” Go with “Manage Settings”.
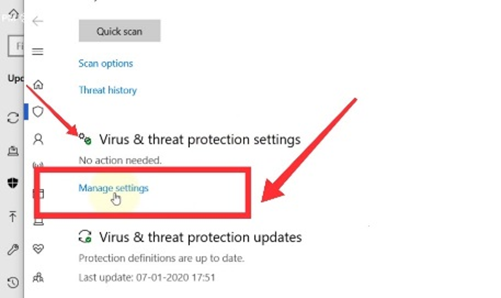
- Scroll down and find “Exclusion.” Click on the “Add an exclusion” option.
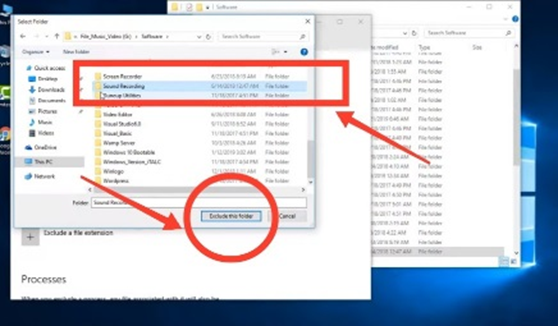
- Select “Folder” from there and choose the folder you want to add.
- Click on the “Exclude this folder” option, and it will add the entire folder to Windows defender.
Removing Exception from Windows Defender
After adding an exception to Windows defender, many times, we need to remove it back. So, if you want to remove any file or folder from Windows defender, here is what to do.
- Launch “Settings” from the “Start” menu.
- Select “Windows Security System” and click on “Viruses and threats protection” unerneath the “Protection areas” header.
- Scroll down and click on “Manage Settings” from “Viruses and threats protection settings”.
- Scroll down and find “Exclusions.” Go with “Add and remove exclusions”.
- Click on the file and choose “remove” to delete the file from there.
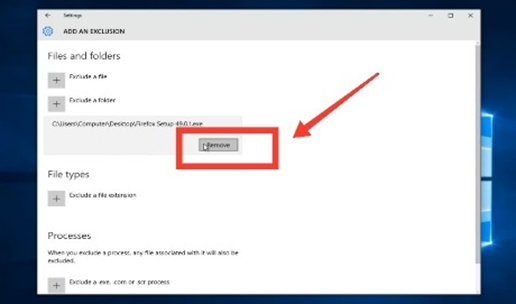
Summary: Add an Exception to Windows Defender
- Locate the program you want to allow in Windows Defender.
- Add an exception to Windows Defender.
- Exceptions are added to an Allowed apps and features list within Windows Defender.
- Open Windows Defender and click on the Settings icon.
- Next, click on Add an exclusion.
- Then click on Add an exclusion under Exclusions.
- Now select one of the following options: Folder, File, or Process.
- Select the file or folder from which you would like to exclude from scanning.