Facebook has become a powerful tool to communicate and connect with people in our lives. We use it to chat, exchange messages, share photos, videos and links to other websites. However, with change comes confusion and problems. You might be one of those users that has a Facebook account that was made several years ago and still use it today. You might also have forgotten your password or been locked out of your account for any number of reasons. This article will explain how to change Facebook’s email settings for both your primary email address as well as an alternate email address you have set up on your profile page.
Facebook is among the social media platforms that allow users to change their main email addresses or the email used during the login process. Making a change to your primary email address is as easy a task as it sounds. You only have to make a few amendments to your settings via your smartphone or personal computer.
You can even do the adjustments from any PC with the application of your preferred web browser.
This article comes in handy in providing some highlights on the steps to follow when changing your primary email address on your Facebook account. Besides, removing the email from your Facebook account completely is also explained.
Here are the steps you’d want to follow
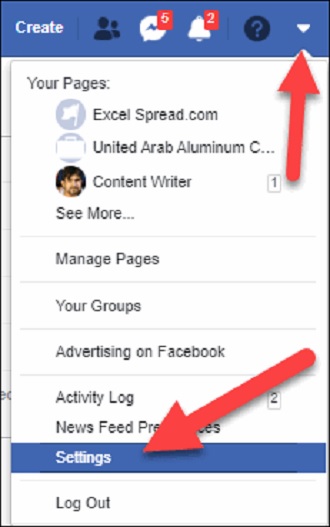
- Log into your Facebook account, and on the right side of your monitor, click on the arrow pointing down.
- Here, choose the Settings and privacy bar in the menu.
- Click on the Settings option.
- Click on Edit right next to the Contact option. Here, you will need to amend the settings of your email. The email address linked to your Facebook account is of two kinds: your contacts as well as the recovery address and the Facebook-generated email address. You can change both the email addresses on the contact page, but the email generated by Facebook can only be amended once.
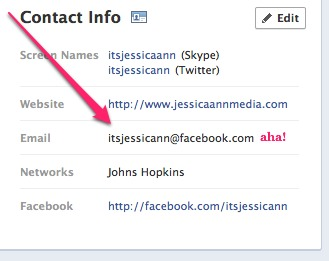
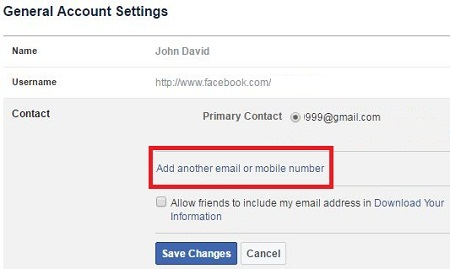
- To change your contact and recovery email, click on “Edit”. Then click on “Add email” option where you will key in your new email address.
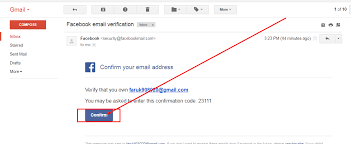
- Check your email for verification then click on the link for confirmation.
- After you are done with the email confirmation process, the next step is to redirect the Facebook Contact section. Here, you can see the new email address as the primary address for your Facebook account.
Now, use this email address as your main contact and recovery address on your Facebook account. On the other hand, changing a Facebook-generated email address will involve these steps:
- Click on the “Edit” option which is right next to your username, mostly referred to as website address. The username is applied when creating your Facebook email and, once amended, will result in complete email address adjustments. Your username can only be changed once, and if it fails to show your actual names, you will receive notifications from Facebook on how to reverse it.
- On the new email alert text box, enter your new email address and pick “Add.”
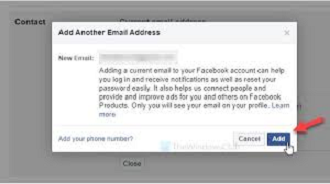
- Click on the Close button after the pop-up alert box has appeared.
- On the other hand, to have the previous email removed, you will need to click on the Edit option next to the Contact bar and click on “Remove” to remove the email address you want.
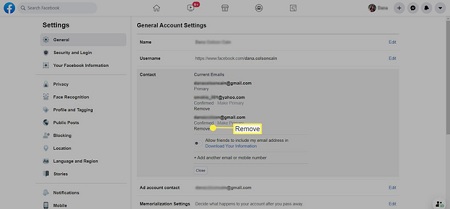
- To set the email as your primary address, you need to click on the Primary Email option where you choose your preferred email address. The address is the one where Facebook sends any notification regarding activities in your account.
- The email can also be used to sign in to your Facebook account. After selecting your preferred email, proceed to enter your Facebook password into the text box that pops up. Then, click on Save.
Summary: Change Facebook’s Email Settings
- Go to Account Settings.
- Under Email -> Primary Contact Email, click Edit.
- Select the email address you want Facebook to contact you through.
- Check your email inbox for a confirmation email and click the link inside to verify your new email address.
Conclusion
Following the above steps will automatically change the entire Facebook settings successfully. Luckily, they can all be done regardless if you’re using a smartphone or a computer. Just make sure that you’re connected to the internet.
Hopefully, all the steps we’ve mentioned can help you change your Facebook email settings without any issues. Just make sure to follow each step properly, and you should be good to go.
