Drawing is the creation of a visible image, either on a surface or in the air. This can be done by an artist using tools, for example, and including the destination surface to provide physical support for the design. Drawing is an ancient form of visual art and one of the main forms of expression in visual culture. Some drawing techniques can be very complex and require years of practice , while others can be quite simple.

You can jot down lots of stuff these days using a wide variety of drawing software and tools aside from the usual pen and paper. The built-in Microsoft Paint on Windows 10 is among the most accessible applications to date. However, the Paint app can be intimidating to use with all the tools you see on it.
You might be wondering right now, "Is there another way I can make a doodle easily using an entirely different type of software?" The answer, fortunately, is a big yes. Microsoft Word happens to fit the bill, too.
Read on to know more about creating a sketch using this word processor and how to do it one at a time.
How to Draw in Microsoft Word?
Here are the steps on how to draw in Microsoft Word:
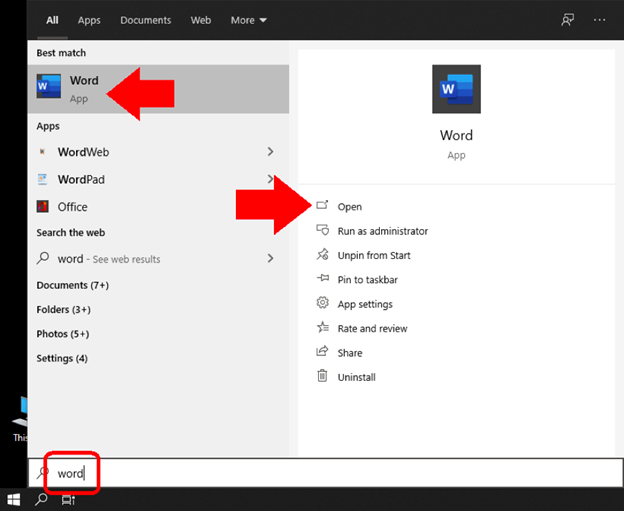
- Click Start (Windows logo) or Search and type "word" without the double quotations, and click on the Word app to open it.
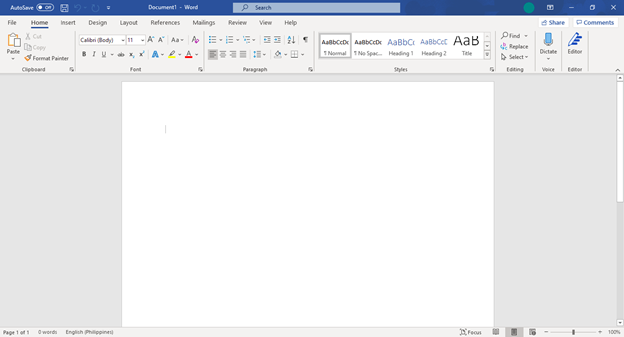
- Once the app window shows up, click on Blank Document to get started.
 A new Word document will display.
- Point your mouse cursor to the Insert tab, located between the Home and Design tabs, and click on it.
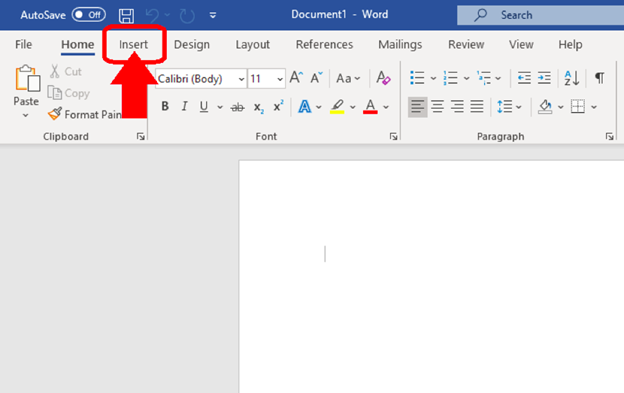 After, you will notice that the buttons or tools inside change as well.
- With the Insert tab selected, move your mouse pointer to the Shapes button and click on it.
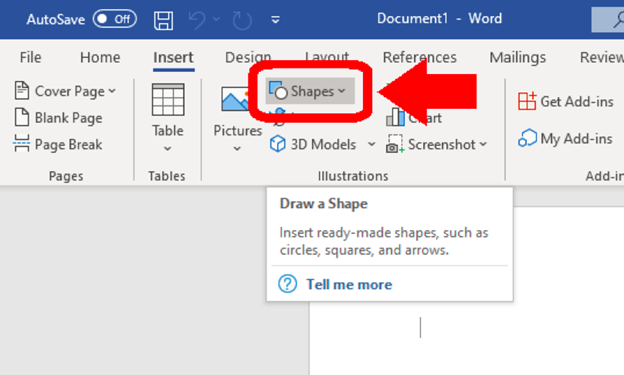 A panel with multiple options pops up, allowing you to choose which shape you would like to insert into the blank document. In this case, however, let's add a freeform object for now.
 - Hover your mouse over the Recently Used Shapes section, and click on the "Freeform: Scribble" option as shown on the accompanying screenshot.
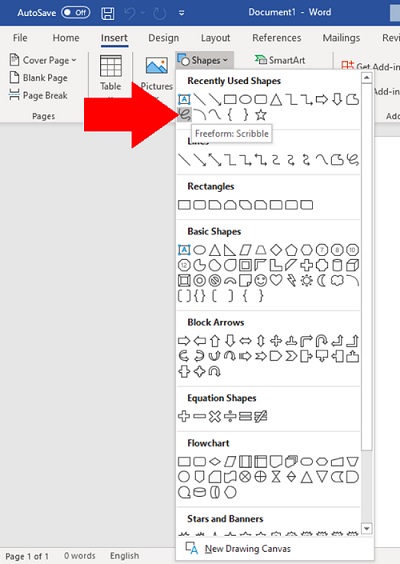 Before you start drawing, make sure that the mouse cursor has changed to the cross or plus sign. Additionally, move your mouse pointer to an empty area in the document as a starting point.
 - Click and hold your left mouse button from the starting point, drag the cursor while you draw something, and release the button once you are finished. However, after you release the mouse button, you cannot resume drawing.
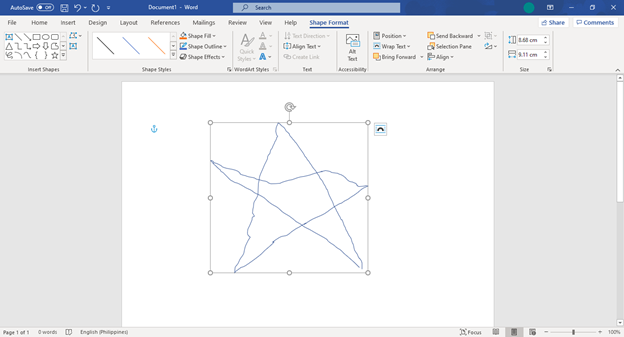
Keep in mind that drawing via digital means may not be intuitive. It does not replicate the same experience as drawing on paper.
Suppose you do not find the result satisfying. In that case, you may Undo this action by pressing Ctrl + Z until the drawing reverts to its previous state.
Edit a Drawing
In most cases, a few points will show up like a sore thumb on your drawing. Luckily, there is an option to edit that drawing in Word and adjust those points until they almost become flat.
- Click on your drawing. After doing so, make sure that a square border with resizing nodes appears around it to confirm it is selected.
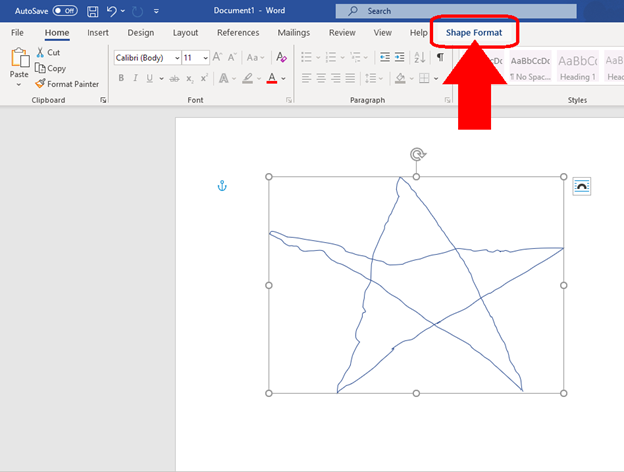
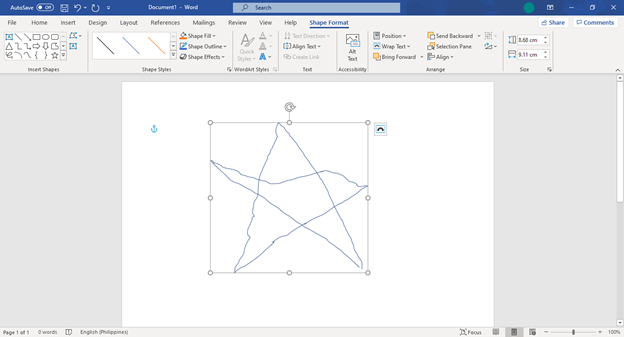 In case you missed it, the moment you clicked on the drawing, the tab on the uppermost part of the app window switches automatically to Shape Format.
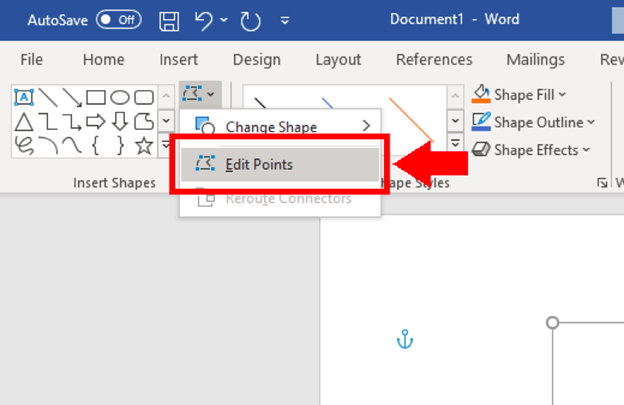
 - With the Shape Format tab selected, move your mouse cursor to the small "Edit Shape" button as seen on the screenshot, and click on it.
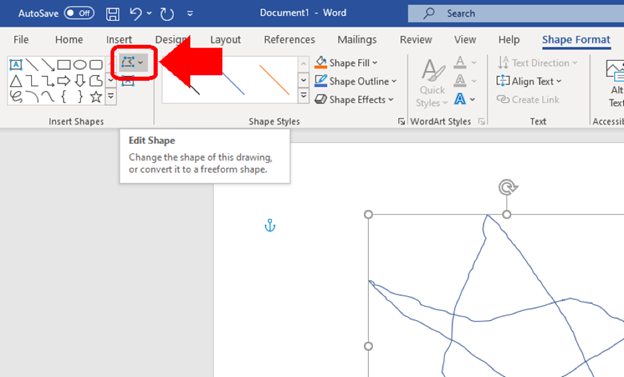
- Click on Edit Points.
 Alternatively, you may right-click on your drawing to access the context menu and select Edit Points.
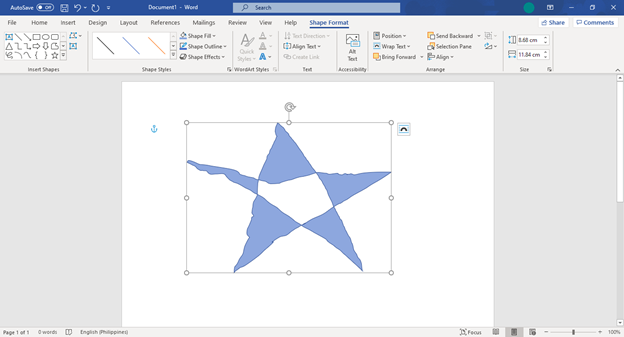
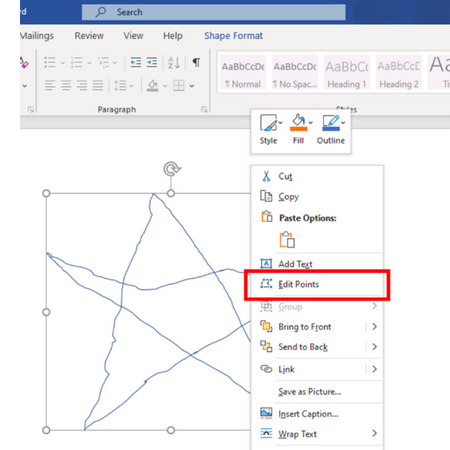 The drawing will become populated with multiple square adjustment nodes. You can click-and-drag these nodes to form your scribble carefully.
Add Color to a Drawing
- Click on your drawing. The tab automatically redirects to Shape Format.
- Point your mouse cursor to the Shape Fill button as depicted on the screenshot, and click on it.
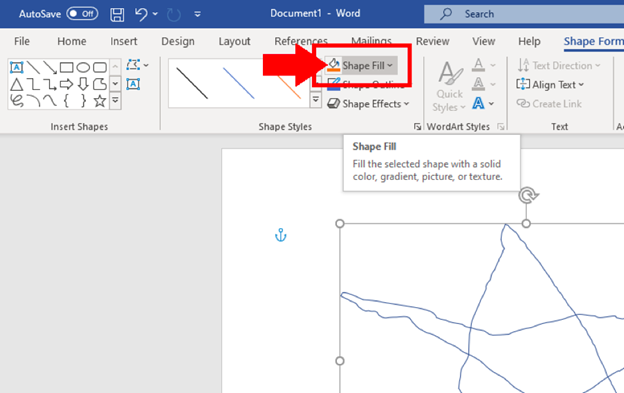
- Choose your desired color.
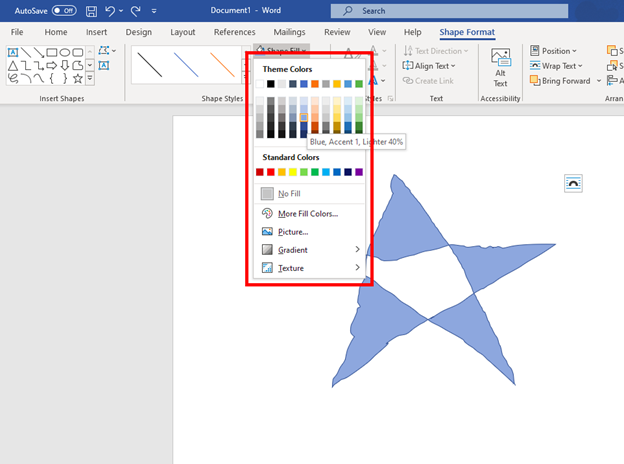 If you don't want to apply any color to the drawing right away, hover your mouse over each selection. This method will let you check how the sketch looks with that color.
Final Words
Drawing on Microsoft Word is quite easy. Just follow the steps mentioned above and you will not have problems navigating it.
Summary: Create A Drawing on Microsoft Word
- Select the Insert tab.
- Select a drawing tool to insert an object.
- If you are familiar with the drawing tools, you can select one from the list, or use the More button to see all available options.
- Click and draw on the document where you want to insert your object. Click and drag using the drawing tool to create your object. When you release your mouse button, the object is inserted into your document.
- Manipulate your objects by using resizing handles, rotation gripper, or other available features that appear when you click the object.