Avast is the world’s leading Internet Security provider that offers free as well as paid security software to protect your PC or mobile device from malwares, Trojans and viruses. DeepScreen technology protects it against the privacy threat that comes when apps need to access all of your device data for its functionality. Avast Antivirus will show you a list, with everything an application wants to access. With this article, you can disable DeepScreen in Avast for better user control and to get rid of the pop ups within the program.

Sometimes, the DeepScreen feature of Avast antivirus gives false alerts, kills the software you are using, deletes essential files, and blocks you from entering or using any necessary links or websites. It becomes annoying when you are working. For that, you have to disable the DeepScreen function in the Avast antivirus or disable the application entirely.
Disabling DeepScreen in Avast Antivirus
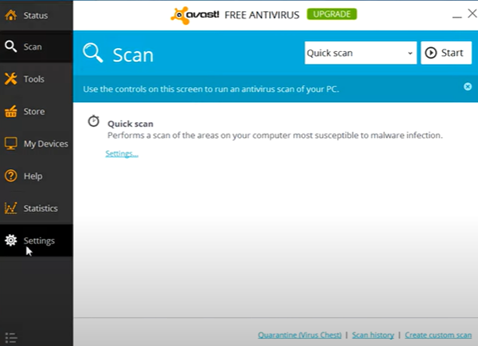
- Open the Avast antivirus application from the “Start” menu. You may open it from the system tray, too, if it is active on the PC. Then, select the “Settings” option.
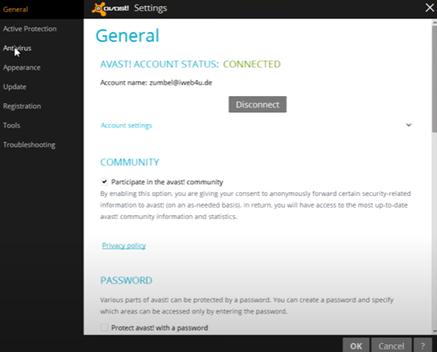
- Pick the “Antivirus” option from the left panel. Locate the “DeepScreen” section.
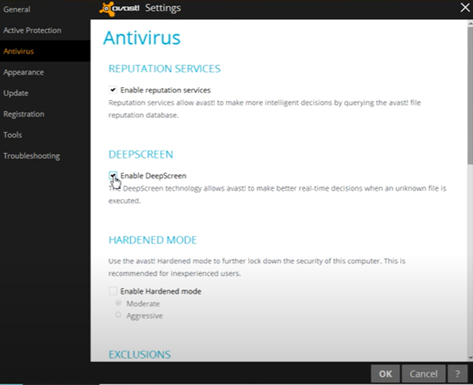
- Uncheck the box beside the option titled “Enable DeepScreen.” Click “OK” to stop the DeepScreen function from the PC.
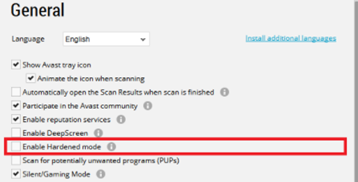
- The DeepScreen enabling option is in the “General” tab of the “Settings” window in some updated and different versions of Avast antivirus.
- There, only unchecking the “Enable DeepScreen” doesn’t work sometimes. For that, you also have to uncheck the “Enable Hardened mode” too.
- For “Adobe Premier 2017”, you must uncheck the “Enable CyberCapture” option. Then, pick “OK” to disable the DeepScreen function.
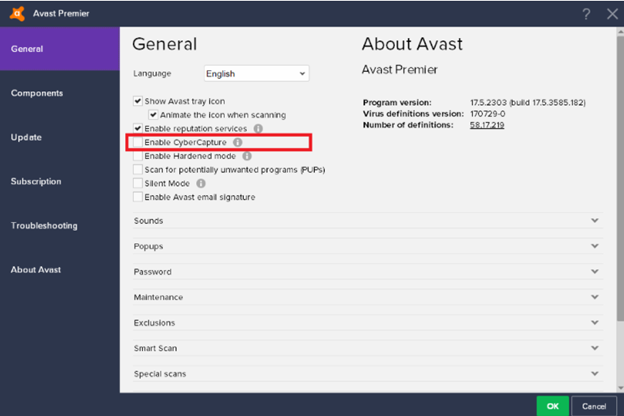
- If this checkbox doesn’t disable the DeepScreen function, you can exclude the file or folder you are working on from the Avast antivirus so that the DeepScreen process doesn’t stop the work or delete them.
- Access Avast. Select the “Settings” menu. Locate the “Components” section and click on it. Then, advance through the “Files System Shield” window.
- Pick the “Customize” option. From there, select the “Exclusions” function. In some versions, such as Avast Professional 2017, the “Exclusions” settings are in the “General” option of the “Settings” window.
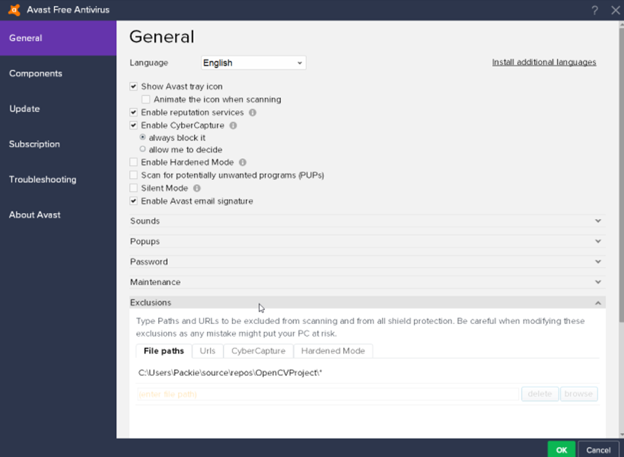
- From the “Exclusions” settings, select “Add the Path.” Find the folder or file you wish to work on and pick it. Then, select “OK.” After that, the Avast antivirus or DeepScreen will not affect that directory.
- In some versions of Avast, there is no “Enable DeepScreen” option is present. In that case, access the “Troubleshooting” section from the “General” window. Deactivate the “Self Defense” option.
Disabling Avast Antivirus
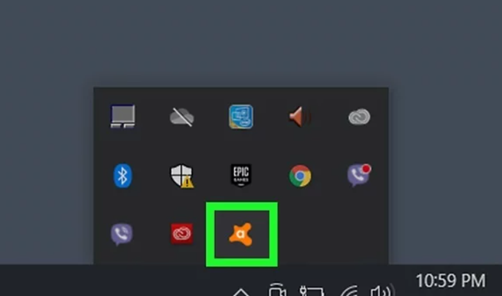
- If the disabling DeepScreen function doesn’t work, you have to disable Avast antivirus totally to stop this problem. Expand the system tray from the taskbar and right-click on the Avast logo.
- Move the mouse cursor on the “Avast shields control” from the dropdown list. Here you can choose how long you wish to disable the Avast. You can permanently disable it too.
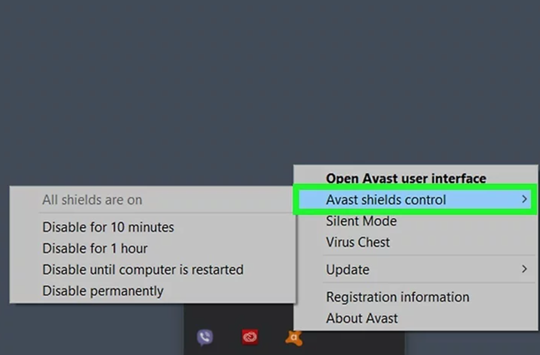
- After picking the duration, a dialog box will show up confirming the setting. Select “OK, STOP.”
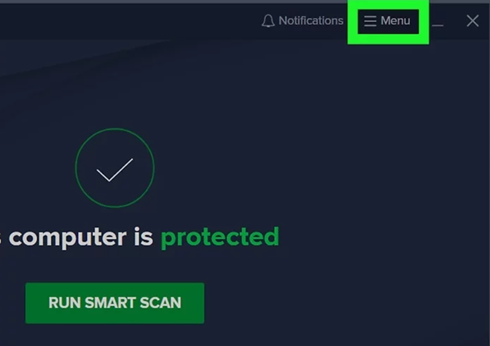
- You can also disable Avast from the application settings too. Access the Avast antivirus and select “Menu” from the top right side of the window.
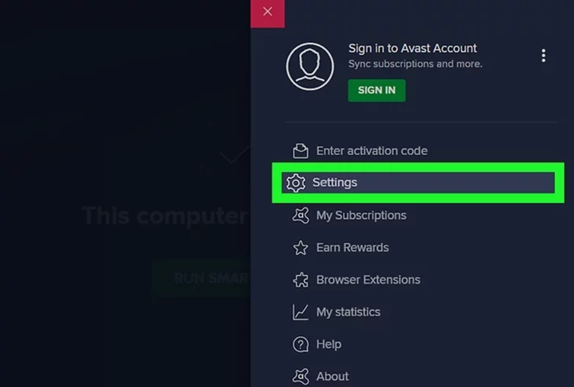
- Pick the “Settings” option. Select “Protection” from the left panel.
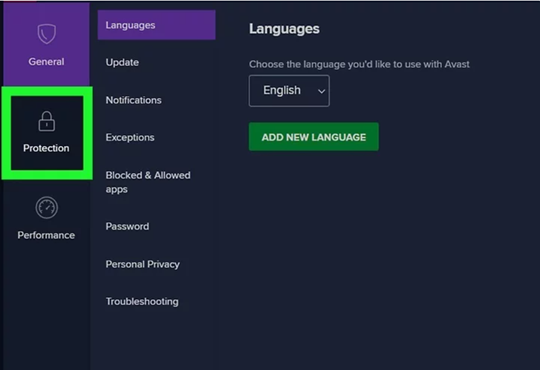
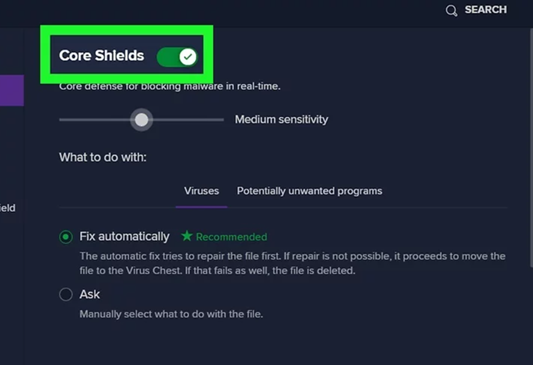
- In the “Protection” window, choose the “Core Shields” option. It will show the shields that are active right now on the PC.
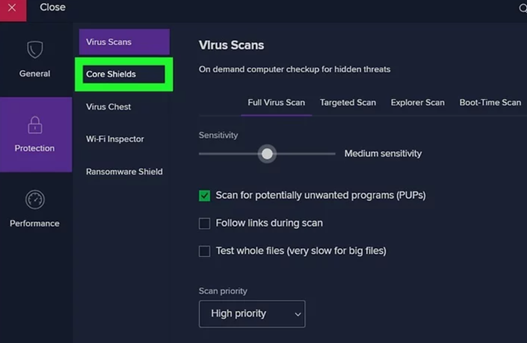
- Switch off the “Core Shields” option. You may also disable particular shields from the options. Then, choose the duration and disable it or disable it permanently.
Summary: Disable DeepScreen Avast
- Click the Menu icon in the top-left corner, then select Settings.
- On the left side, click Active Protections and select DeepScreen from the list of available shields.
- Uncheck the Enable box next to the PUPs (Potentially Unwanted Programs) detection category.