Windows 10 comes with a lot of new features. One of them is the fact that Windows 10 has built-in Skype. However, this can be considered as a bloatware from some people's point of view. Does it make sense to use Skype in Windows 10? After all, you already have an app called Messaging and an app called Skype Video. This article will show you how to disable and uninstall Skype in Windows 10.

Technology is rapidly advancing. Skype used to be unparalleled as a video conferencing app. Currently, Skype has been replaced with many other new, better quality applications with more functionality. We have Whatsapp, Google Duo, Zoom, Google Meet, and so many others.
Apart from the advancement of technology, Skype tends to open up by itself, without the user’s permission. Sometimes, as it runs in the background, it over consumes the system resources of your computer, making other applications that you are using so much slower.
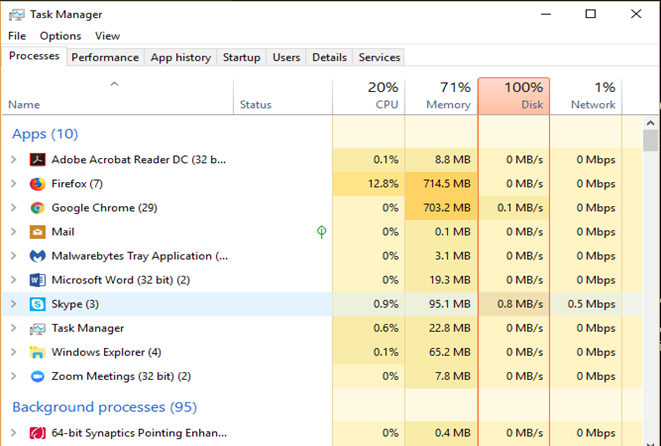
Disable Skype Through Task Manager
- Open up Task Manager on your computer.
If you are unsure where it is, click on the menu option of your computer. It is found on the bottom. When you open the menu tab, a tab labeled Task Manager will pop up. Click on it.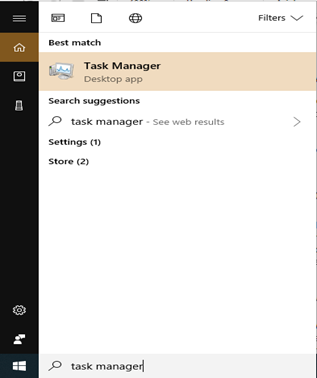
- Search for the tab labeled “Startup”. Click on the Startup tab.
- Scroll down the options until you see the icon for Skype. Click on the icon. An option will pop up saying “Disable”.
- Click Disable.
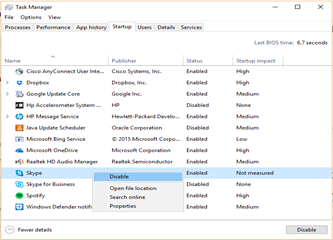
After you click disable, Skype will not run in the background when you restart your computer. Take a quick look at your applications on Task Master.
Take note of apps that have an “Enabled” status. They may also have been pre-installed and may be running in the background everything your computer is put on. Disable the apps that you do not need.
The fewer the application that is running in the background, the more efficient your computer will be.
Uninstall Skype
Uninstalling Skype is an efficient method to completely and permanently disable it on your Windows 10.
To begin with, ensure that the Skype application is closed properly and no background updates are going on.
Method 1: Uninstall Skype Using The Control Panel
This is the easiest method of permanently disabling Skype.
- Look for the Skype icon on the screen of your computer. It may be found on the bottom right of the Windows 10 navigation bar.
When your arrow has located the Skype icon, right-click the icon. Options will be displayed. Choose the Quit Skype option.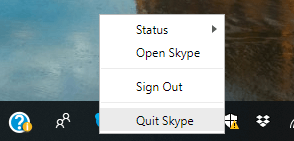
- Once more, go to the navigation bar. On the bottom left, in the bar for search, input “Control Panel”.
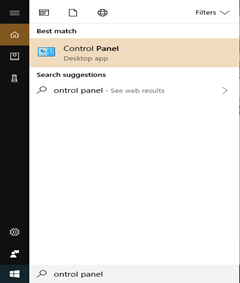
- Right-click on the control panel once it shows up. It will open up. Options will be displayed, including “Uninstall a program.” This option is seen on the bottom left of the screen.
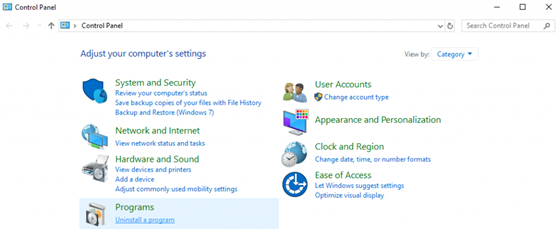
- Click on the option labeled “Uninstall a program.” Programs will be displayed for your perusal.
- Find the Skype icon. Once you find it, right-click it.
- “Uninstall" will be displayed. Give the option a right-click.
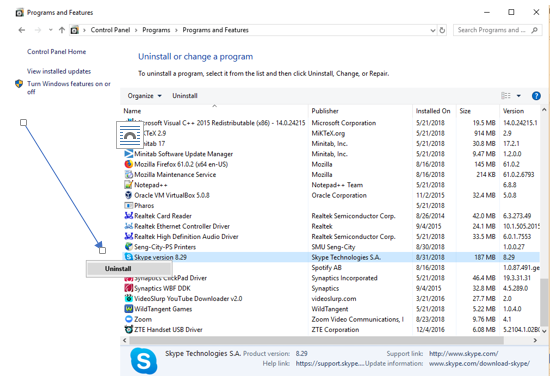
Skype will be uninstalled on Windows. A prompt will appear on your screen once the uninstallation is complete.
Method 2: Uninstall Skype Through The Application
Another method to disable Skype completely is to uninstall the application directly. The Skype application can be found in the folder labeled “Programs". The icon on the desktop home screen represents a shortcut. Deleting the shortcut will not uninstall Skype.
- Find the Skype application by searching for it using the search bar.
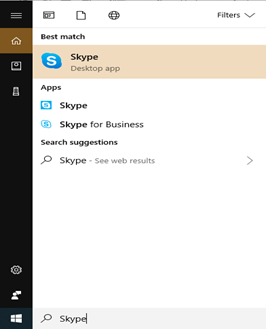
- Right-click the Skype application.
- An option will be displayed, labeled “Uninstall”. Give it a right-click.
- Skype is now uninstalled.
Method 3: Uninstall Skype Using Settings
- On the search box, type “programs”
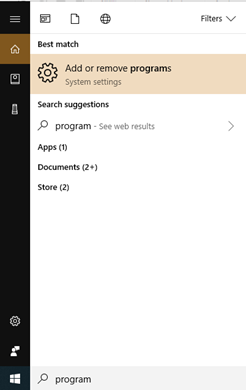
- An option labeled “Add or remove programs” will be displayed. Right-click on it.
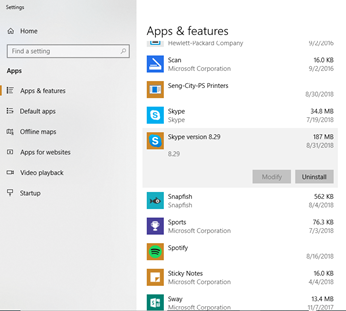
- Many applications will be displayed on the screen. Search for Skype.
- Click on Skype. An option labeled “uninstall" will be seen. Click on it.
Summary: Disable Skype in Windows 10
- Right-click Windows [Start] and choose Task Manager.
- Under the Startup tab, select Skype from the app list and select Disable.
- Right-click the taskbar and choose Task Manager again.
- Select the Processes tab, then look for Skype.exe under Background processes and select End task to kill it if it's still running.
- Exit Task Manager and reboot your computer to save the changes!
Conclusion
With this guide, you can now disable the Skype app and prevent it from opening by itself upon starting up your computer. This will free up some of your computer’s memory and prevent it from slowing down.