How To Encrypt C:\ And Other Partitions Using BitLocker?
642 Views
You have just created the perfect operating system to keep your data safe, but the hard drive that is holding your perfect OS will hold data of other users or maybe another operating systems. Therefore it is very important to encrypt it so that no one can access your data in case of theft. In this article, we will see how to do that. We will also see how to turn on or off Bitlocker from command prompt as well as through group policy editor.
Data privacy and security is a serious thing that every gadget owner needs to be aware of, especially when it comes to their personal computers. You never know when snoops might be phishing for your private information.
Bitlocker Drive Encryption is a stable security feature available on Windows 10. If you’re worried about having your privacy being violated, then the most logical thing would be to protect it using this feature.
Things to Remember
- Encrypting an entire drive takes a long time, so make sure to keep your device plugged into a steady power supply.
- Trusted Platform Module (TPM) is a special microchip designed to enhance your data security. You can still use your Bitlocker without the TPM but it will require additional steps to obtain the maximum amount of security the same as using a TPM.
- If you have a TPM, then accessing the encrypted partition will be easier for you because the TPM stores your password for you.
- Bitlocker is only available on Windows 10 Enterprise and Windows 10 Pro.
- Your PC has to contain two partitions: systems and operating system partitions. If you don’t have any, then Bitlocker will create one for you.
Now that you know what it takes to encrypt C and other partitions using BitLocker, let us now look at the steps involved.
Setting Up Your Bitlocker
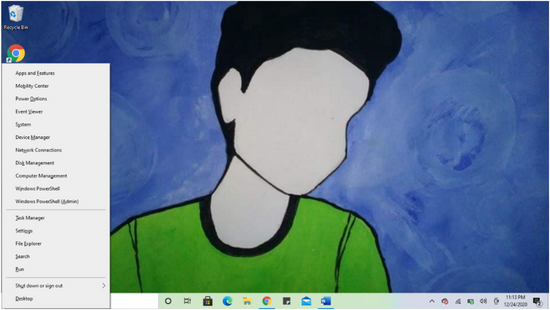
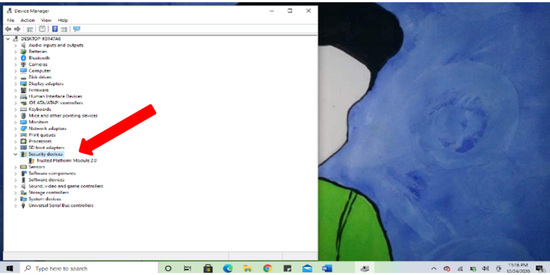
- Open the Device Manager using Windows Key + X.
- Click Security and Devices. Check if you can see the TPM and its version number. Note that if it exceeds version 1.2, then it can support Bitlocker.
- If You Don’t Have TPM
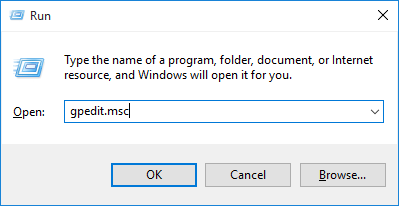
- If you don’t have a TPM, then proceed to Windows key + R to open the run command and type in the command gpedit.msc. Click OK.
- Click to expand Administrative Templates, to Windows Components.
- Click to expand BitLocker Drive Encryption and Operating System Drives.
- Double-click on the Require additional authentication at startup.
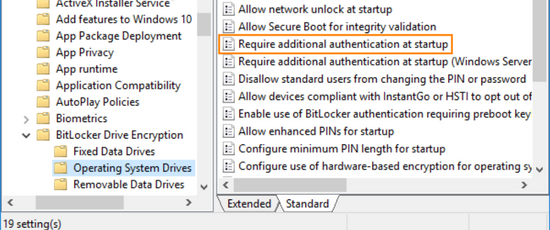
- Select Enabled.
- Make sure to check the option that allows BitLocker without needing a compatible TPM. You should however note that this will need a password or a startup key on a USB flash drive.
- Click OK to complete this process.
Enabling Bitlocker on your Operating System
- Open the Power User menu by pressing the Windows key + X. Then select Control Panel.
- Click System and Security.
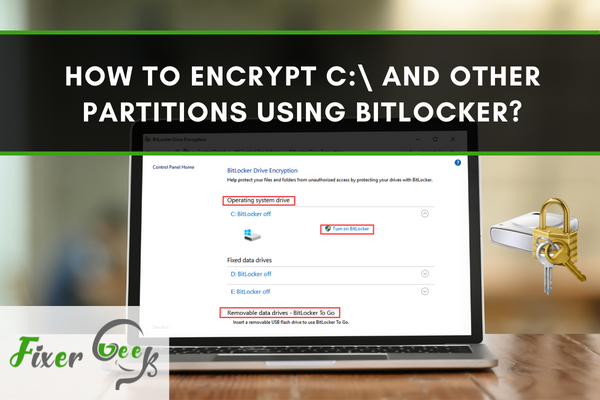
- On the System and Security tab, go to BitLocker Drive Encryption and click on it.
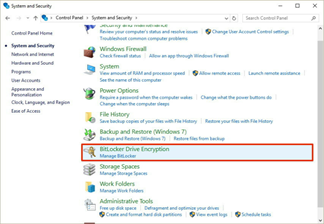
- Turn on the BitLocker.
- Choose a way on how to unlock your Bitlocker. You either use a USB drive or employ a password using the upper and lowercase letter, number, and even symbols for maximum security. Choose a strong password that only you know of.
Note: You cannot access the encrypted partition without your USB drive or password. Hence, you should choose your password wisely.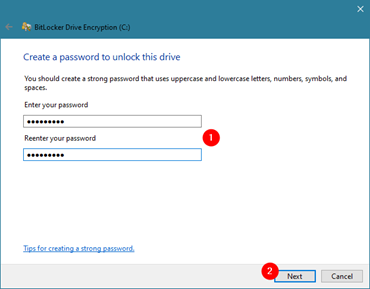
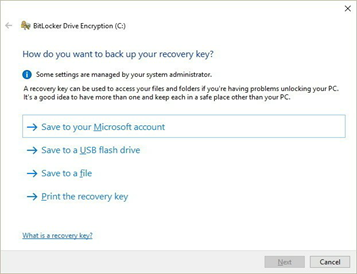
- IN case you forget your password, you will be offered a recovery key using any of the following choices: Save to your Microsoft account, save to a file, print the recover, or save to a USB flash drive.
- Choose the encryption best suited for you. You have two choices:
* Encrypt used disc space
* Encrypt entire drive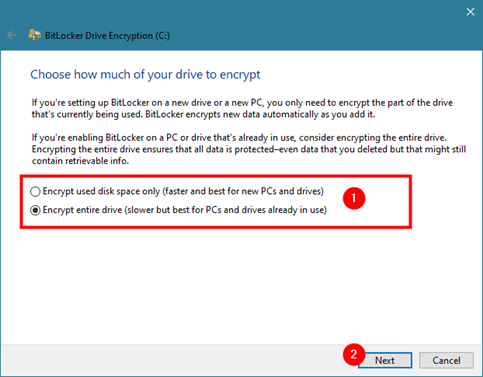
- The next step is to choose your encryption mode between:
* The new encryption mode, which works best for fixed drives on the device.
* Compatible mode, which is suitable for drives that can be moved from the device.
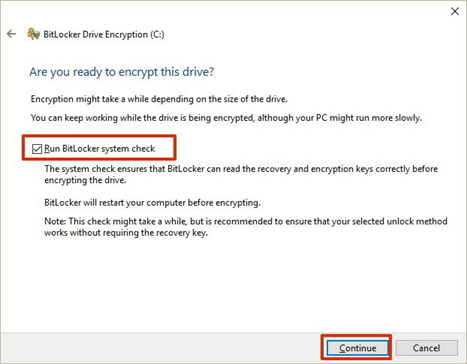
- Don’t forget to check the Run Bitlocker system check and then click Continue.
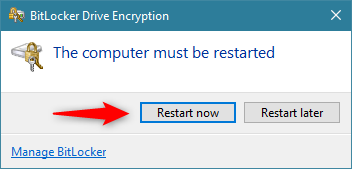
- Bitlocker will need to restart/reboot your PC to go through with the encryption process. So, click Restart Now.
- Finally, reboot your pc and enter your password to unlock the drive. If your PC has a TPM chip, then your device will start as usual. Without a TPM, the device will prompt you to enter your password to unlock the drive.

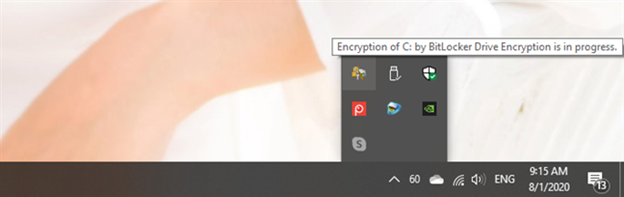
- After opening your device, sign in to your Microsoft account. You can check your encryption status by clicking on the Bitlocker icon.
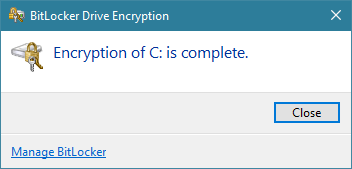
- Your drive encryption is finally complete.
Summary: encrypt C:\ and other partitions using BitLocker
- Press Win + X and select “Control Panel” from the menu.
- Select System and Security from the Control Panel.
- Now, click on “BitLocker Drive Encryption”.
- In the BitLocker Drive Encryption window, click on “Turn On BitLocker” next to the hard drive that you want to encrypt.
- Now select “Use a password to unlock the drive” and in the box below enter a password you can easily remember and again in the Confirm Password box.
- After entering your password, click on Next.
Conclusion
Bitlocker is a type of security feature that helps keep your mind at ease and only opens with proper authorization programmed by the owner. However, it is also important to remember that using any type of encryption can slow your device due to your Bitlocker running in the background. However, enabling and setting up an encrypted partition will be worth it especially if you value your privacy and online security.
