When it comes to printers, Brother is undoubtedly one of the best brands. It's an affordable printer that can produce high quality prints. The only problem is, learning how to install a Brother printer on Mac can be difficult.
Brother Printers are one of the most famous printers used in both the workplace and home. These printers are famous for user-friendliness, durability, and quality. However, some people find it hard to install a brother printer on Mac. It’s not as hard as you think.
I will show you how easily you can install a Brother printer on your Mac in this step-by-step guide. By the end of this guide, you will know everything about how to install Brother printer on Mac even if you don’t have a CD.
Downloading the Driver
At first, you have to download the driver installer. If you have a CD, then you can simply install from it. But if you don’t have one, you have to download the driver.
- Go to your browser and search for “download brother driver” on google.
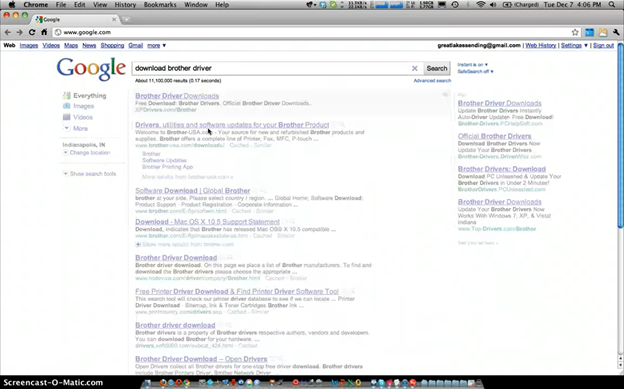
- Alternatively, you can go to this link: www.brother-usa.com/download.
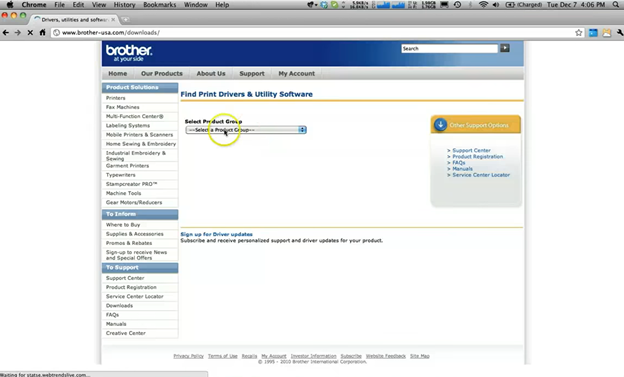
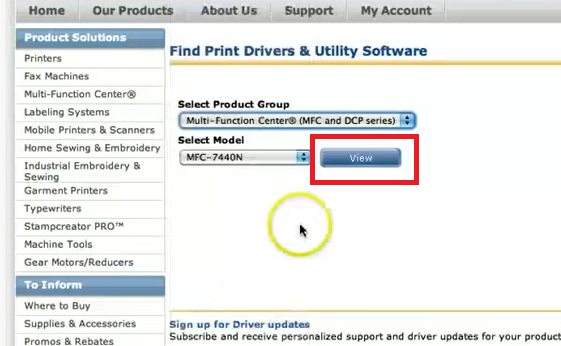
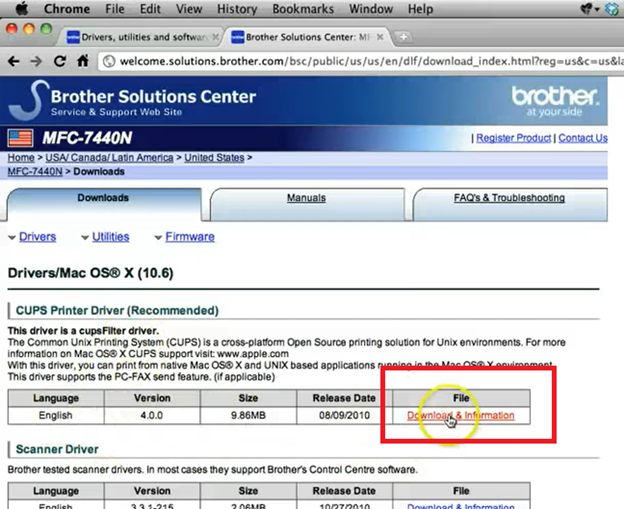
- Open the drop-down menu under “select product group” and choose your printer.
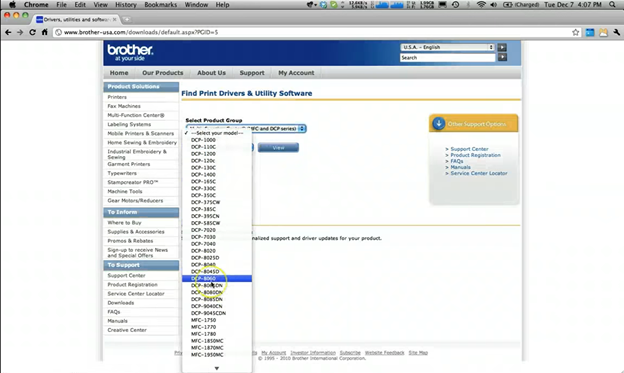
- Now choose the model of your printer.
- Click the “view” button.
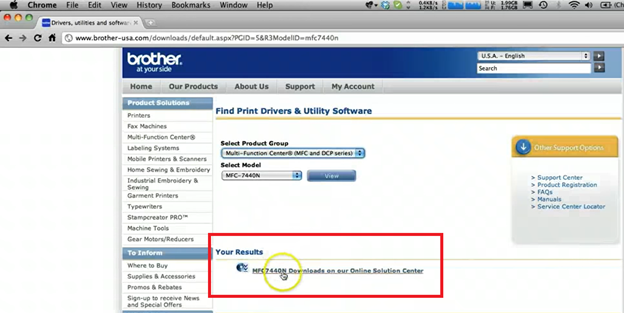
- A download link will be shown just below. Click the link to go to the download page.
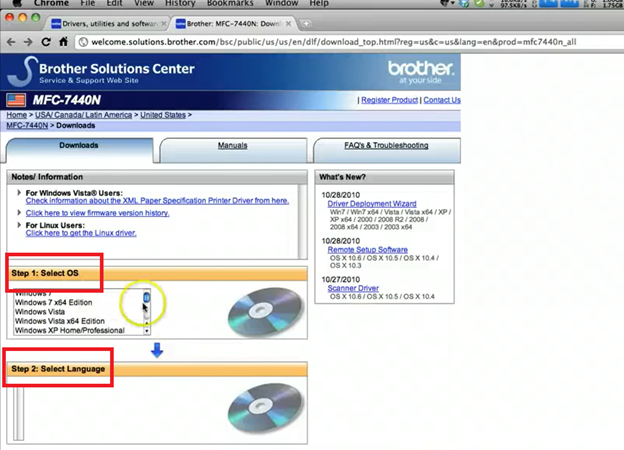
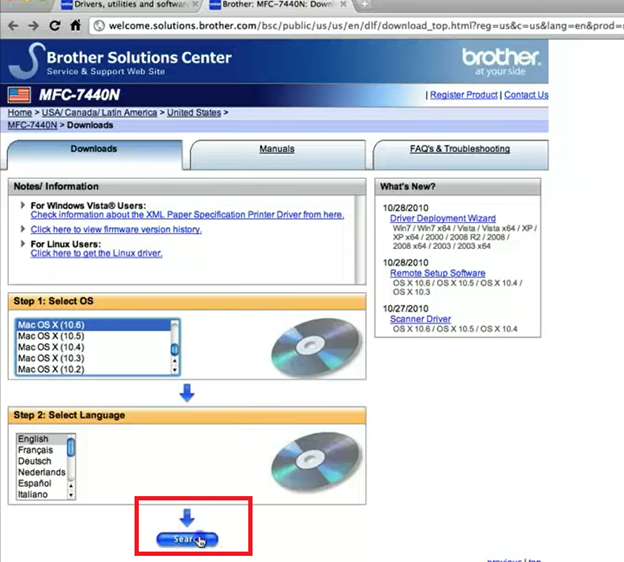
- Now choose your operating system and language.
- Click the “Search” button below.
- Click the link under the “file” column as shown.
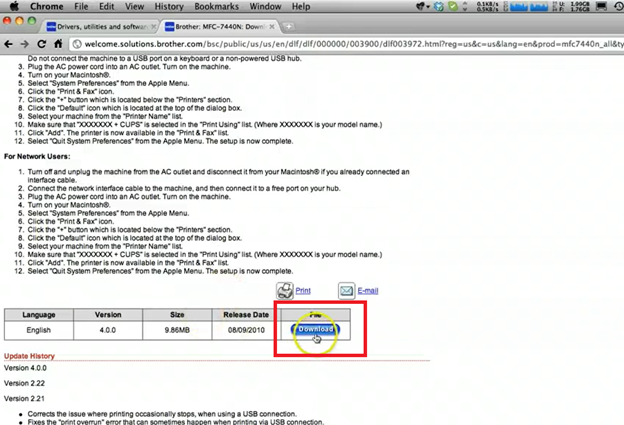
- Hit the “Download” button.
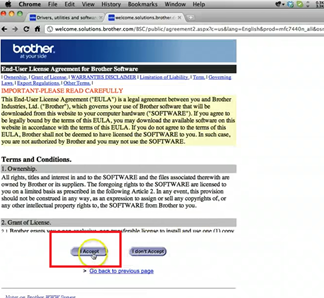
- Accept the terms and services by clicking “I Accept”.
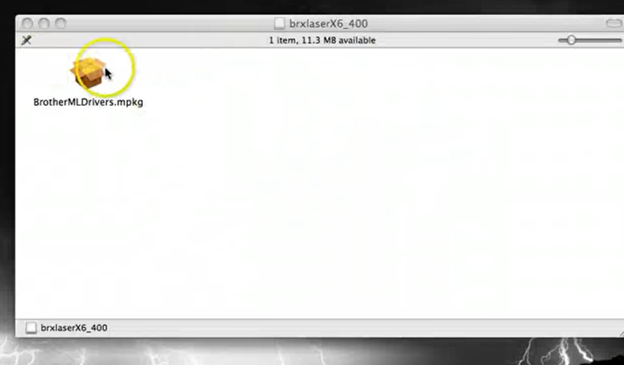
- Your Driver will be downloaded shortly.
Installing the Driver
Now I will show you the process of installing the driver.
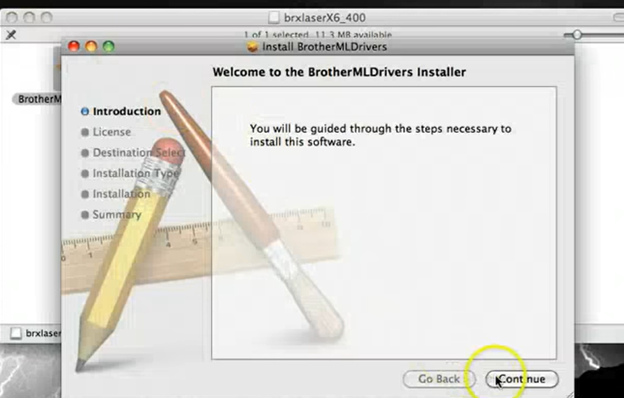
- Launch the driver installer that you’ve just downloaded.
- Click the “Continue” button.
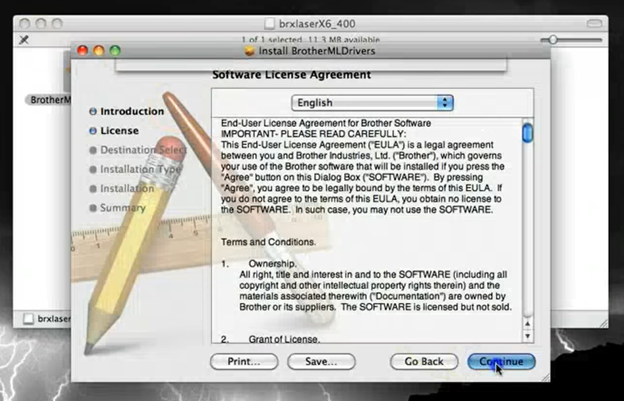
- Choose the language “English” and then accept the agreements.

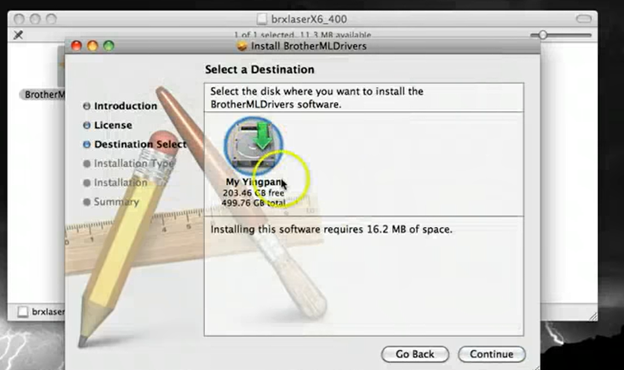
- Select the location where you want your driver to be installed.
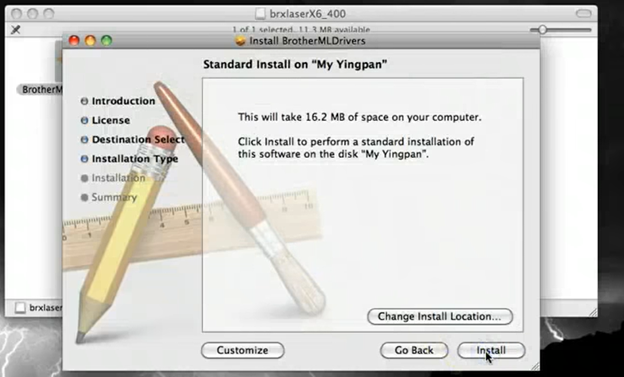
- Now hit the “install” button.
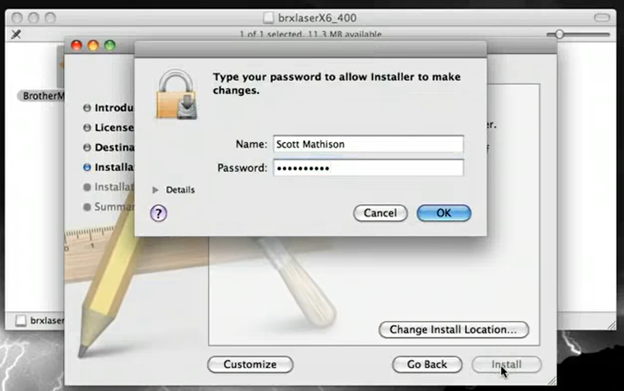
- If you are asked to give your password, enter the password.
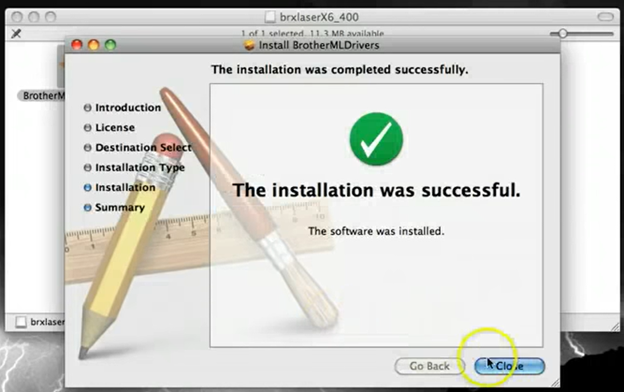
- After a while, the installation will be done.
- Close the installer.
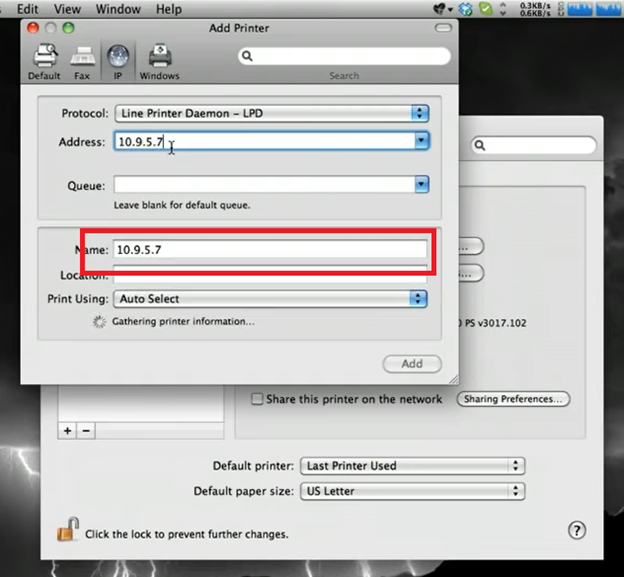
Adding the Printer in System Preferences
Even when you install the driver, the printer won’t be found in the system preferences. So you have to manually add it. Here is the process to do that:
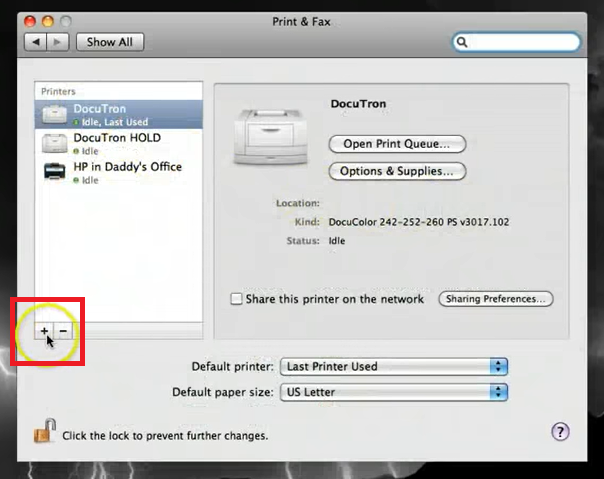
- Open “System Preferences”.
- From the menu, choose the “Print & Fax” icon and open it.
- A new window will open and show you the list of printers. Here you have to add the “Brother Printer”.
- Click the “+” icon below.
- Provide the required IP address for the printer.
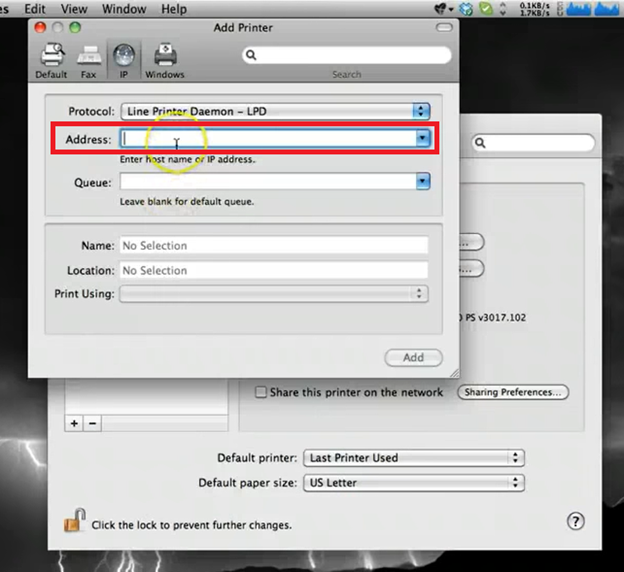
- Below, in the “Name” box, use the same IP address.
- Choose your printer from the drop-down menu for “Print Using”.
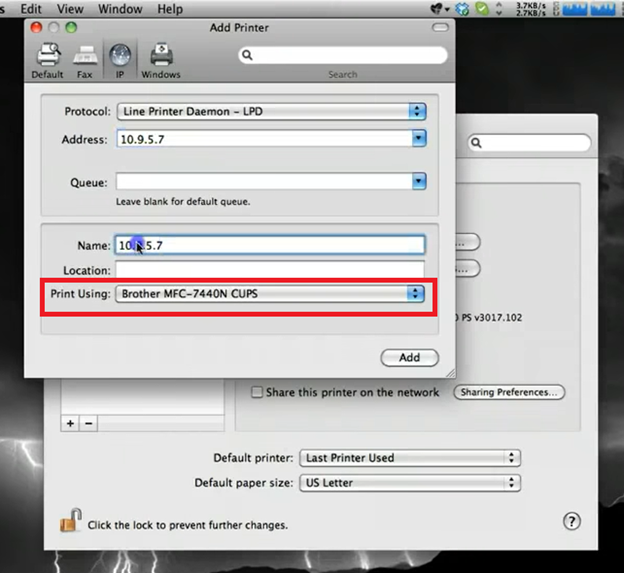
- Now click the “Add” button.
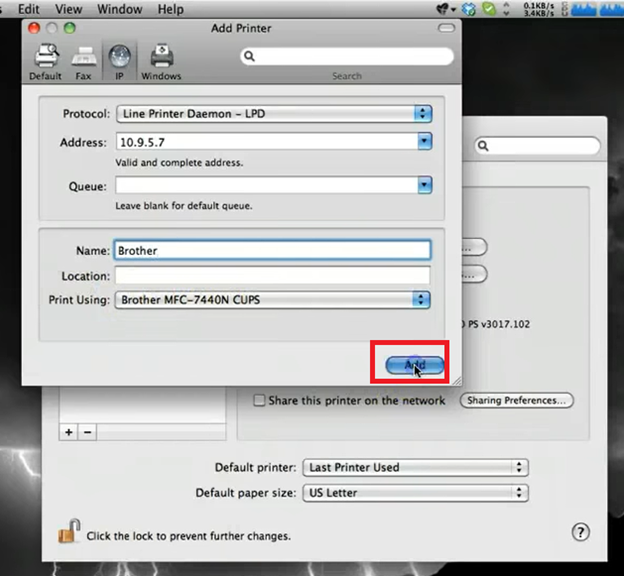
- The new Brother printer will be added to the list.

Summary: Install Brother Printer on Mac
- Download the latest drivers from Brother.
- Install the drivers on your Mac.
- Connect the printer to your network.
- Add the printer to your Mac.
- Try and print with the printer.
