Are you struggling with this question – How to install the Cisco VPN client on Windows 10? No problem. The following article will answer your question and solve the issue of installing a Cisco VPN connection on your computer.

Cisco VPN client is the app that helps you to build a VPN on your computer. When you update your computer the configuration may be changed and your cisco may install again. To avoid the problem I discussed the process that won't make a problem when your windows get updates.
The process to install Cisco VPN client on Windows 10
- First, open any browser on your PC and also open two windows on the browser.
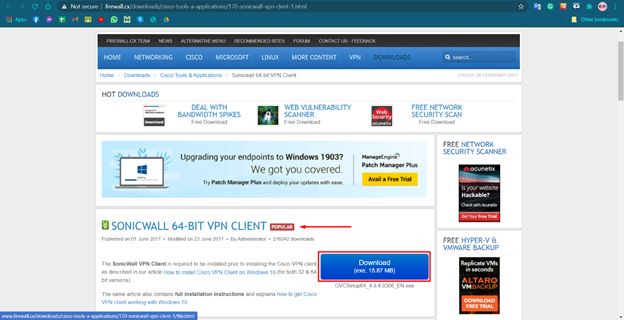
- Now go to the first window to download the SonicWALL Global VPN. Go to the this link.
- Now click the ‘Download’ button right side of the SonicWALL Global VPN name.
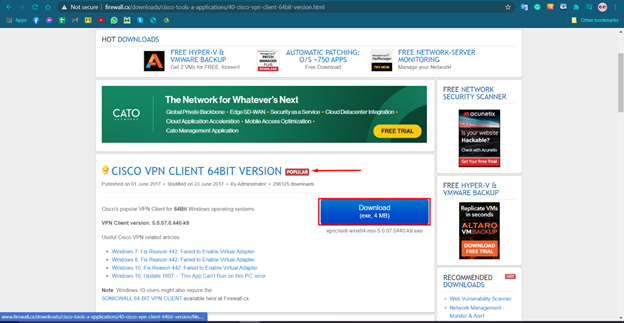
- Now open the 2nd tab to download the VPN Client for Cisco.
- Enter this URL for 64-bit variant or click on this URL to download the 32-bit version of the application.
- At this time click on the ‘Download’ button.
- Now go to the File Manager of your computer.
- And go to the location where your Cisco VPN Client was downloaded.
- Now create a new folder in the same location.
- Then Rename the folder as your wish. Rename folder related to the VPN; like VPN client-win10.
- At this time select the file of the Cisco VPN Client and cut it by pressing Ctrl + X on the keyboard.
- Now open the folder you created before.
- Paste the Cisco VPN Client file in the folder by pressing Ctrl + V on the keyboard.
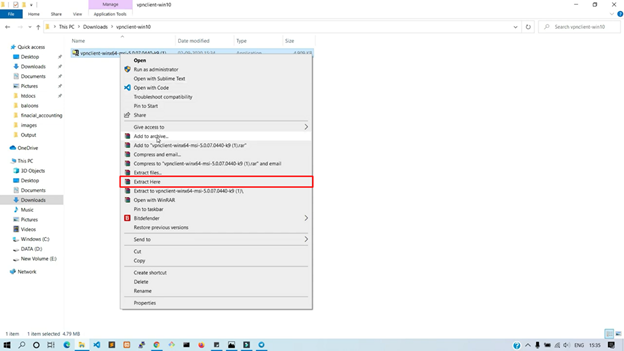
- Again, select the Cisco VPN Client file and move the mouse pointer on the file. Then click the right button of the Mouse.
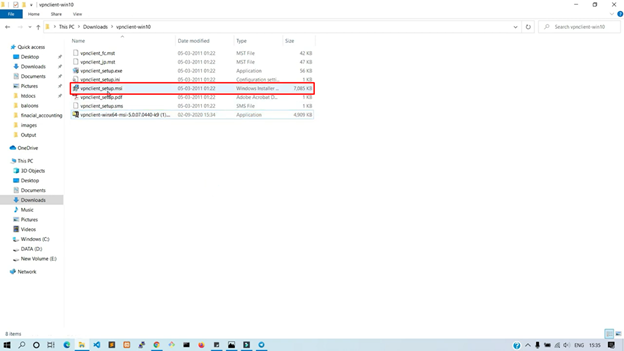
- Now click on the ‘Extract Here’ option. Several new files will be unzipped in this folder.
- After that double click on the ‘vpncliant_setup.msi’ file to install it.
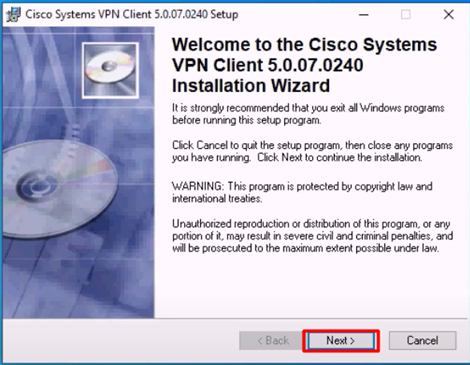
- At this moment Cisco VPN Client installation wizard will appear on the screen. Click on the ‘Next’ button to continue the installation.
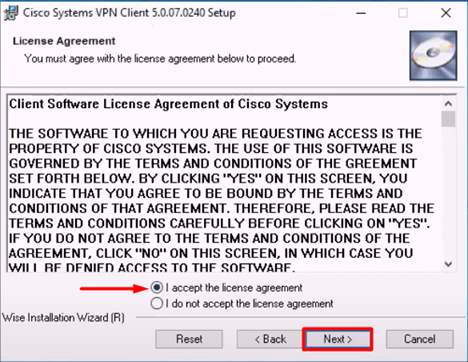
- Then License Agreement page will be shown. Now click on the ‘I accept the license agreement’ option after that click on the ‘Next’ button.
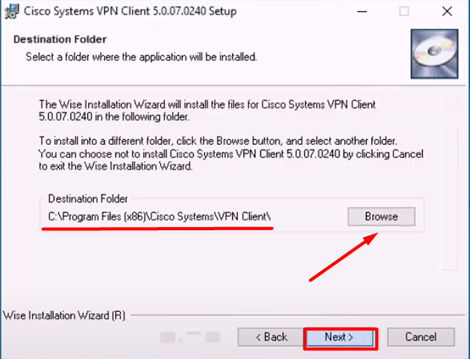
- From the next window choose the location by clicking on the ‘Browse’ option. By default, it is set to the C drive Program File location. And now, click on the ‘Next’ button on the next page.
- This type of application is capable to change the Windows System; so that a confirmation pop up window from the Windows operating system for permission. Click ‘Allow’ to initiate the installation process.

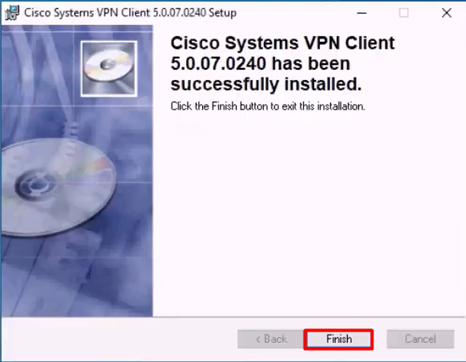
- Now it will take some time to process the installation. After completion of the process, the successful massage will be shown. Now click on the ‘Finish’ button.
- In the windows search bar, search ‘Registry Editor’ and open the application.
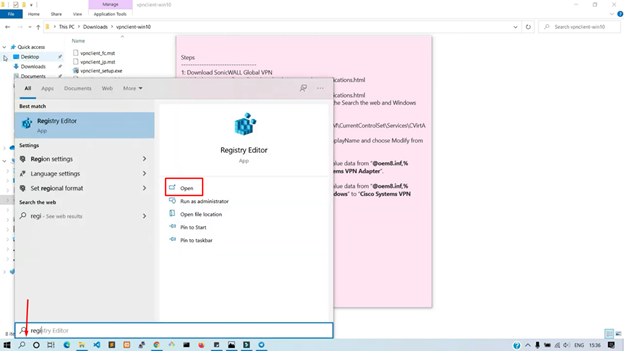
- Now like above give the windows permission by clicking on the ‘Yes’ button.
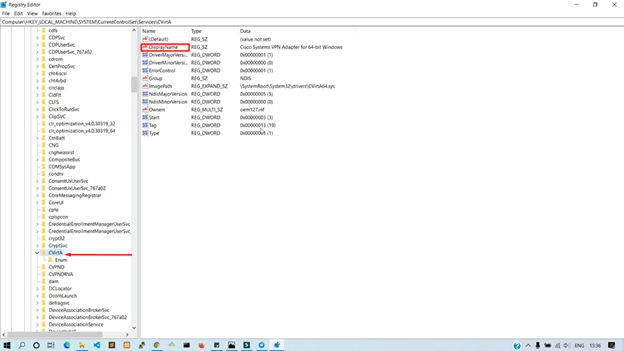
- Here you have to make some configuration to run the Cisco VPN Client perfectly. At first click on the ‘HKEY_LOCAL_MACHINE’ option.
- Then click on the ‘SYSTEM’ option.
- Now click ‘Current Control Set’
- After that click on the ‘Service’ option.

- Scroll down the page and double click on ‘CvirtA’. Then you will find the ‘DisplayName’ reg_sz file.
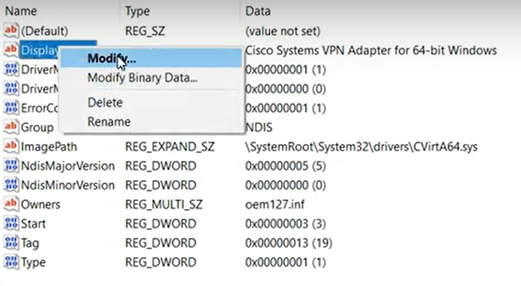
- Click the right button on the ‘Display Name’ and choose the modify option.
- Now change the value data to ‘Cisco Systems VPN Adapter for 64-bit Windows’ for 64-bit machine and ‘Cisco Systems VPN Adapter’ for a 32-bit machine. Press ok to complete the process.
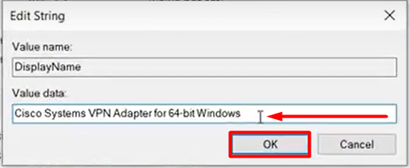
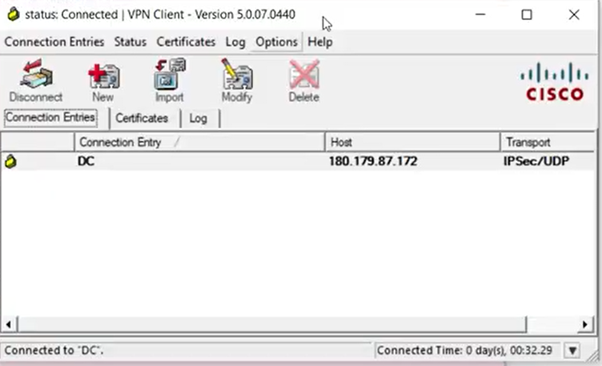
- Now open VPN Client and your process are completed.
Summary: Install Cisco VPN client on Windows 10
- Download the Cisco VPN client installer.
- Extract the .zip file.
- Open the extracted folder, you should see 6 files.
- Click on Win10/8.1/8/7/Vista 64-bit and install the application.
- After installation, go to Start -> Cisco -> Cisco AnyConnect Secure Mobility Client.
- Enter your user name and password to connect to the server. Click Connect.
