Have you ever played Minecraft and wanted to install different texture packs to change the appearance of textures in the game? By applying new packs you can customize your game, make it look better than before, or even make your Minecraft look like a completely different game. In this guide I'll show you how to install texture packs in Minecraft on Windows 10.

Minecraft is commonly known as a world-building game that allows you to construct environments. Textures play a vital role in the realism and creativity involved in this activity. It is for this reason that we understand the influx of questions regarding the installation of texture packs, one that the Windows 10 edition was known for.
With that, let us give you a quick overview followed by a simple step by step procedure to help you out.
Minecraft: the Old and the New
The new Minecraft Windows 10 version has been out for a while, but there still have been qualms about this upgrade. This can be derived from the fact that the Java edition works as a full application that has plenty of resources to use.
Minecraft Windows 10, on the other hand, is a pocket edition that was designed to accommodate mobile users. With that, one of the FAQs about Minecraft involves texture packs and how to install them.
Prior to installation, you need to know that two versions exist in the Minecraft development, the Java and the UWP. Do take note that these are not compatible with each other. This is why you should always go through the descriptions in the repository.
However, you should not be daunted by the new Windows 10 edition since it allows for more modifications in the game.
How to Install?
Texture packs in the Windows 10 edition of Minecraft are also called PE resources. Here’s how to go about the installation:
- You first have to download the texture pack. There are plenty of online resources out there, one of which is planetminecraft.com. Save it on your desktop for easy relocation.
- Use an extraction software like Winrar or 7-Zip to extract the texture pack.
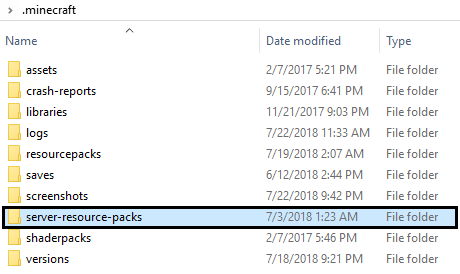
- Take note that you will need to create a resource pack folder to store the texture pack. This is the folder where Minecraft normally stores all its texturing material.
This location may vary for GNU, Linux, and macOS users.
- Transfer the extracted texture pack into the resource_packs folder. This way, Minecraft can have easy access to the file.
- You can now open Minecraft.
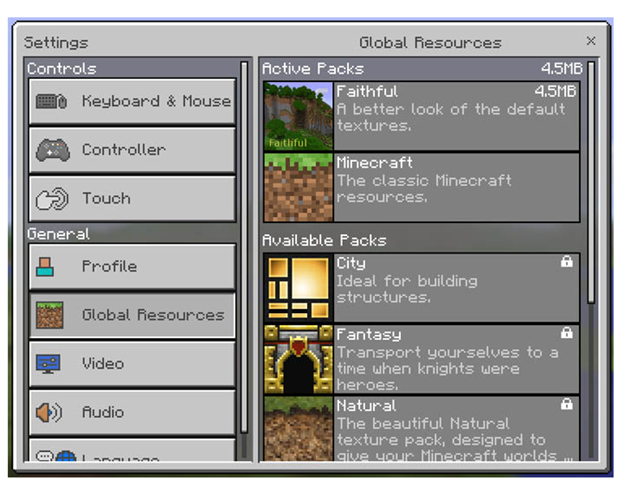
- Go to your “Settings” and click “Global Resources” which is located at the left sidebar. Look for the name of the texture pack you downloaded.

- Enable this texture pack. Make sure that it is included in the list of texture packs that are available for use.
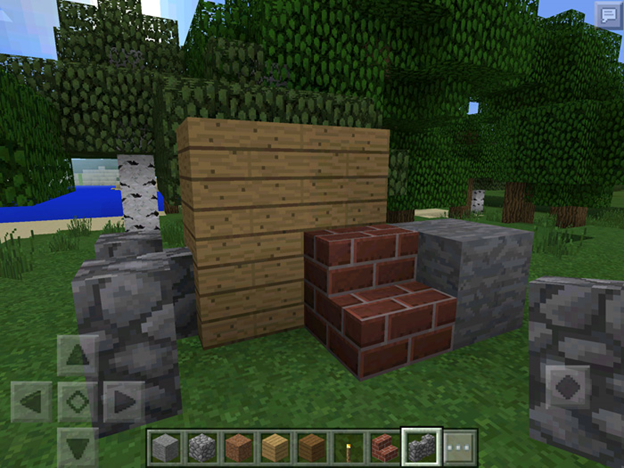
- Once these settings are applied, the resource pack should appear immediately as it is used. You can then start using the textures while building the world.

- There may be times when Minecraft fails to auto update, and you will not see your textures being applied. If this happens, you can exit the software and eventually re-open to check the status of the screen.
If you are unable to locate or use the texture pack you downloaded, it could possibly be because of incompatibility because it is a Java version texture pack.
With all that being said, we hope that this guide has been of help to you. Best of luck with your world-building activity!
Summary: Install texture packs in Minecraft in Windows 10
- Open Minecraft for Windows 10.
- Click the button with three horizontal lines in the upper left corner.
- Select Settings from the drop-down menu.
- Click Global Resources to open the Resource Packs window.
- Select Open Resource Pack Folder from the Resource Packs window.
- Copy the texture pack file into the folder you just opened, then close that folder.
- Press Esc while in Minecraft to open the Game Menu. If a resource pack is installed, it will appear here in a list, enabled by default and ready to play with. You can choose a different one by clicking on it, or you can use minecraft's built-in resource packs by clicking on "Default Resource Pack".