- How to make Wamp Server run online?
- Step 1: Identify the computer’s IP address
- Step 2: Set up your computer’s network
- Step 3: Create a firewall allowing inbound traffic on your computer
- Step 4: Make the WAMP Server available on the Internet
- Summary: Make a Wamp Server Accessible on the Internet
- Conclusion
How do I make a WampServer on my local network accessible on the internet? This is a very common question from people who are either setting up their own development environment or setting up a website on the internet. We shall answer this question to make your search easier.
Are you wondering how to make your computer’s wamp service run online? Well, you’ve got yourself lucky today. Following this guide will help you get the wamp server accessible on the internet. But first, download the wamp server online if you haven’t had one on your computer yet.
How to make Wamp Server run online?
Step 1: Identify the computer’s IP address
The first on the list of this tutorial is to figure out the IP address. To do this, go to the Windows command prompt. You can quickly find the command prompt through the search bar on your computer.
Once you open the command prompt, type “ipconfig.”
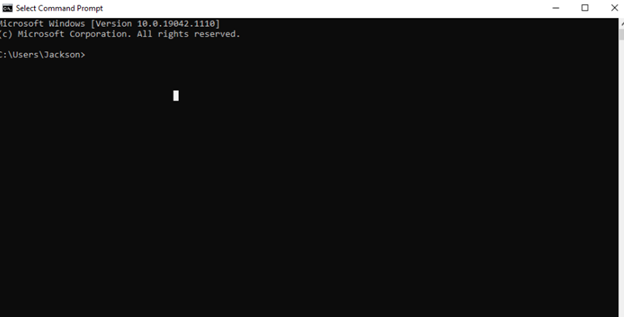
After you type ipconfig, you will see the image below on your screen. Take note of your IP address as shown.

You can also assign a permanent address for your computer. This will prevent you from IP configuration next time you will want to run the wamp server. Feel free to search “How to get a permanent address for a computer” online.
Step 2: Set up your computer’s network
After you set up your device’s basic network or after it is properly configured, set up the virtual host for apache through the WAMP. Just launch the WAMP server, go to the Apache menu, and click “http.vhosts.conf.” Wait until the configuration textile shows up.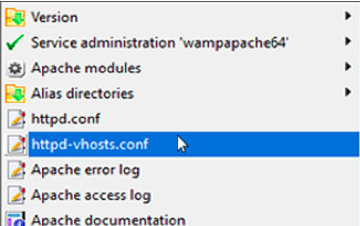
Step 3: Create a firewall allowing inbound traffic on your computer
After the vhost configurations, you have to make a firewall to have inbound traffic in port 80. This is to allow your computer and network to access the webserver. Once you made a firewall, your firewall will start recognizing port 80 requests every time you enable it.
To start, go to the start menu
- On the search bar, look for “Windows Firewall Advanced Security.”
- Click Windows Defender Firewall once it appears.
- On the left menu, right-click “inbound rules.”
- Choose “New Rule.”
On the inbound rules, follow these steps:
- Rule Type: Port
- Port: Local Port 80
- Profile: Check all the box
- Action: Choose “allow the connection.”
- Name: You can type in the name you want.
Take note to enable the port 80 rule to run the wamp server. Now, every time you want to enter the IP address of your computer, you can type in: http:[inser IP Address of your computer]:80.
Meanwhile, for LAN development, you can also enter the hostname instead of your IP address. Just edit your computer’s hosts file at “C:\WindowsSystem32Driveretchosts.” This will make your computer solve the address.
Step 4: Make the WAMP Server available on the Internet
The final step, of course, is to make the WAMP server accessible online. The port 80 forwardings are required on your web server. To do this, go to your router through the default gateway address of your computer. Like most computers, the username is “Admin,” and no password unless specified by your network’s administrator or computer’s manual.
Once you have logged in, look for the port forwarding option the add the following:
- Your web server or computer’s IP address
- Protocol: TCP
- Port 80
If you get successful in following this quick tutorial, you can have your WAMP server online or accessible on the internet.
Summary: Make a Wamp Server Accessible on the Internet
- Open the WampServer Configuration
- Edit the httpd.conf File
- Remove Apache’s Default Listen Port
- Add Your IP Address to the Apache Configuration
- Allow WampServer in Windows Firewall
- Save and Restart WampServer
Conclusion
There are times that you are required to expose or WAMP to other devices, may it be the same network or not. A typical use for this is to share data stored in our PC through the internet. These data could be movies, presentations, music, and whatnot.
Allowing you or anyone to access your WAMP server online is also helpful when you lose or break your PC. This will retrieve all essential data kept on your computer.
