How To Remove And Delete Synced Photos From An IPhone?
387 Views
- Delete your synced pictures from your Apple iPhone by using iTunes
- Method 1: Uncheck your synced photos
- Method 2: Create A Fake or Vacant Folder to Eliminate Synced Photos from an iPhone
- Finding it difficult to delete synced photos using iTunes? Then try it without iTunes
- Summary: Remove and delete synced photos from an iPhone
- Conclusion
Delete your photos on the iPhone is a pretty common task for those iPhone owners who take a lot of photos. Imagine that you just sync few thousand photos from iPhone to your computer using iTunes on a routine basis. And then you decide one day that you no longer need those photos on your computer. How to remove and delete synced photos from an iPhone?
Want to delete your synced images? It is a lot easier to delete the pictures that are present on the camera roll, whereas deleting the synced pictures is worrisome as it does not show an option for deletion. Many users have been demanding this option for a long time now. Users expect manageable and simple methods in such cases. There are two different methods that you can apply to remove your synced photos from your gallery instantly. You may use iTunes or avoid using iTunes as per your preference.
Delete your synced pictures from your Apple iPhone by using iTunes
iTunes is known for importing photos, but you can use it to remove your synced photos too.
Method 1: Uncheck your synced photos
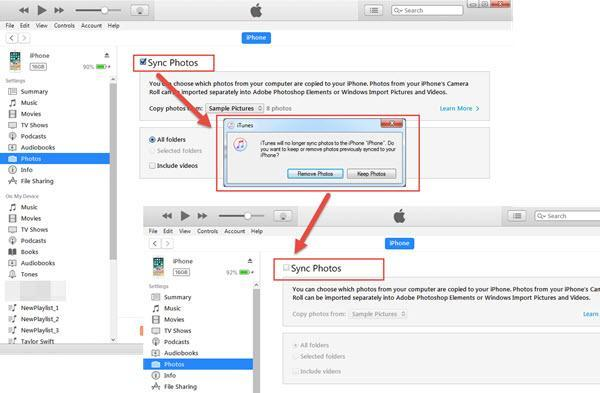
Start by opening iTunes and connect a USB to your computer. In this matter, the computer can be life-saving for you. After this, there will be a phone shaped icon present on the screen. Click on it and select the ‘photos’ option from the drop-down menu below on your iPhone screen.
Uncheck the option for 'Sync photos' and you will get a notification that all the synced images have been deleted .Then a question will pop-up saying “do you want to keep these synced photos or remove them from the iPhone?”
Method 2: Create A Fake or Vacant Folder to Eliminate Synced Photos from an iPhone
Sometimes when you choose sync-photos from another mediator, the snapshots will also be saved in ‘My computer’ on iPhone like iTunes. Hence, the synced photos will not disappear just by unchecking them. So, make a fake or vacant folder to replace the images from ‘My computer’ to delete it.
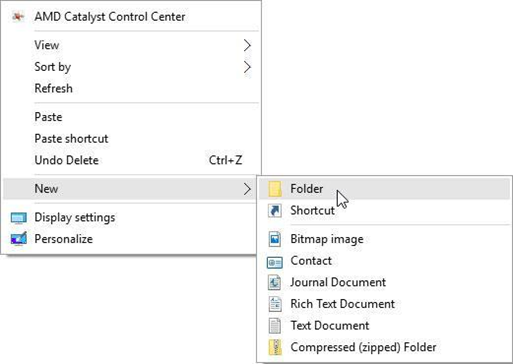
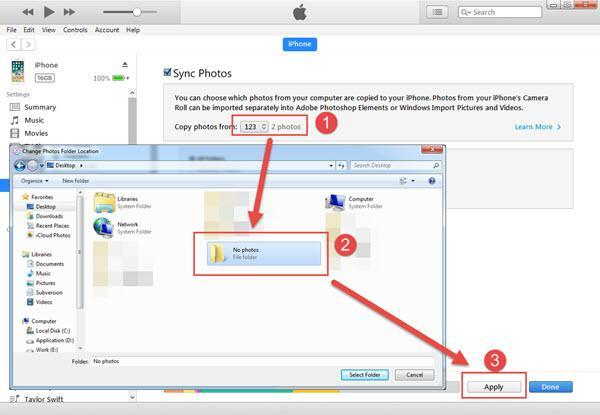
Build a free or falsified folder on your computer with no photos.
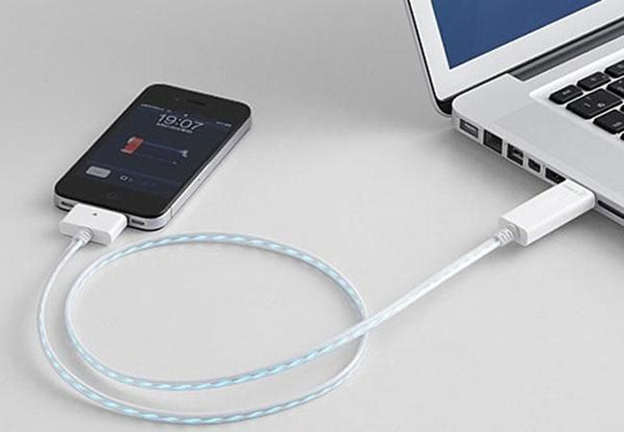
Connect your iPhone and computer by a USB cable and transfer the photos by clicking on the phone shaped icon. Then, select the ‘photos’ option from the menu that will appear on the screen.
Enable it and click on 'choose folder' from the drop-down menu to select the fake folder that you just established.

Click on the 'Apply' button in the right corner of iTunes to start syncing. Once completed, the folder containing synched images will be replaced by the empty folder.
Finding it difficult to delete synced photos using iTunes? Then try it without iTunes
A great idea to remove or delete your synced photos without iTunes is to make full use of the iCloud present on your iPhone.
Method 1: By iCloud on iPhone
If your photos are synced to iTunes, then turning on the iCloud photo library will solve the issue. When you turn it on, the statement will pop-up that "Photos synced from iTunes will be removed" as iTunes and iCloud do not support each other. Hence, turning on one of them will automatically turn off the other one.
Method 2: By DearMob iPhone Manager
If using iTunes is complicated, then you can try DearMob iPhone Manager. It is superior as compared to other similar products. There are no limitations in deleting the synced photos.
Download DearMob iPhone Manager on your computer and open it. Connect your iPhone and computer and tap on ‘Trust’ if any notification appears.

Tap on ‘Photo Transfer’ on the main UI of DearMob iPhone Manager, and select the synced photos that you want to delete.
Select ‘Delete Photo’ on the top bar of this software and then click on the sync button. Now, it will delete all the synced photos.
Summary: Remove and delete synced photos from an iPhone
- Delete synced photos from an iPhone.
- Launch the Photos app from your Home screen.
- Tap Albums in the bottom right corner.
- Tap Camera Roll.
- Tap Select in the top right corner of the screen.
- Tap each synced photo you want to get rid of, then tap Delete in the bottom right corner when you're done selecting.
Conclusion
These are some of the simple steps that you can apply to delete your synced photos. All the above-mentioned steps work and will give you satisfactory results. If you encounter any trouble, then feel free to let us know. Choose the best method that suits you to remove your synced photos.
