Amazon elastic compute cloud EC2 is the foundation of an effective ecommerce strategy, so whether you are starting a site or looking to improve your current site, Amazon is a good place to start. Here's everything you need to know about using Amazon EC2.
Amazon Elastic Compute Cloud is also known as Amazon EC2 is web maintenance application that administers safe, adjustable compute space in the cloud. It is constructed to produce web-scale cloud computing effortless for designers and developers. Using Amazon EC2, you can make a virtual server that is called an instance. You may arrange and design the operating system and tools that work on the instance. So, if you are a web developer that works on cloud computing, you need to know how to use Amazon EC2. In this article, we will give you a proper idea about how to use Amazon EC2.
Before You Get Started
For starting to use Amazon EC2, you first have to sign up for Amazon Web Services (AWS). Amazon EC2 offers an AWS Free Tier to the account that registered not more than twelve months. So. You can use the free tier options and use amazon EC2 without paying. So, the basic you should know about Amazon EC2 is:
- To commence an instance
- Join to the instance
- Conclude or terminate the instance
You will gain knowledge about these from the article below. So, set up an amazon web service to use EC2 and follow us along.
Using Amazon EC2
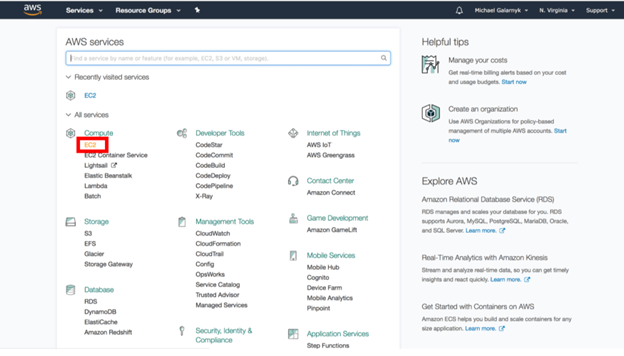
- Open the AWS Management Console from Amazon Web Services. Locate and select the EC2 service beneath the “All Services” section. Click on “Launch Instance”.
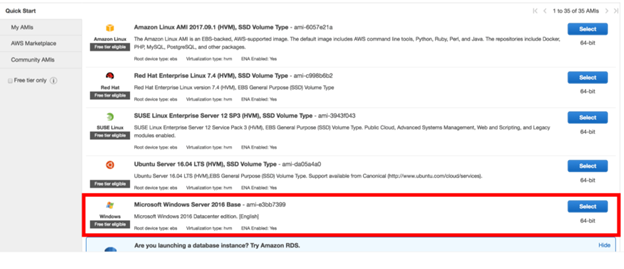
- Amazon Machine Image (AMI) window will emerge. You may choose the Microsoft Windows Server 2016 Base. This will make an instance that is based on Windows. Contrary to a conventional Linux based instance. It will influence how your instance will link.
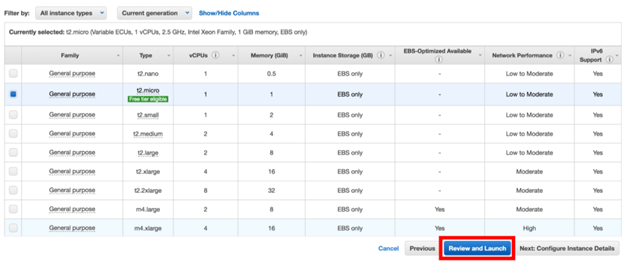
- After selecting the AMI, choose the instance type. Pick the “t2.micro” type which is free tier eligible. Select “Review and Launch” and proceed.

- A preview window consisting of all the given information will open. Review it and choose “Launch”.
- Then, you may pick a current ley pair or make a new pair. Avoid proceeding without a key pair. After making the new key pair, save and download it. Then, select “Launch Instances”.
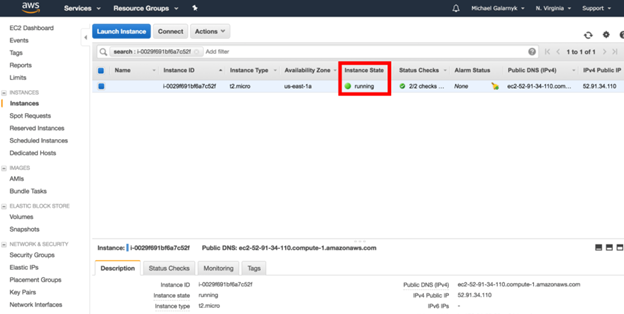
- After completing the whole process, return to the Amazon EC2 console. Advance to the next process, when the “Instance State” is running.
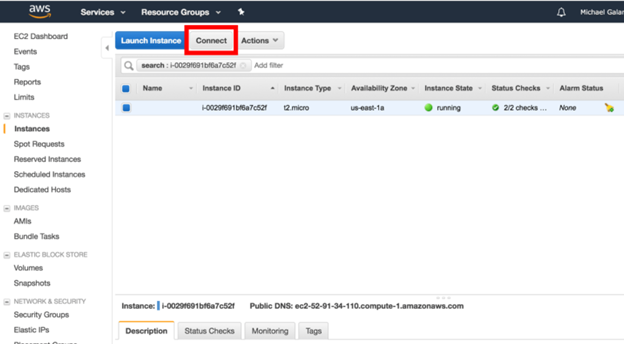
- Now, for connecting the instance, select “Connect” from the top toolbar.
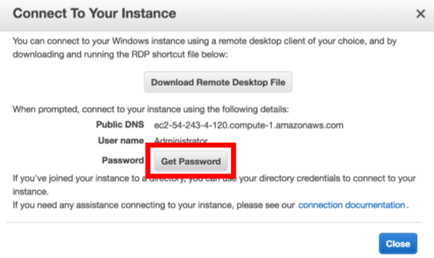
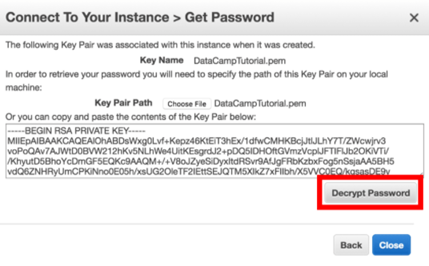
- Store the remote desktop file by downloading it. Select “Get Password”. Then, pick the downloaded key pair file and choose “Decrypt Password”. After decrypting, sign in to your instance.
- Access your RDP file. Then, put the password. And, it will join the instance with your windows.
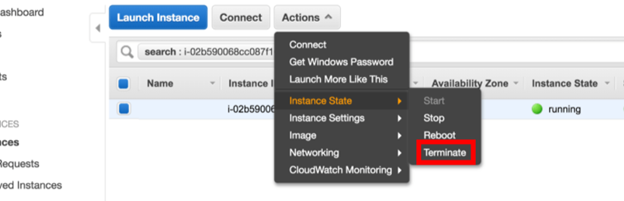
- After completing the use of the instance, you have to end or terminate it. Click on “Instances” from the navigation panel. You will see a list of instances that are running. Pick the instance you wish to stop.
- Then, locate the “Actions” option from the top toolbar and click on it. Select “Instance State”.
- It will give you two choices of either ending or terminating the instance. Click on “Stop” if you wish to work with the instance again. If you do not wish to use it ever again, choose “Terminate”.
So, following these steps, you can effortlessly use Amazon EC2.
Summary: Use Amazon EC2
- Clicking on the “Create Instance” button will bring you to the “Choose an Amazon Machine Image” screen.
- Amazon keeps track of each server instance using a set of key-value pairs called tags.
- Security groups act as virtual firewalls that control the traffic allowed to reach one or more EC2 instances.
- The only ports enabled by default on a new security group are port 22 for SSH and port 80 for HTTP.
- In order to communicate with your instance while it is running, we need to use ssh.
- Once logged into your instance, you will be prompted to enter the sudo password.
- You should have received everything that you need in order to connect to your instance via SSH!
