n If you are an HP user and want to tweak the performance of your computer, post the discussion below. If you know how to access the advanced bios settings hp, let us know in the comments section. Accessing Advanced BIOS Settings on any laptop can be tricky as its components are deep in the system. However there is a simple way to access Advance Bios Settings on HP laptops. This article will talk about with step by step instructions so that you can easily view and change bios settings on your laptop.

The BIOS settings contain some critical computer options changing, which may lead to some significant problems. For this reason, the BIOS settings are not directly accessible in desktops laptops like HP. But if you need to access the settings for some reason, you can follow either one of the following methods.
Accessing from Windows 10 Startup Menu
There are different models of HP laptops, for example, Pro book, Pavillion, Notebook, Z Book, and so on. The BIOS settings key may vary according to the models (i.e., F10, F12, F11, or F8).
If you know which one is the BIOS key, repeatedly press that key (i.e., F10) during startup, and it will directly take you to the BIOS settings. From there, you can use the left/right arrow keys to go to the “Advanced BIOS Settings” on your laptop.
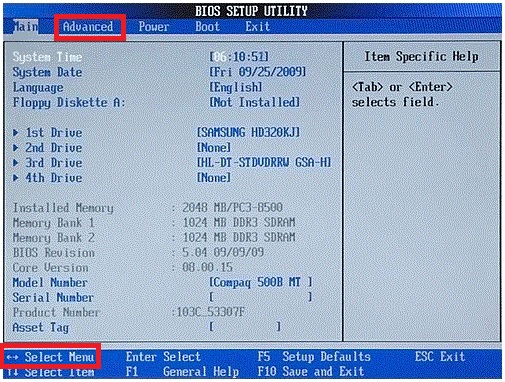
If you don’t know which one is the BIOS key, and if you have windows 10 installed, then you can go to the Windows 10 Startup Menu and find out the BIOS key for your laptop. To do this:
- Turn off your HP desktop/laptop completely.
- Turn it on again by pressing the power button.
- Wait until a message comes in the lower-left corner.
- When you see the message, press the “ESC” key on your keyboard.
- You will now enter the Startup Menu, where you will find the BIOS key.
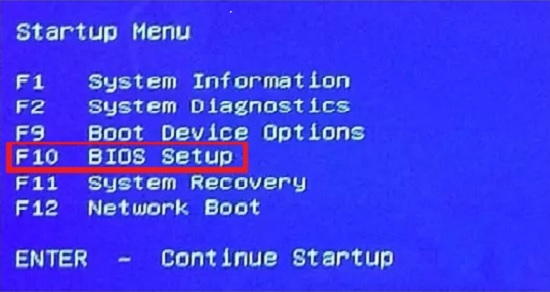
- Press that key (i.e., F10) to enter the BIOS settings.
- After that, use the “Right Arrow” key on the keyboard to go to “Advanced” BIOS settings.
Accessing BIOS without Restarting Windows 10 in HP
In this method, you can access BIOS settings using the Advanced Startup Options in Windows 10.
- Go to Windows “Settings > Update & Security”.
- Now from the left panel, click on “Recovery” and then click “Restart now.” This will let you enter the Advanced Startup Menu.
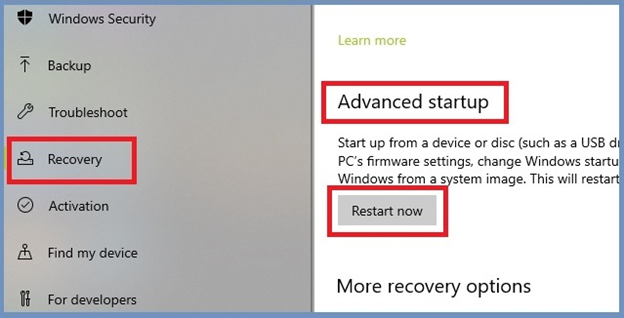
- Go to “Troubleshoot > Advanced Options”.
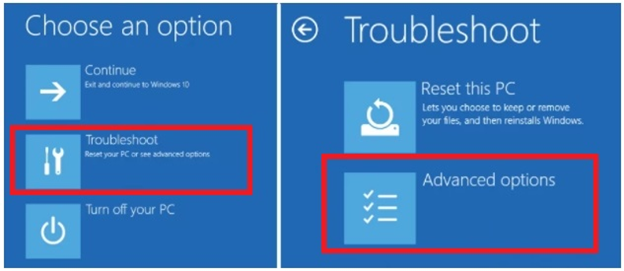
- Now Click on “UEFI Firmware Settings” .
- Hit the below “Restart” button.
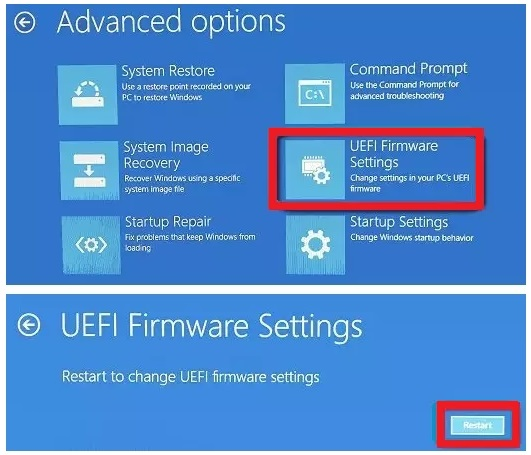
- Now you will enter the Startup Menu of Windows like before.
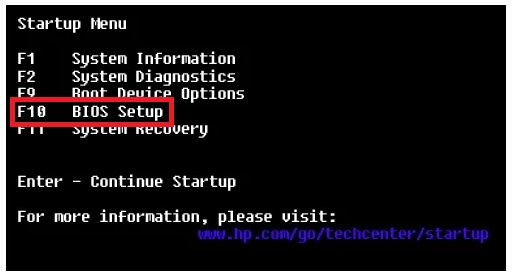
- From there, you can choose the related key (i.e., F10) to enter the “BIOS Setup” menu.
Accessing Advanced BIOS in Windows 7 on HP
If your HP computer has Windows 7 installed, follow these steps to access the “Advanced BIOS” settings:
- Turn on your HP computer if it’s off. If it’s on, restart.
- A black screen will quickly pop up and go right away to show you which button to press for entering setup.
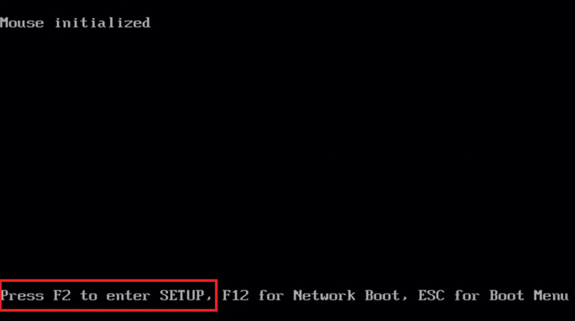
- Press that button (in this case, “F2”).
- Now navigate to the “” option (use “Down Arrow” key for this) and hit “Enter”.
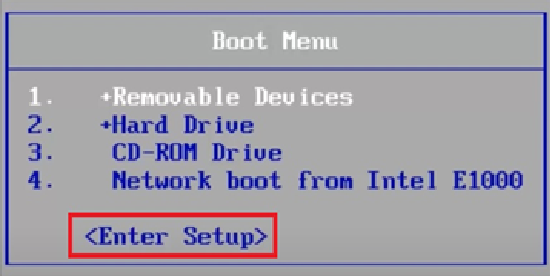
- You will now enter the BIOS Setup menu.
- Now use the “Right Arrow” key to go to the Advanced option.
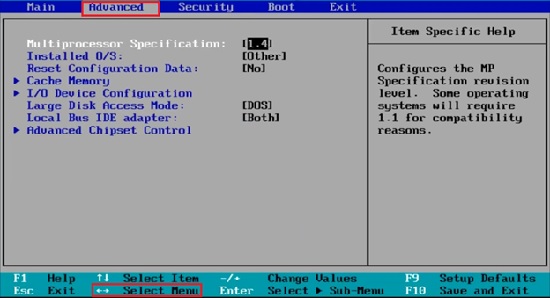
From the “Advanced BIOS Setup” menu (in both Windows 7 and 10), you change large disk access mode, choose either to reset the configuration data or not, and more.
Summary: Access to Advanced Bios Settings HP
- To access Advanced Bios Options on HP desktop or laptop, you need to enter the boot menu (press F10, Esc or F12 key repeatedly when booting your computer). It will display a list of devices that computer can boot from. Choose your internal hard disk and press ENTER. This will load a minimal OS and Advanced Bios Options screen will appear. If this does not work, try rebooting your computer two or three times.
- If you can’t get into bios menu, there is a less intrusive way to get into the bios. You can use BIOS key to access Advanced Bios Options for Windows 10/8.1/8/7 using BIOS Key . Just download and run it on your PC. It’s portable and works on both 32-bit and 64-bit versions of Microsoft Windows® Operating Systems.