In this post, I explain how to allow your Minecraft Server through a firewall. I've worked with a lot of servers and can tell you, running a server is fun, but everything has its difficulties. One problem particularly includes opening the required ports on your router so that external gamers can join your server.
Minecraft is an online multiplayer game in which players construct and demolish various kinds of blocks. It was created by Mojang Studios releasing initially on 18th November 2011. The game’s two main categories are Survival and Creative.
As of 2020, it has been ported to various platforms, has sold about 200 million units, and has 126 million players worldwide. To play Minecraft, you’ll need a server. It can become a problem if your Windows Firewall is blocking Minecraft servers. In this case, you have to set up new rules on the Firewall to allow the servers, and I’ll explain how to do that.
Allowing Minecraft Server through Firewall
To set up new inbound and outbound rules for Minecraft servers on the Firewall takes several steps. Follow the procedures below –
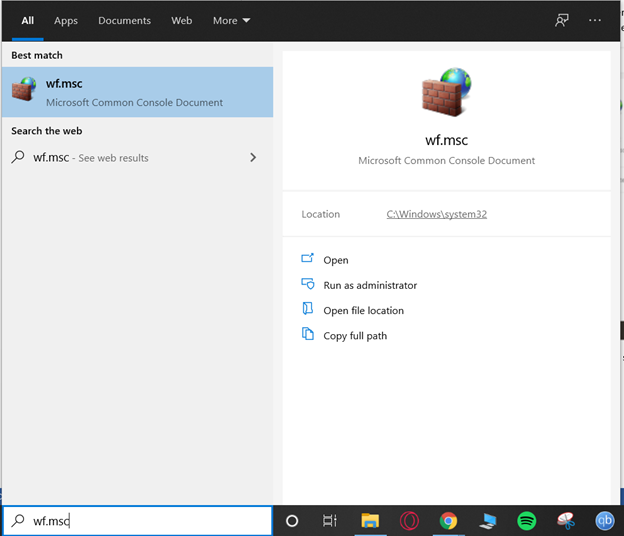
- Go to the Windows search bar and type “wf. msc” to open the advanced security of the Firewall. You can alternatively go to Control Panel and click Firewall, then select the “Advanced settings.”
- Open the “Inbound Rules” option.
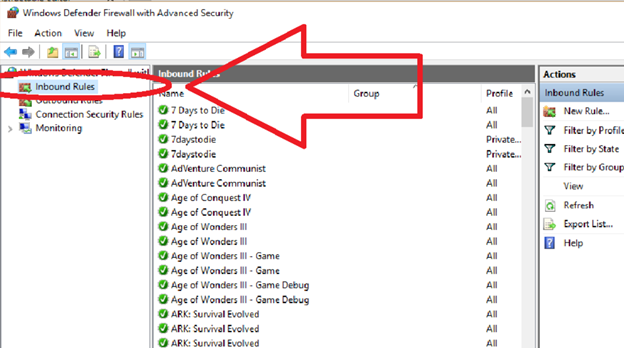
- Click on the “New Rule” option to open the available rule options.

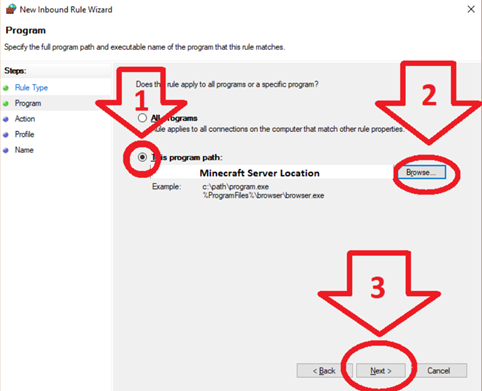
- Choose the “Program” option and click on the “Next” button.

- Select the option for a specific program and browse for the program location. We’ll have to tell the computer which application you want to create an exception for because it doesn’t know. Right-click on the program shortcut and open the file location. Browse according to that file location and click on the “Next” button.
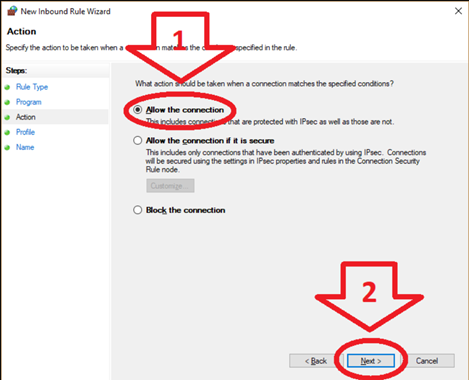
- Select “Allow the connection” and click on the “Next” button.
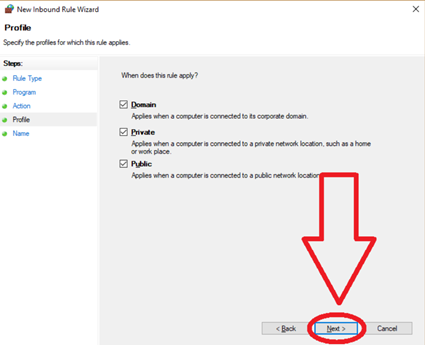
- Tick all the checkboxes for connection options (Public, Private, and Domain). Click on the “Next” button.
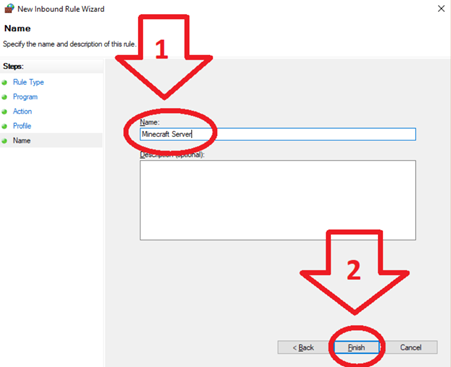
- Give the new inbound rule a name. You can put any name you prefer, but it should be relevant to remember it correctly. Click on the “Finish” option.
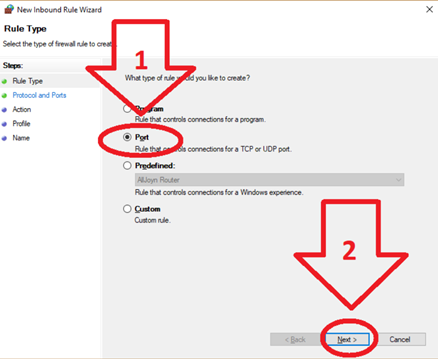
- Click on the “Inbound Rules” again and make a new rule using the rule type as “Port.” Click on the “Next” button.
- Choose the “TCP” and “Specific local port” options. Put the port number “25565” in the specific local port section. Click on the “Next” button.
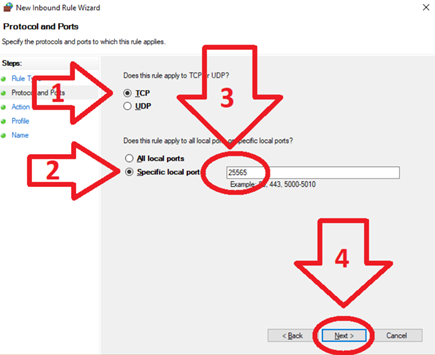
- Choose “Allow the connection” and click on the “Next” button.
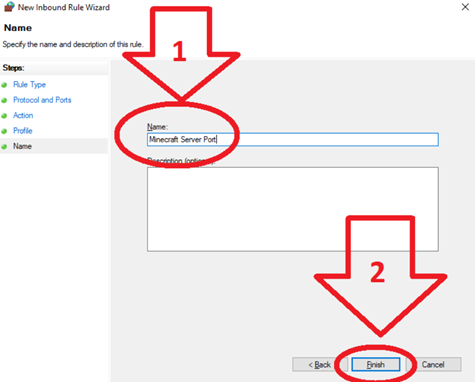
- Type a name for this new inbound rule. Click on the “Finish” button.
 Now, you have to set up outbound rules for your Minecraft server. Outbound rules are set up in the same way as the inbound rules. Follow the above instructions and create two outbound rules for “Program” and “Port” connection types. Use the same port value “25565” in outbound rules. It will allow Minecraft server through Firewall in your operating system.
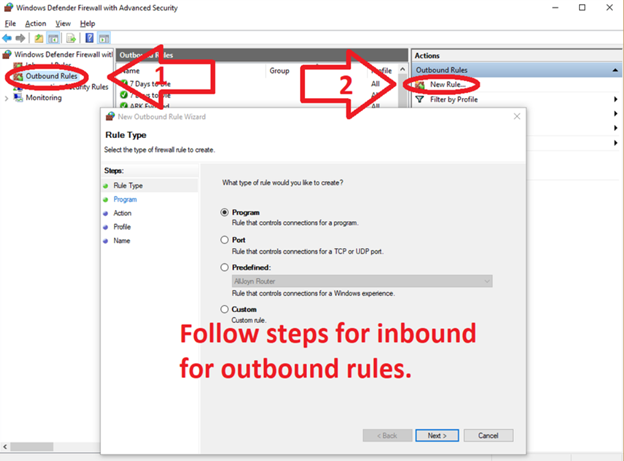
Is Port 25565 Safe to Open?
In general, port-forwarding is a secure process. But to make sure safety entirely, you should always keep the Firewall enabled.
Summary: Allow Minecraft Server Through Firewall
- Open Windows Defender Firewall. Click on 'Allow an app or feature through firewall'.
- Click on 'Change Settings'.
- Scroll down to Minecraft Server and check both boxes for private and public network.
- Click Ok.
