Wireless connections are getting stronger, more stable and faster each day. It’s a great development for those of us who take the freedom of staying connected wherever we go on vacation or even at home. With wireless networks becoming so popular it’s hard to find great hidden wireless networks anymore because they tend to get really crowded. In this article I will share some simple steps on how to connect to a hidden wireless network in Windows 10.

Every time Windows 10 users try to search for an accessible Wi-Fi network nearby, a unique one named "Hidden Network" would sometimes show up on their list of available wireless networks. You might be wondering right now how you can connect to it. The good news is that with the right details, you can link your device to a hidden network.
Before you proceed, though, keep in mind that the device you want to connect must be within the range of the hidden Wi-Fi network.
You should also check out the necessary network details below:
- The SSID (Service Set Identifier) or name of the hidden wireless network.
- The password or security key associated with that network.
- The type of network security or encryption that it uses. These types include WEP and WPA2-PSK.
Additionally, you can connect to a hidden wireless network through the Wi-Fi networks list from the System Tray and via the Settings app.
Using the Wi-Fi Networks List from the System Tray
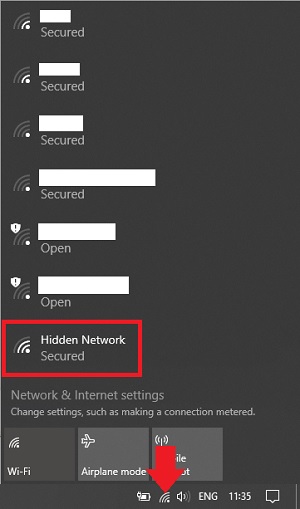
- Hover your mouse over the Wi-Fi icon on the System Tray at the bottom-right corner of the Windows 10 desktop. Click on it to view the list of available wireless networks.

- Scroll through the visible Wi-Fi networks to the bottom until you see "Hidden Network" and click on it.
- Tick the check box beside "Connect automatically" and click Connect.
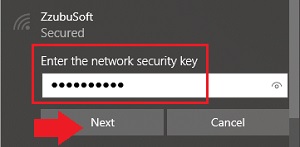
- Enter the hidden network's name or SSID manually and click Next.

- Type in the network security key and click Next. During this time, Windows 10 attempts to connect to the hidden wireless network for a few seconds. If you do not encounter any issues, refer to the next step.
- If the system asks you to whether allow your PC to be discoverable on this network, you may click Yes or No according to your preference.
Tip: The discoverability preference will set the network location or profile as well as your network sharing settings.
Using the "Manage known networks" option via Settings
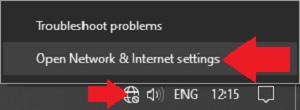
- Navigate back to the System Tray and right-click on the Wi-Fi symbol. Click on the option Open Network & Internet settings to open the Settings app.

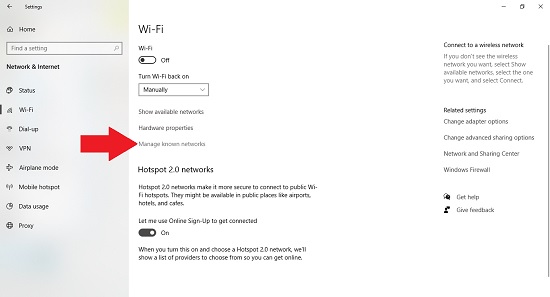
- On the Settings window, hover your mouse over the left side. Under Network & Internet, click on the Wi-Fi tab.
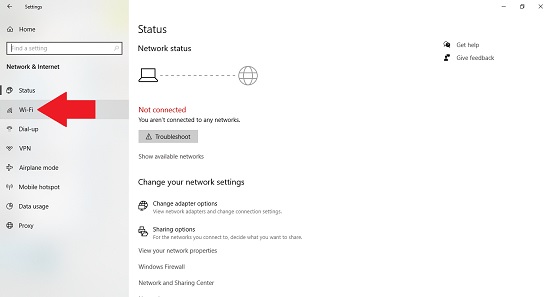
- On the Wi-Fi page, click on the "Manage known networks" link.
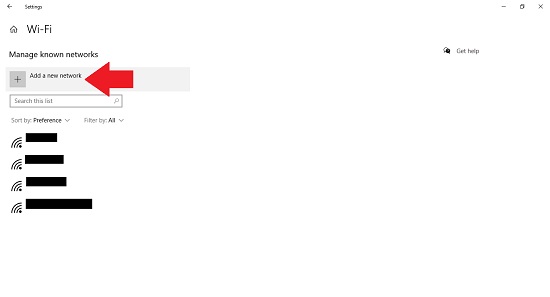
- On the Manage known networks page, click on the "+ Add a new network" button.
- Type in the correct security information for the hidden Wi-Fi network as follows:
• In the Network name text field, type in the name or SSID of the hidden wireless network.
• In the Security type dropdown, select the type of security that the network uses. In some cases, routers may name this authentication method. Moreover, Windows 10 may or may not prompt you to specify an encryption type depending on the chosen security type.
• In the Security field, type in the password associated with the hidden network.
• Tick the check box next to "Connect automatically" if you want to link your device to the hidden network right away.
• You may tick the check box next to "Connect even if the network is not broadcasting" if applicable
Tip: If the option "Connect even if the network is not broadcasting" is enabled, Windows 10 searches for the hidden Wi-Fi each time it is not linked to a network, even if that concealed network is not in your location. However, this option poses some risk to your privacy because skilled experts can intercept this specific search.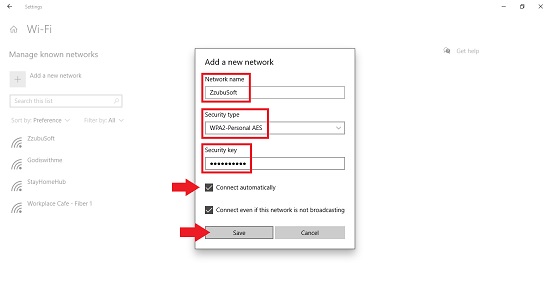
- Check to make sure that all the entered details are correct and click Save.
Summary: Connect to a hidden wireless network in windows 10
- In Windows 10, open the "Settings" app and navigate to the "Network & Internet" section.
- Tap or click on the WiFi option in the left-hand pane.
- Scroll down to the bottom of the Wi-Fi settings page, and tap or click the "Manage known networks" link.
- On this page, select the network you'd like to connect to from the list of known networks under "Wi-Fi."
- At the bottom of this window, tap or click the "Properties" button.
- Here on this page, ensure that your hidden network is not being broadcast by changing "Visibility status" from "Visible" to "Hidden."
- Once you've made your changes, tap or click "Save."
Conclusion
With the aforementioned steps, you can connect to that hidden wireless network and allow you to surf the web.
